
Control Access (Access & Message)
In Step 2 - Access & Message, you define who can unlock or see the content you targeted.
In Step 2 - Access & Message, you define who can unlock or see the content you targeted in Step 1.
BSS B2B Lock uses access rules made of conditions that describe which visitors are allowed. Everyone who doesn’t match any rule is blocked and sees your lock message. You can use a single condition for simple cases, or combine conditions and rules with AND / OR logic for more advanced B2B scenarios.
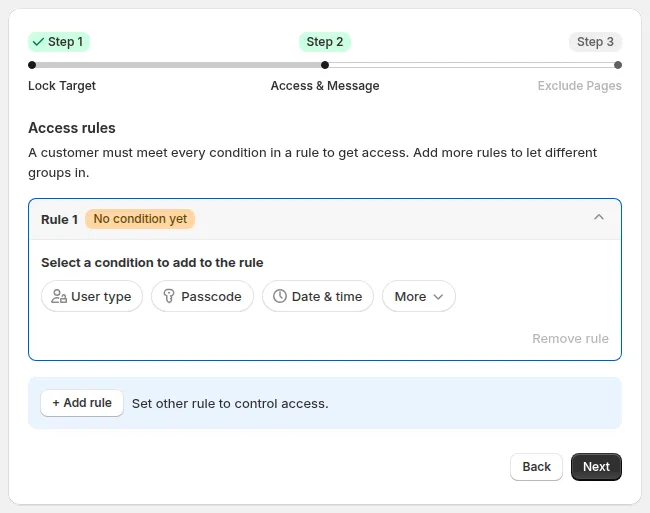
Step 2 starts with Rule 1. Pick a condition chip to add the first condition.
How to add a condition
Section titled “How to add a condition”- Under Access rules, go to Rule 1 and pick a condition chip under Select a condition to add to the rule:
- User type
- Passcode
- Date & time
- More → Email, Location, or Other condition
- In the condition card (Condition 1: <type>), choose the option from the Select access rule dropdown and fill in its settings.
- Tick Reverse access rule if you want the opposite (e.g. everyone except tagged customers).
- Click Done. To change it later, click Edit; to remove it, click ×.
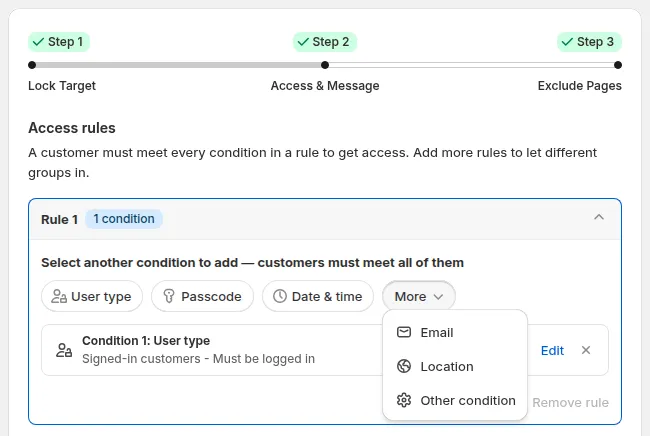
Condition chips: User type, Passcode, Date & time and More. Clicking More shows 3 more options: Email, Location and Other condition.
1. User type
Section titled “1. User type”What it is
Pick User type to decide which kind of customer gets access. The Select access rule dropdown offers:
- Everyone - No restrictions: rule applies to all visitors. Useful as a baseline rule.
- Signed-in customers - Must be logged in: visitors must be logged in with a Shopify customer account.
- Tagged customers – Must have specific tags: the customer record must have one of the selected tags.
- Specific customers – Must match exact email: only selected customer accounts can view the content.
- Request access – visitor request, you approve: visitors submit a request; you approve or reject it.
- Customer must be in this company name: the customer must belong to a selected Shopify B2B company.
- Customer must be in this company location: the customer must belong to a selected company location.
- B2B customer – Shopify B2B only: Shopify must identify the logged-in customer as a B2B customer.
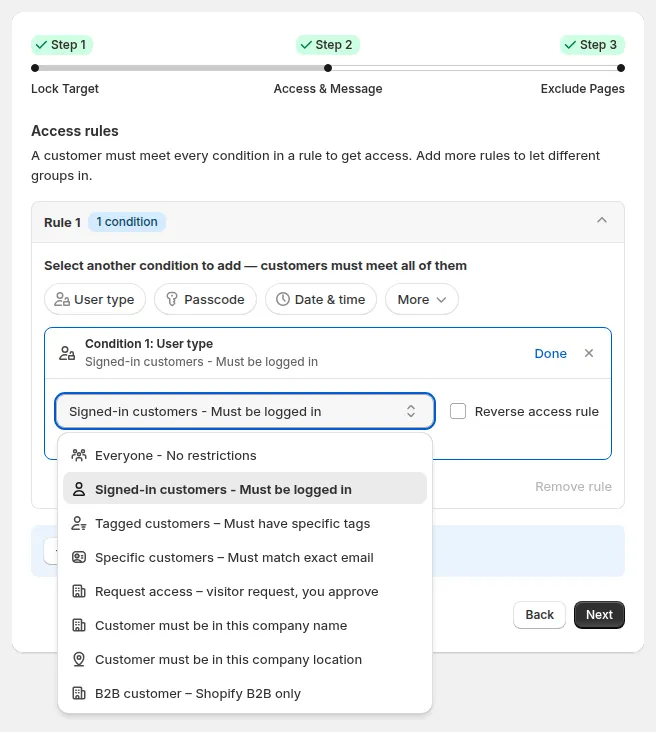
User type options, including the company and B2B customer options.
Typical uses
- Signed-in customers: hide prices from guest users; lock pages or the entire store behind a login screen. Tick Reverse access rule to target guests only.
- Tagged customers: wholesale-only products/collections (tag:
wholesale,b2b-approved); segment-based catalogs (e.g.,silvervsgoldcustomers see different product sets); regional or channel tags (e.g.,EU-distributor,JP-partner). - Company name / company location / B2B customer: grant exclusive pricing or product access to designated corporate buyer companies.
- Request access: review who gets in. Approve or reject requests in the admin; customers get automated email notifications.
Examples
- “Tagged customers:
wholesale” → show wholesale catalog. - “Tagged customers:
silver” → show only products taggedsilver.
Tagged customers is one of the most powerful conditions for B2B because it works perfectly with BSS B2B Solution registration/approval flows.
2. Passcode
Section titled “2. Passcode”What it is
Pick Passcode → Passcode - Must enter the correct passcode to require visitors to enter a passcode before they access the locked content.
- If they enter a correct passcode → grant access.
- If not → show the passcode prompt again.
Settings
- Passcode: type a passcode and click Add passcode. You can add several passcodes. Leave the field empty and click Add passcode to generate a random passcode. Use Import to add passcodes in bulk and Clear to remove them.
- Passcode case-sensitive: choose Yes or No.
- Enter passcode once: choose whether one passcode entry unlocks all locked items (e.g. Enter passcode once to access all prices) or each item separately (e.g. Enter passcode once to access each prices). The wording follows your Step 1 target.
Typical uses
- Private landing pages for specific partners or campaigns.
- Temporary locked content shared only with certain groups.
- Simple “invite-only” areas without needing accounts or tags.
3. Date & time
Section titled “3. Date & time”What it is
Pick Date & time to open the content only inside a time window.
- After date/time → Visible from: access starts at the date and time you pick.
- Before date/time → Visible until: access ends at the date and time you pick.
Pick the date in the calendar and set the time. Time is based on your Shopify store’s time zone, which you can check in Store details.
Typical uses
- Pre-launch pages that are only accessible to partners before a public release.
- Time-limited campaigns where VIP customers get early access to collections.
4. URL Parameter (Query string)
Section titled “4. URL Parameter (Query string)”What it is
Pick More → Other condition → URL parameter – For UTM, affiliate to allow access based on specific URL query parameters (such as UTM campaign tags, affiliate tracking parameters, or promo tokens) without modifying theme code.
- Operators supported:
Is exactly: URL query must match the parameter and value exactly (e.g.?ref=affiliate_vip).Contains: URL contains the specified substring (e.g.utm_campaign=wholesale_summer).Starts with: URL parameter begins with a specific prefix.Has any value: Triggers as long as the parameter key exists in the URL regardless of value.
- Options:
- Ignore Case: Case-insensitive comparison option.
Typical uses
- Create dedicated campaign landing pages accessible only from specific KOL, influencer, or affiliate links.
- Restrict catalog or pricing access to users arriving from a targeted email campaign (
utm_source=newsletter_b2b). - Personalize locked content for private promotional campaigns.
5. Location
Section titled “5. Location”What it is
Pick More → Location to restrict access based on the visitor’s detected country or region.
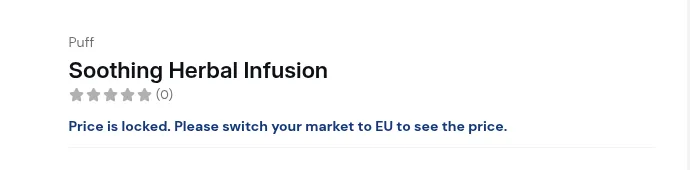
- Features a searchable dropdown with country flags and multi-select capability.
- Allows you to quickly select multiple allowed countries. Tick Reverse access rule to block them instead.
Typical uses
- Restrict wholesale catalogs to domestic or authorized export markets only.
- Block visitors from unsupported shipping regions.
6. Secret link
Section titled “6. Secret link”What it is
Pick More → Other condition, then choose Secret link – Must access via a special link in Select access rule. This condition only allows access if the visitor arrives via a special URL that includes a secret token.
- The rule generates (or expects) a URL like:
/collections/wholesale?token=123@ - If the visitor uses this URL → grant access.
- If they come via any other link → deny access.
Typical uses
- Hidden collections or pages for VIP or early access campaigns.
- Secret sales where only people with the link can see products/prices.
- “Soft-gated” content you don’t want to show in navigation or search.
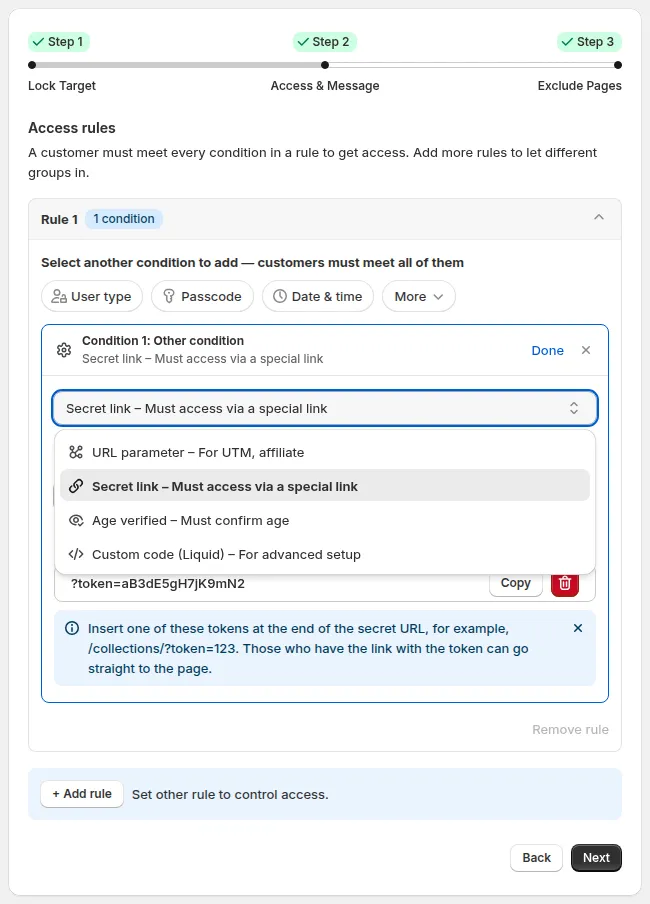
More → Other condition: URL parameter, Secret link, Age verified and Custom code (Liquid). Secret link and Age verified are not offered for the Price and add to cart and Variants targets.
7. Other conditions supported
Section titled “7. Other conditions supported”Beyond user type, passcode, date & time, URL parameters, location and secret links, BSS B2B Lock supports several additional conditions for advanced workflows:
- Email (under More): Email domain – Must use an allowed email domain or Email subscribers – Must be subscribed to your emails
- Gate content by the visitor’s email, e.g. require visitors to subscribe with their email address before accessing gated content.
- Age verified – Must confirm age (under More → Other condition)
- Presents an age-gate verification popup (e.g. 18+ / 21+) before granting access to regulated items.
- Custom code (Liquid) – For advanced setup (under More → Other condition)
- Developers can evaluate custom Liquid conditions for highly tailored storefront gating logic.
8. AND/OR logic & multiple rules per lock
Section titled “8. AND/OR logic & multiple rules per lock”Step 2 follows one simple principle: “A customer must meet every condition in a rule to get access. Add more rules to let different groups in.”
- Conditions inside one rule are joined by AND: all must match.
- Add a second condition to a rule from Select another condition to add: customers must meet all of them. An AND pill appears between the conditions, and the rule header shows 2 conditions - all must match.
- Example: Signed-in customers AND Tagged customers:
wholesale→ only logged-in wholesale customers can see the content.
- Separate rules are joined by OR: any rule can match.
- Click + Add rule (“Set other rule to control access.”) to add another rule. An OR pill appears between the rules.
- Example: Rule 1 Tagged customers:
distributorOR Rule 2 URL parameter?ref=partner→ either tagged distributors or visitors from the partner link get access.
- To delete a rule, click Remove rule under it.
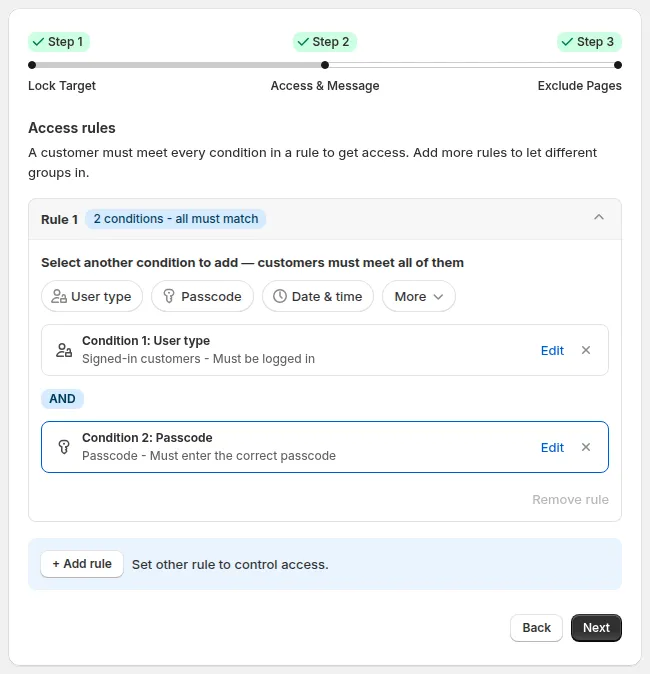
Conditions inside a rule are joined by AND: customers must meet all of them.
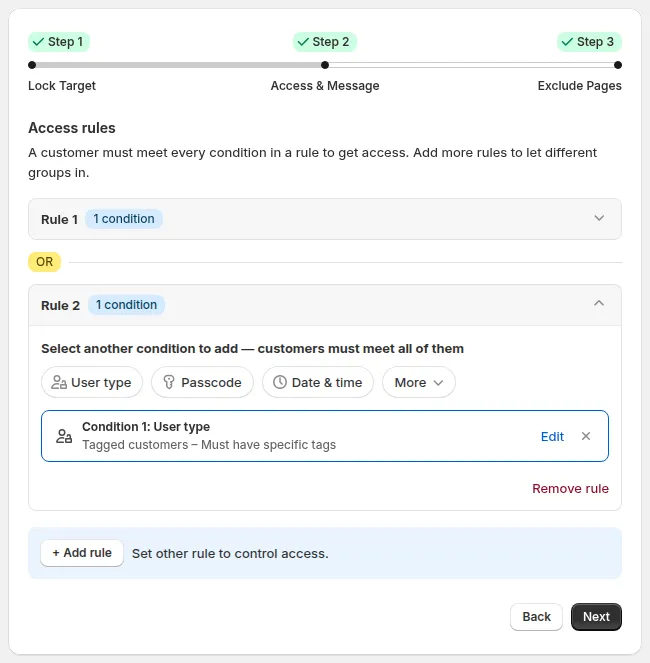
Separate rules are joined by OR: matching any one rule grants access.
Use multiple rules to support layered behavior, for example:
- Rule 1: Tagged customers
VIP→ allow full access. - Rule 2: Passcode → allow temporary access.
- Everyone else → sees your lock message (e.g. with a request access CTA).
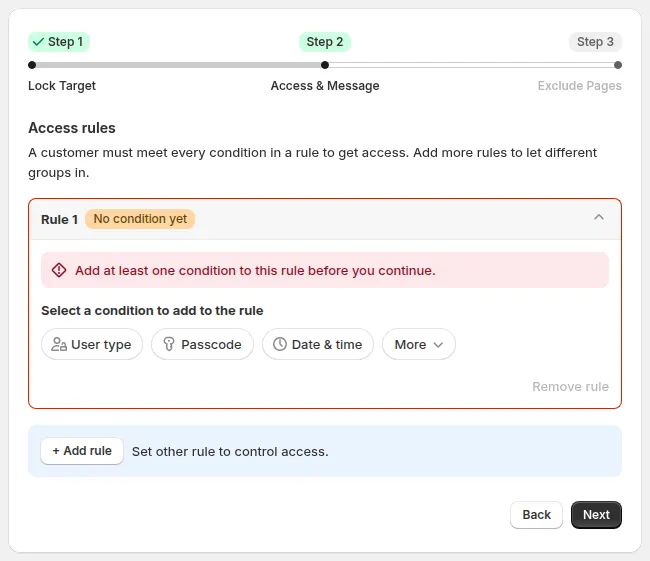
Every rule needs at least one condition before you can continue.
The Summary card on the right lists your rules as you build them, e.g. “Rule 1: Signed-in customer” and “Rule 2: Passcode + URL parameter”.
9. The lock message (Preview card)
Section titled “9. The lock message (Preview card)”Once a rule has a condition, the Preview card appears under the Summary card. It shows a live storefront mock of what blocked visitors see, and it updates as you change the rule.
- Use the message dropdown in the Preview card to pick the message to preview (e.g. Message Hide Price, Passcode, Access Denied Message).
- Click Customize message to open Preview & customize message and edit the text and styling.
For details, see Customizing the lock message.
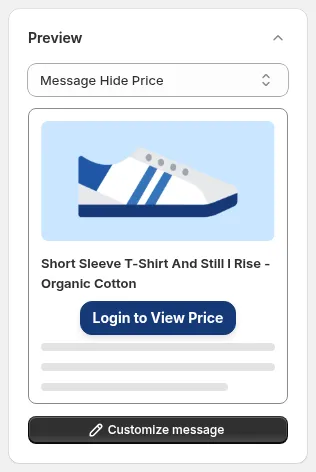
The Preview card shows the lock message live. Click Customize message to edit it.
In Access & Message, you answer:
“Which visitors are allowed to see this locked content?”
You can choose from:
- User type: Everyone, Signed-in customers, Tagged customers, Specific customers, Request access, Company name, Company location, B2B customer
- Passcode (password-protected content)
- Date & time (visible from / visible until)
- Email, Location and Other condition (URL parameter, Secret link, Age verified, Custom code (Liquid)) under More
…and combine them with AND (conditions inside a rule) and OR (separate rules) for real-world B2B workflows.
Still Need Help?
Section titled “Still Need Help?”If you have questions or need assistance configuring BSS B2B Lock, our dedicated support team is here to help.
- In-App Assistance: Click Need help? or use the in-app chat button within BSS B2B Lock.
- Email Support: Contact us at [email protected] with your store URL and specific rule details.