
Exclude Pages & Lock Message
In Step 3 – Exclude Pages, you keep selected content unlocked and set SEO and page-display options. The lock message is customized from the Preview card.
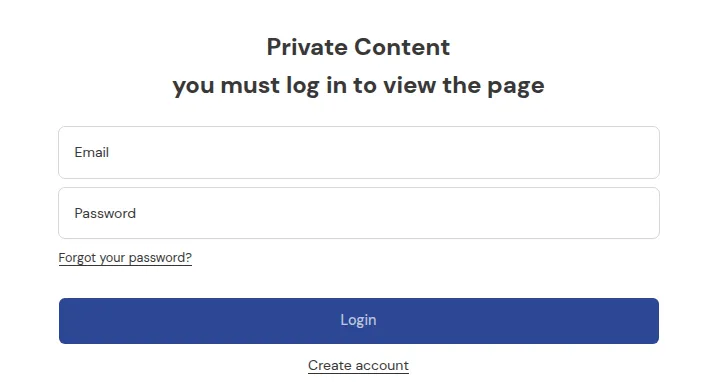
What your customers see on the storefront.
Once the basic logic is in place, two things fine-tune how your lock behaves for visitors:
- Step 3 – Exclude Pages, which content stays unlocked, plus SEO and page-display options for page locks.
- The Preview card → Customize message: what blocked visitors see.
You’ve already told BSS B2B Lock:
- What to protect (Step 1 – Lock Target), and
- Who can access it (Step 2 – Access & Message).
These settings answer a different question:
“What should blocked visitors see, and are there any exceptions?”
Not every option needs to be used on every rule. For simple setups you can leave Step 3 as it is and just click Save. But for a polished B2B experience, this is where you add the details.
Step 3 - Exclude Pages
Section titled “Step 3 - Exclude Pages”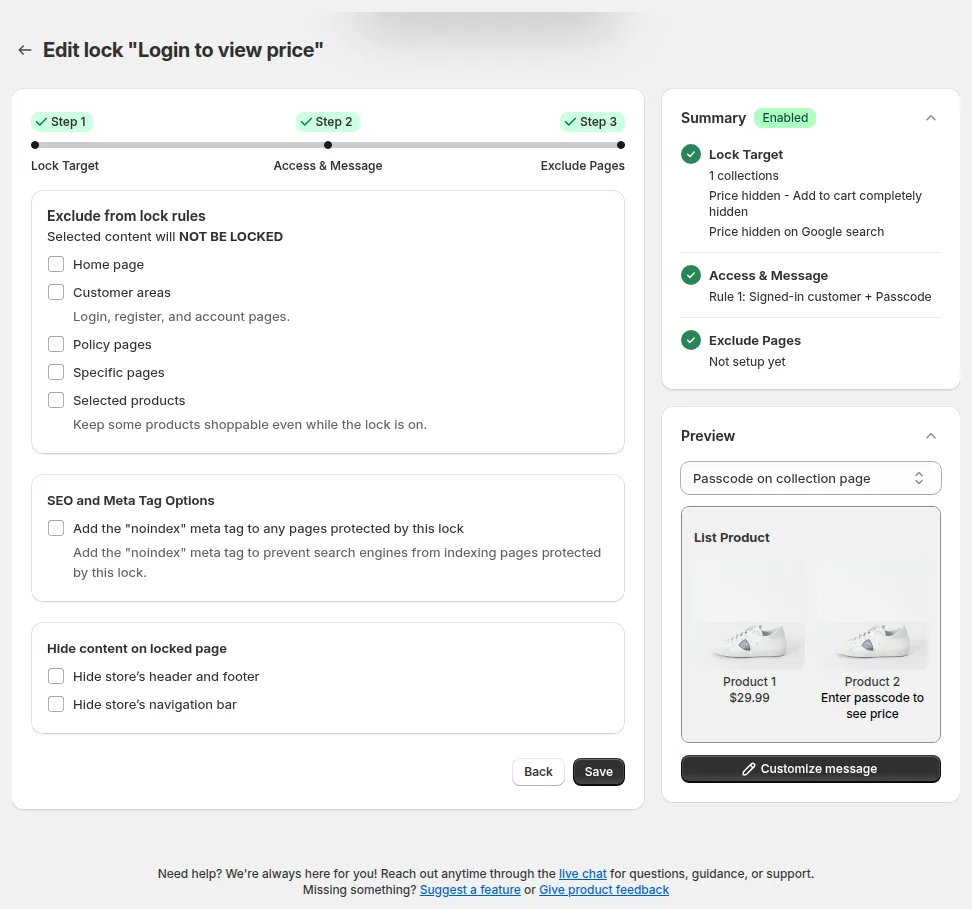
Step 3: tick the content that should stay unlocked, then click Save.
1. Exclude from lock rules
Section titled “1. Exclude from lock rules”Sometimes you lock a big area (like the entire store or a whole collection) but you want exceptions. The Exclude from lock rules card says it plainly: “Selected content will NOT BE LOCKED”.
Tick what should stay open:
- Home page
- Customer areas: login, register, and account pages.
- Policy pages
- Specific pages: type a page URL and click Add. Example: keep your “Contact” or “About us” pages public while everything else is gated.
- Selected products: keep some products shoppable even while the lock is on. Example: lock the entire store but keep one public product visible.
Use exclusions when:
- Your rule target is broad (entire store / large collection).
- You have a few elements that must remain public (legal pages, contact page, marketing landing pages, etc.).
The Summary card shows your choice, e.g. “Excluded: Homepage, 0 Specific pages”.
2. SEO and Meta Tag Options
Section titled “2. SEO and Meta Tag Options”For locks that replace a whole page (such as Entire store), Step 3 also shows SEO and Meta Tag Options:
- Add the “noindex” meta tag to any pages protected by this lock: prevents search engines from indexing the locked pages.
Tick it when the locked pages should not appear in search results at all. Paired with Hide price on Google search (set in Step 1 for price and product targets), this helps you keep B2B information controlled while still maintaining a good UX.
3. Hide content on locked page
Section titled “3. Hide content on locked page”Also for page locks, Hide content on locked page lets you strip the store chrome around the lock message:
- Hide store’s header and footer
- Hide store’s navigation bar
Use it for a clean, focused lock screen, e.g. a private wholesale portal where guests shouldn’t browse your menus.
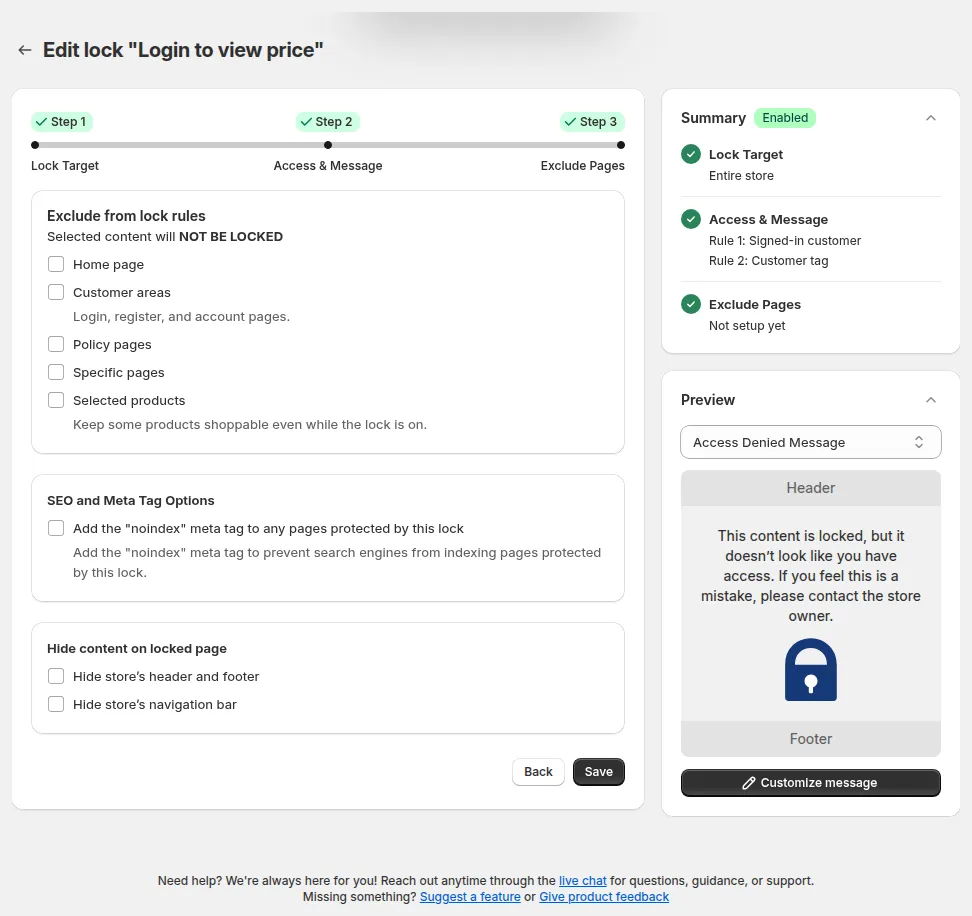
For page locks such as Entire store, Step 3 adds SEO and Meta Tag Options and Hide content on locked page.
4. Save the rule
Section titled “4. Save the rule”Click Save at the bottom of Step 3, or Save in the Contextual Save Bar at the top of the page at any step. BSS B2B Lock shows “Saved lock settings” and updates your theme in the background (“Updating lock, integrate themes and sync with Shopify…”).
Customizing the lock message
Section titled “Customizing the lock message”When a visitor does not meet your access rules, BSS B2B Lock replaces your content with a lock message. You edit it from the Preview card in the right column, not in Step 3.
- Add at least one condition in Step 2 – Access & Message. The Preview card appears under the Summary card.
- In the Preview card, pick the message to preview from the dropdown (e.g. Message Hide Price, Passcode, Passcode on collection page, Access Denied Message). The storefront mock updates in real time.
- Click Customize message. The full-screen Preview & customize message modal opens.
- In the left panel, edit the message’s Text content. The field holds HTML; click Edit with editor to edit it in the editor instead.
- Optionally add Custom CSS to style the message.
- Check the result in the preview on the right. Switch between desktop and mobile to see both layouts.
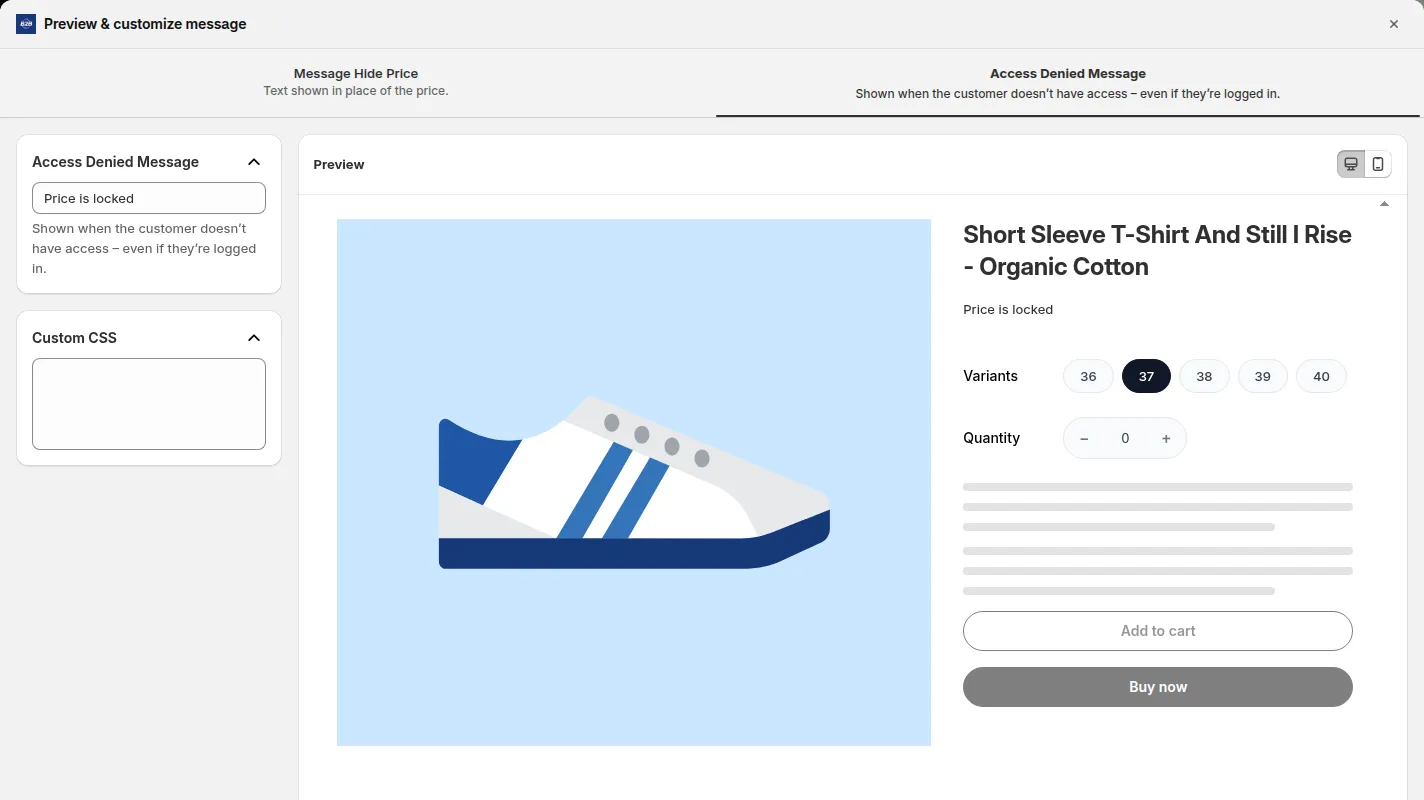
Edit the message text and CSS on the left; check the live preview on the right.
Writing a good lock message
Section titled “Writing a good lock message”Think of the lock message as a mini landing page: it shouldn’t just block people; it should guide the right visitors to the right action.
- Headline
Short, clear title such as:- “Wholesale access only”
- “Login to view prices”
- Body text
Explain who this area is for and what the visitor should do next, for example:- “This content is reserved for approved wholesale customers. Please log in or request an account to continue.”
- Links and next steps
Add links in the message text so visitors don’t hit a dead end:- If your condition is Signed-in customers: link to Login and Create account.
- If your condition is Tagged customers (e.g.
wholesale): add a link or note about how to request a wholesale account. - Point to your contact page or B2B registration form for a “Request access” path.
When can you keep the defaults?
Section titled “When can you keep the defaults?”You don’t have to configure every option for every rule.
You can safely leave Step 3 and the default message as they are, and just click Save, when:
- You’re testing or prototyping a rule.
- You just need a simple internal control (e.g., hide a test page from guests).
- The default lock message is “good enough” for now.
You should spend more time on exclusions and the message when:
- The rule impacts real customers (especially first-time visitors).
- You’re locking critical areas like pricing, wholesale collections, or key landing pages.
- You want a polished, branded experience with clear actions (login, register, contact, etc.).
Where did the other settings go?
Section titled “Where did the other settings go?”- Passcode case sensitivity and multiple passcodes: set in the Passcode condition in Step 2 – Access & Message, together with Enter passcode once to access all prices / each prices. See Control Access.
- Start / end dates: use the Date & time condition in Step 2 (Visible from / Visible until). See Control Access.
- Hide price on Google search: set in Step 1 – Lock Target. See Lock Content (Targets).
With Step 3 – Exclude Pages and Customize message, you transform a basic lock into a user-friendly, business-ready experience:
- Add exclusions so some pages/products remain public.
- Add the noindex meta tag and hide the header, footer or navigation bar on locked pages.
- Customize the message blocked users see, with clear Login / Register / Request access links.
Still Need Help?
Section titled “Still Need Help?”If you have questions or need assistance configuring BSS B2B Lock, our dedicated support team is here to help.
- In-App Assistance: Click Need help? or use the in-app chat button within BSS B2B Lock.
- Email Support: Contact us at [email protected] with your store URL and specific rule details.