
Access Management (Passcode Request)
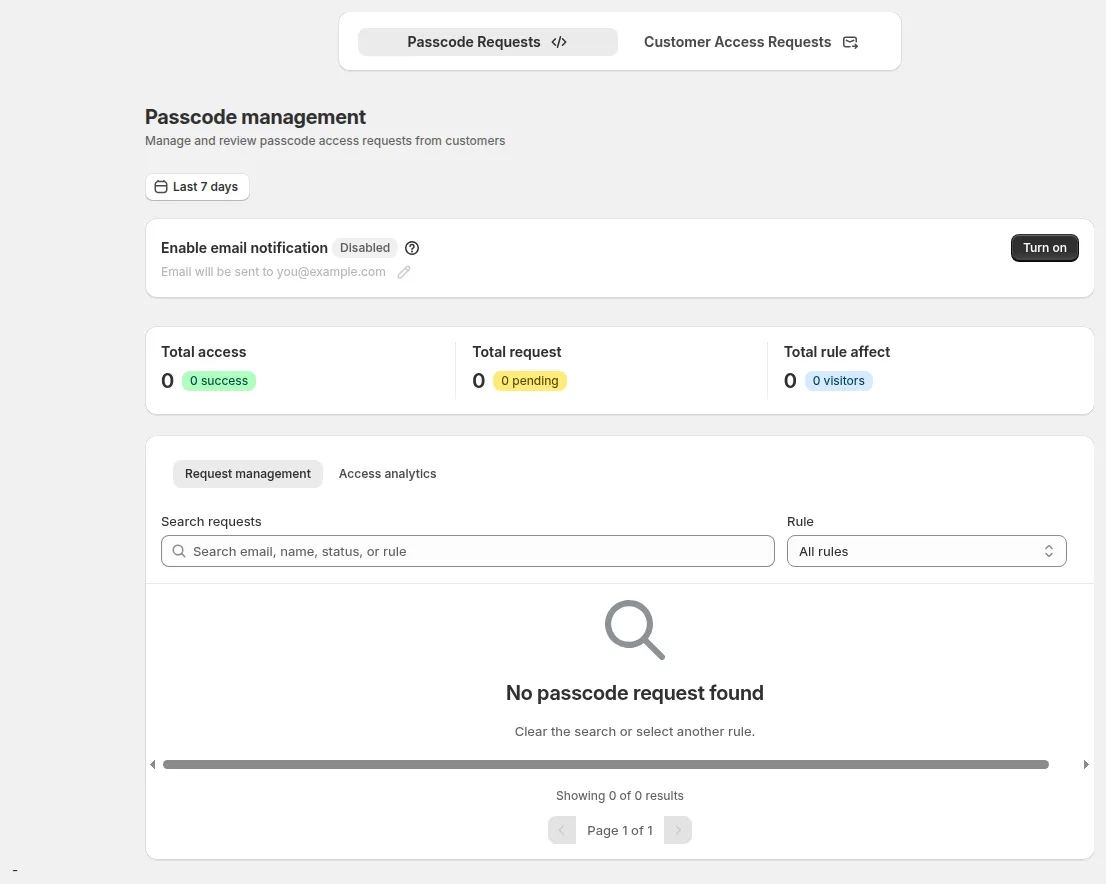
When customers encounter locked content, they shouldn’t hit a dead end. Access Management lets them request a passcode directly from your store, and lets you approve it with just a few clicks.
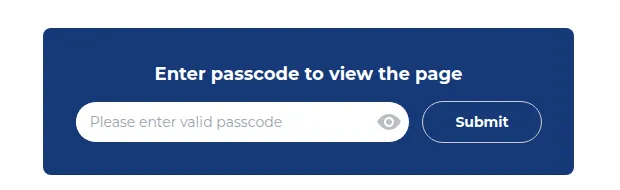
What your customers see on the storefront.
Manage Passcode Requests and Approve Customer Access Automatically
The system handles the email delivery automatically, so you stay in control without the manual back-and-forth.
Availability may vary by plan or setup. Check your current plan before configuring.
💡 Best Practice: Enable email notifications before you start approving requests. Without a notification email set up, you won’t know when a new request comes in, and customers will be left waiting.
On This Page
Section titled “On This Page”- Eligibility Requirements
- Understanding Access Management
- Availability & Limitations
- How to Enable Access Management
- How to Approve a Passcode Request
- How to Decline a Request
- Customize the Passcode Email Template
- Testing Your Setup
- Customizable Fields
- Troubleshooting Common Issues
- Still Need Help?
Eligibility Requirements
Section titled “Eligibility Requirements”Before you begin, confirm the following:
- You are using BSS BSS B2B Lock
- You have at least one active lock rule using a Passcode
- Request Passcode is enabled inside that lock rule
- You have a valid email address to receive request notifications
- You have access to Settings in the app dashboard
Understanding Access Management
Section titled “Understanding Access Management”What it is: Access Management is a built-in request flow that lets customers ask for a passcode when they can’t access locked content. You review the request, approve it, and the app sends the passcode email automatically.
What you can do: Receive request notifications, approve or ignore requests, preview the passcode email before sending, and customize the email template to match your brand.
Where it applies: Only on lock rules where Request Passcode is enabled. Rules without this setting will not trigger the request flow.
Availability & Limitations
Section titled “Availability & Limitations”| Item | Detail |
|---|---|
| Plan Gate | Available during Trial and on all Paid Plans (restricted on Free Plan) |
| Request trigger | Only works on rules with Request Passcode enabled |
| Default filter | Request dashboard defaults to Last 7 days view for fast triage |
| Notification method | Automated admin notification emails |
| Email customization | Fully customizable via Settings → Template Email (Passcode) with touchpoint merge tags |
| Passcode delivery | Approved and sent by merchant with 1 click |
| Request status options | Pending, Approved |
⚠️ Caution: There is no automatic decline email. If you reject a request, you can ignore the entry or notify the customer manually.
How to Enable Access Management
Section titled “How to Enable Access Management”Step 1: Go to BSS BSS B2B Lock → Access Management
Step 2: Enable Email notification
Step 3: Enter the email address where you want to receive request alerts
Step 4: Click Save
Step 5: Go to Locks → Edit Rule → Passcode Request
Step 6: Enable Request Passcode inside the rule
Step 7: Click Save
⚠️ Caution: Both settings must be active: email notification in Access Management AND Request Passcode in the rule. Missing either one will break the flow.
How to Approve a Passcode Request
Section titled “How to Approve a Passcode Request”Once a customer submits a request, here’s how to process it:
Step 1: Go to BSS BSS B2B Lock → Access Management
Step 2: Click the edit icon next to the request showing Pending status
Step 3: Open the Condition ID dropdown and select which passcode to send
Step 4: Click Preview Template to see exactly what the customer will receive (optional but recommended)
💡 Tip: Always use Preview Template before sending to confirm the passcode and email content look correct. You can also click “Click here to edit” at the bottom of the preview to jump directly to the email template editor.
Step 5: Click Send email
The request status will change to Approved and the customer will receive the passcode automatically.
How to Decline a Request
Section titled “How to Decline a Request”There is currently no one-click decline option. Here is how to handle it:
- To silently ignore: Leave the request as Pending: no email will be sent
- To remove the request: Click the trash icon to delete it
- To notify the customer: Send a manual email from your own email client explaining the decision
⚠️ Note: The app does not send any automatic notification to the customer when a request is declined or deleted. If communication matters to your brand, always follow up manually.
Customize the Passcode Email Template
Section titled “Customize the Passcode Email Template”You can edit the email your customers receive when a passcode is approved. This is useful for matching your brand tone, adding instructions, or writing in another language.
You can access the template editor in two ways: directly from the Preview Template screen by clicking “Click here to edit”, or by going to Settings → Template Email (Passcode).
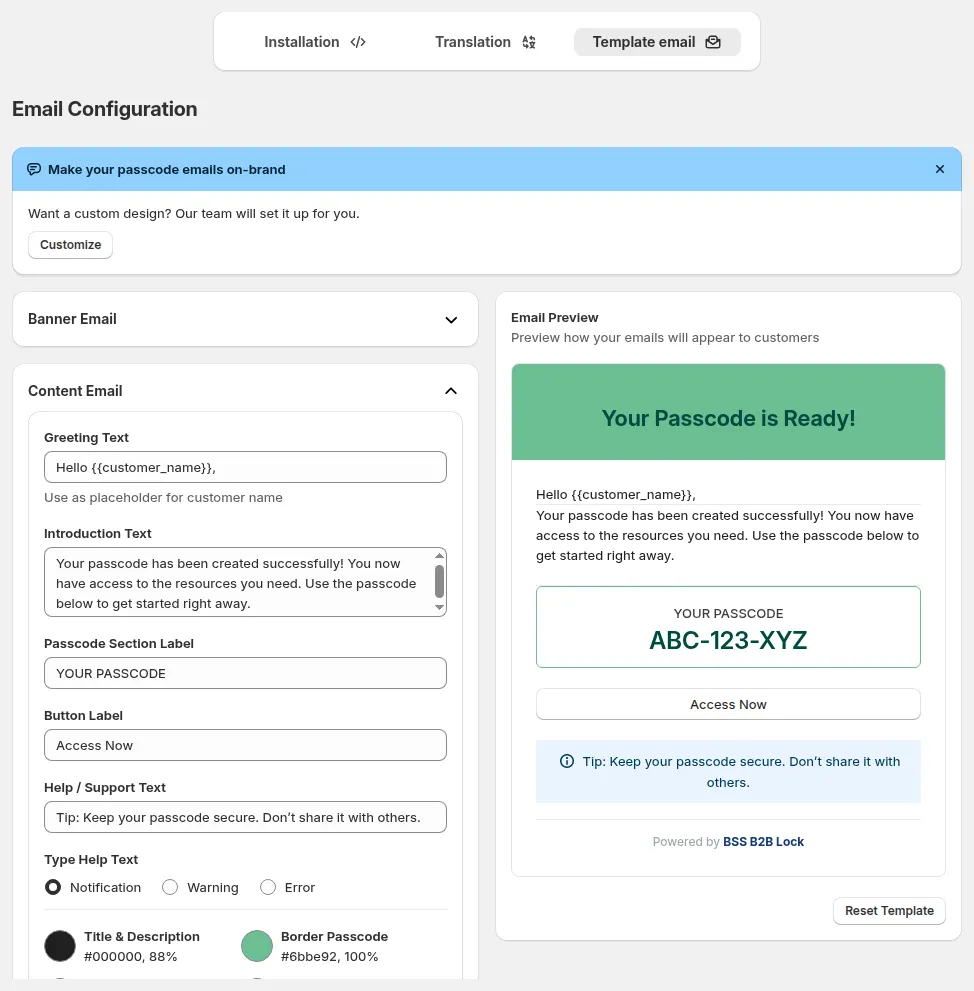
Email template settings with customizable field
Step 1: Go to Settings → Template Email (Passcode)
Step 2: Expand the Content Email section
Step 3: Edit the fields you want to update (see table below)
Step 4: Click Save
Customizable Fields
Section titled “Customizable Fields”| Field | What It Does |
|---|---|
| Greeting Text | Opening line of the email. Use {{customer_name}} to personalize |
| Introduction Text | Main message explaining what the email is about |
| Passcode Section Label | Label shown above the passcode in the email |
| Button Label | Text displayed on the access button |
| Help / Support Text | Small tip or support note shown below the passcode |
| Type Help Text | Display style of the help text: Notification, Warning, or Error |
💡 Tip: Use
{{customer_name}}in the Greeting Text to make the email feel personal. Example: “Hi {{customer_name}}, your access code is ready.”
Testing Your Setup
Section titled “Testing Your Setup”Step 1: Open your storefront and visit a page protected by a rule with Request Passcode enabled
Step 2: Submit a test passcode request using a test customer account
Step 3: Check that you receive the notification email at the address you configured
Step 4: Go to Access Management, find the request, and approve it
Step 5: Check the test customer’s inbox to confirm the passcode email arrived correctly
Step 6: Confirm the passcode in the email actually unlocks the content
Troubleshooting Common Issues
Section titled “Troubleshooting Common Issues”Not receiving request notification emails
- Confirm Email notification is enabled in Access Management
- Check that the notification email address is entered correctly
- Check your spam or junk folder
Request Passcode option not appearing on the storefront
- Confirm Request Passcode is enabled inside the specific lock rule
- Confirm the rule is active and applied to the correct page or product
Customer not receiving the passcode email after approval
- Ask the customer to check their spam folder
- Confirm you clicked Send email and the status changed to Approved
- Double-check the email template has no broken variables
Language not displayed as expected in the email
- The email language depends on how you configure the template fields
- Go to Settings → Template Email (Passcode) and update the content to your desired language manually
Still Need Help?
Section titled “Still Need Help?”If Access Management is still not working after trying the steps above, contact the support team with the following details:
- Your shop name
- The name of the rule using passcode request
- A description of the issue
- A screenshot of the problem
Reach out via the contact support link in the app, or email [email protected]