
Quick Tour of the Dashboard
The Dashboard is the first screen you see after installing BSS B2B Lock.
In just a few minutes, you can understand the full interface, set up language translations, check your session reports, and review your current plan.
Available on all plans: Free through Plus. Some report details may vary depending on your store configuration. Contact [email protected] if you need help.
For new merchants
Read this page before configuring anything else in the app.
Understanding the Dashboard helps you find the right feature quickly and avoid getting lost in the menus.
The full tour takes about 5 minutes.
On This Page
Section titled “On This Page”- Eligibility requirements
- Understanding the Dashboard
- Step 1: Explore the main interface
- Step 2: Set up translations (Translation)
- Step 3: View session reports (Report)
- Common issues & fixes
- Getting more help
1. Eligibility Requirements
Section titled “1. Eligibility Requirements”You can access and use the Dashboard if you meet all of the following:
- The BSS B2B Lock app is installed from the Shopify App Store.
- You are logged into Shopify Admin as the store owner or an admin staff member.
- You are on any BSS B2B Lock plan: Free, Basic, Grow, Advanced, or Plus.
Note
If you just installed the app and the Dashboard appears empty, wait 1-2 minutes for the system to initialize.
Still empty after 5 minutes? Contact [email protected].
2. Understanding the Dashboard
Section titled “2. Understanding the Dashboard”What is the Dashboard?
Section titled “What is the Dashboard?”The Dashboard is the central hub of BSS B2B Lock. From here, you can reach every key feature in just a few clicks: no need to dig through multiple menus.
What can you do from the Dashboard?
Section titled “What can you do from the Dashboard?”- Get an overview of your store’s lock status and activity.
- Set up CMS translations for a different language (Translation).
- Monitor customer session activity through reports (Report).
- Review and upgrade your current plan (Pricing Plan).
What store types does the Dashboard support?
Section titled “What store types does the Dashboard support?”- B2B-only stores.
- Hybrid stores running both B2B and B2C.
- Both small stores and larger, high-traffic operations.
3. Step 1 - Explore the Main Interface
Section titled “3. Step 1 - Explore the Main Interface”Here is what you will see the first time you open the Dashboard after installing the app.
Open the Dashboard
Section titled “Open the Dashboard”- Go to your Shopify Admin.
- Click Apps in the left navigation bar.
- Select BSS B2B Lock from your list of installed apps.
- The app opens directly to the Dashboard screen.
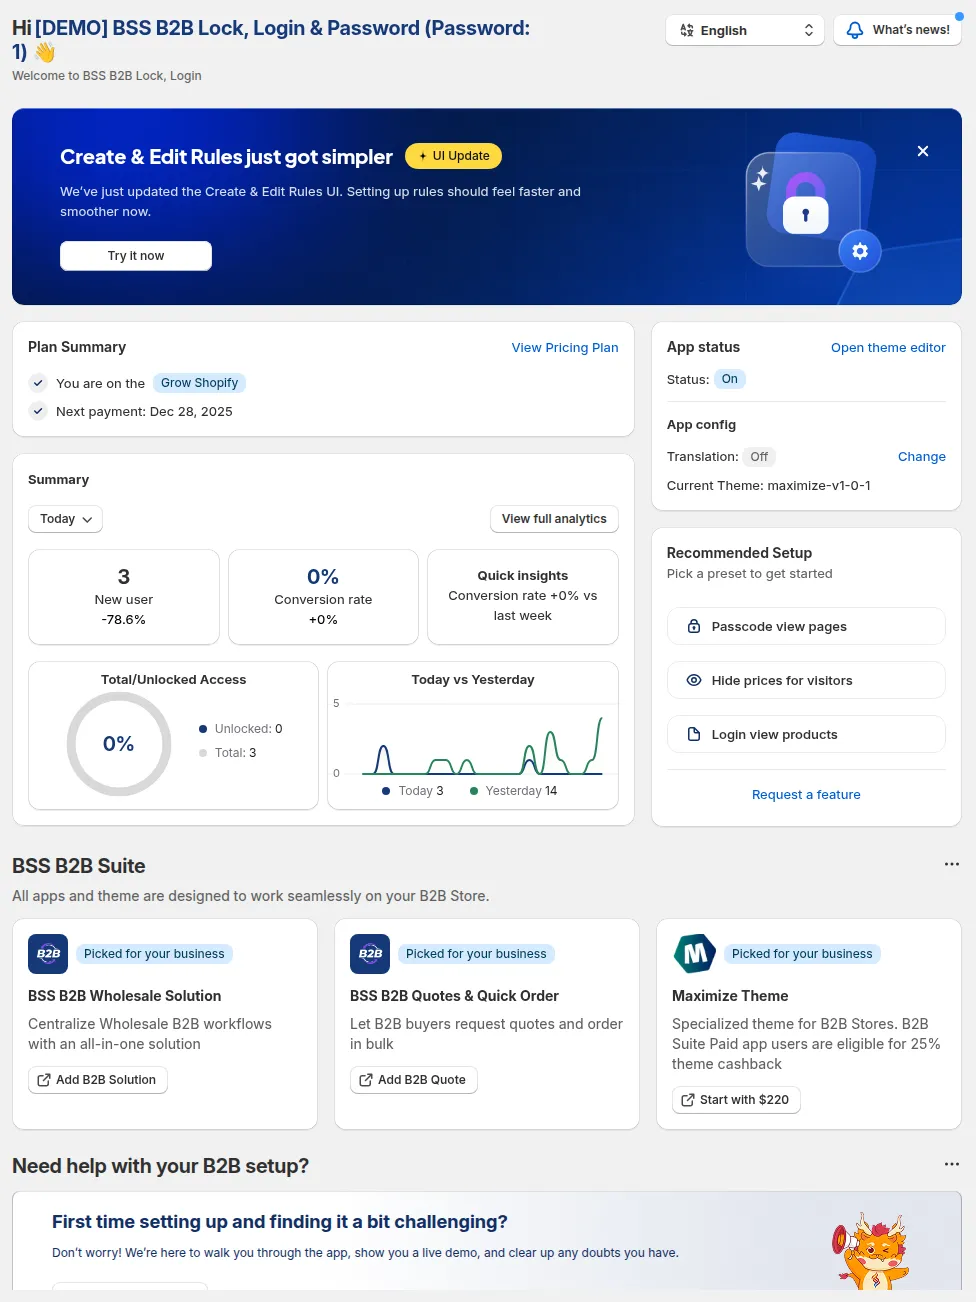
The BSS B2B Lock Dashboard: your central hub after installation.
Key sections in the Dashboard
Section titled “Key sections in the Dashboard”- Request Access Feature Banner: Highlights the Customer Approval capability with a New Feature badge and a Create Lock Now button that opens the Rule Builder with the Request Access condition pre-selected.
- Lock list (BSS B2B Lock → Locks): Manage all your rules in one table (Rule, Access attempts, Status, Created Date, Updated Date, Action). Turn a rule on or off with the Status toggle, then click Save in the Contextual Save Bar. Inspect trend sparklines and trigger counts in the Access attempts column, click the down caret (⌄) at the far right of a row in the Rule column to expand a summary of that rule, and use Edit, Duplicate or Delete in the Action column. Click Add lock rule to open the Start with a preset modal and create a rule from a ready-made preset or with Create my own lock.
- Reports & Lock Analytics: View granular session analytics, sortable country tables, and rule trigger counts. See Reports & Lock Analytics.
- Theme Cleanup: Access the dedicated cleanup screen from the left menu to safely disable all active lock rules across your themes in one click before uninstalling or changing themes. See Theme Cleanup.
- Translation: Translate app CMS content across 20 supported languages.
- Pricing Plan: Review your current subscription and access trial / plan upgrade settings.
- Settings & Installation: Manage theme auto-installation (Live vs Draft themes) and App Embed activation.
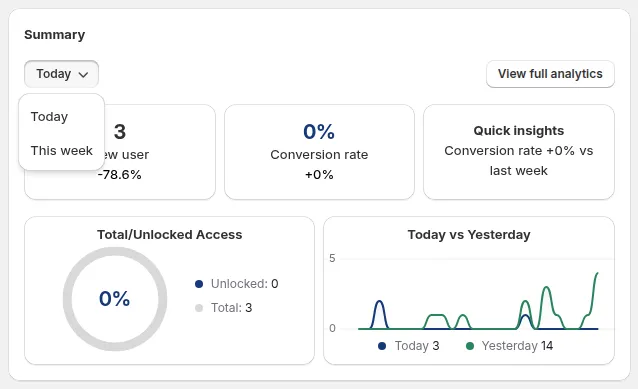
Use the Summary date filter (Today / This week) to switch between daily and weekly views.
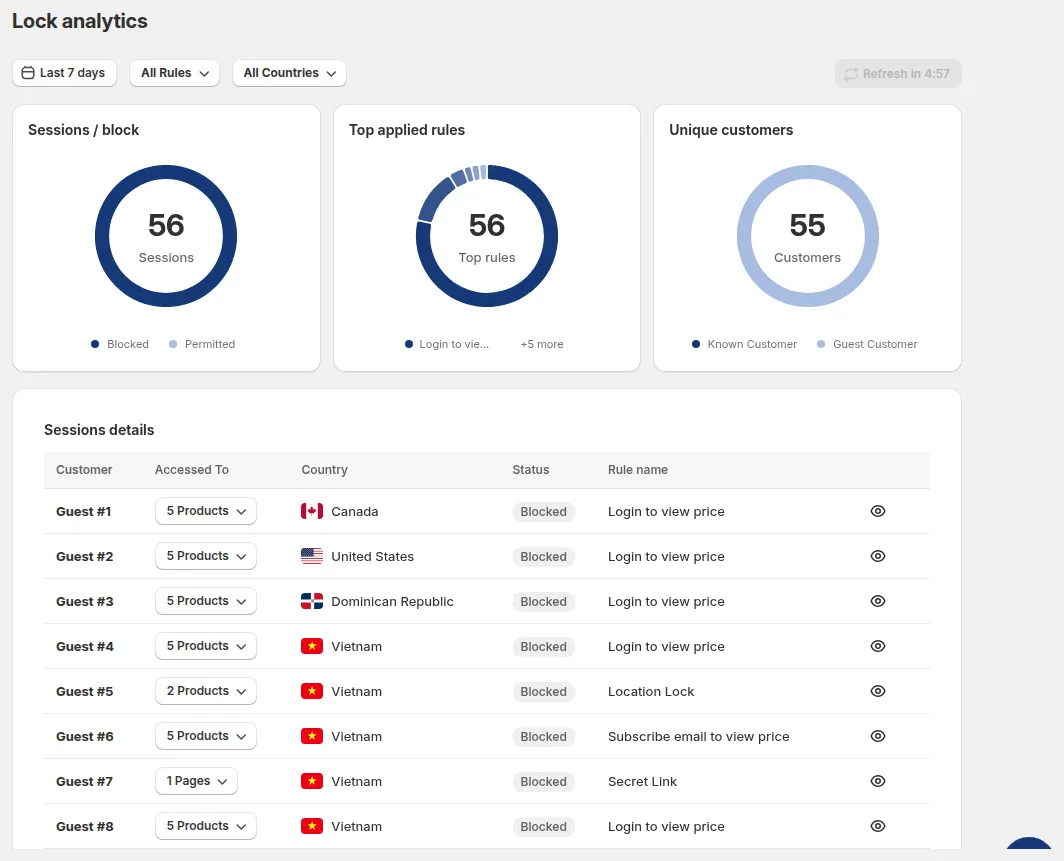
Click 'View full analytics' to open the detailed Report section.
Tip
The left navigation bar is the fastest way to move between sections.
You do not need to return to the Dashboard to reach Report or Translation: select them directly from the menu.
4. Step 2 - Set Up Language Translations (Translation)
Section titled “4. Step 2 - Set Up Language Translations (Translation)”The Translation feature lets you translate your app’s CMS content, messages, labels, and interface text shown to customers, into 20 languages.
For example: if your store serves French-speaking buyers, you can translate lock messages into French for a better customer experience.
How to access Translation
Section titled “How to access Translation”- From the Dashboard, click the language selector in the top-right corner.
- Select the language you want to switch to.
- Go to Translation in the left menu to edit individual CMS fields.
- Fill in the translated text for each field.
- Click Save.
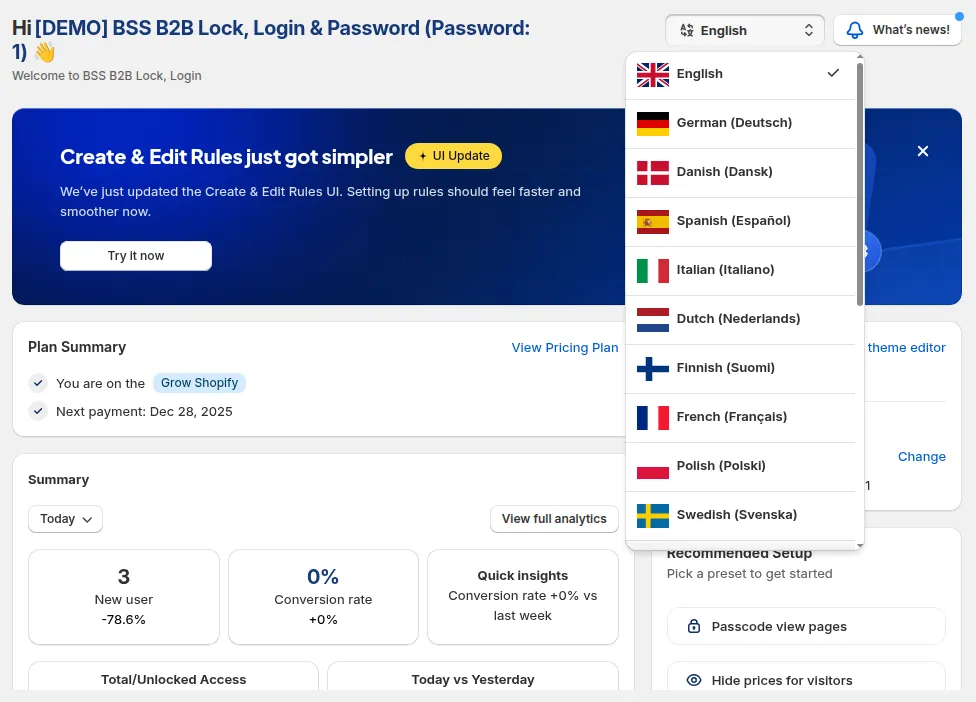
Click the language selector in the top-right corner to switch the app interface language.
Note
Translation only applies to app CMS content: messages, button labels, and interface text.
It does not translate product descriptions or store content. Those are managed directly in Shopify.
5. Step 3 - View Session Reports & Analytics
Section titled “5. Step 3 - View Session Reports & Analytics”The Analytics & Report section shows you how customers are interacting with your protected pages.
- Passcode Usage: Tracks passcode submissions and verification success rates.
- Lock Analytics: Detailed geographic breakdown, sortable rule tables, and session access logs. See the complete Reports & Lock Analytics guide.
6. Common Issues & Fixes
Section titled “6. Common Issues & Fixes”Dashboard appears empty with no data
Section titled “Dashboard appears empty with no data”- Wait 1-2 minutes after installing the app, then reload the page.
- Check that the app has been activated in the Settings section.
- Still empty after 5 minutes? Contact [email protected].
Translation option not visible in the menu
Section titled “Translation option not visible in the menu”- Check your app version: Translation may only be available from a specific version onward.
- Try clearing your browser cache and reloading.
- Make sure you are logged in with an admin account.
Report chart shows no data
Section titled “Report chart shows no data”- Charts only populate after at least one customer has attempted to visit a protected page.
- If your store is newly set up, create a lock rule first, then test access to trigger data.
- Check the time filter: you may be viewing a period with no activity yet.
Upgrade button is not working
Section titled “Upgrade button is not working”- Try a different browser or clear your cache.
- Make sure your Shopify account has permission to change billing.
- If the issue persists, contact [email protected] with a screenshot of the error.
7. Getting More Help
Section titled “7. Getting More Help”Followed all the steps above and still running into issues? Our support team is ready to help.
Contact Support
Email: [email protected]
Include: your store URL, a description of the issue, and a screenshot if possible.
Response time: within 1 business day.
Grow, Advanced, and Plus plans receive priority support.
The Learn & Support section on the Dashboard: access the User Guide, Demo Store, Policy, and Changelog.