
Create Your First Lock (5-minute setup)
Goal: Hide prices from guest users and show them only to logged-in customers.
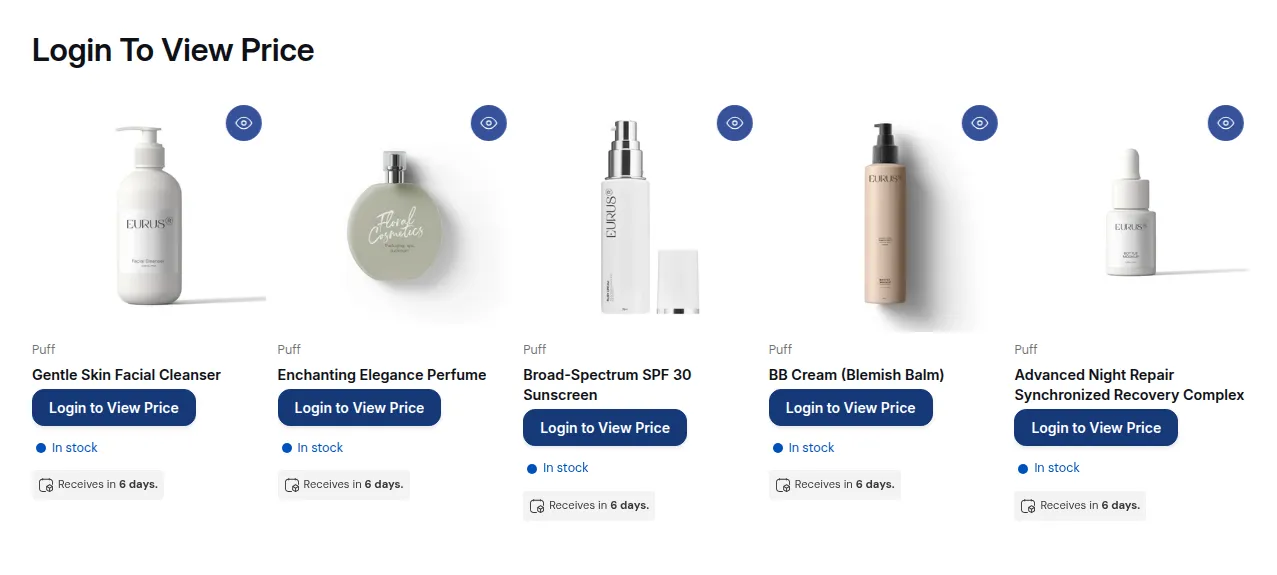
What your customers see on the storefront.
This is the most common first setup for B2B / hybrid stores: guests can browse products, but they can’t see prices until they log in. We’ll do it using the 3-step Rule Builder:
Step 1 – Lock Target → Step 2 – Access & Message → Step 3 – Exclude Pages
Before you start
Section titled “Before you start”Make sure:
- You’ve installed BSS B2B Lock and can open it from Shopify admin.
- The App Embed for BSS B2B Lock is enabled in your current theme (Online Store → Themes → Customize → App embeds → toggle on).
- You’re on the Locks screen inside the app (see Quick Tour of the Dashboard).
Step 1 – Lock Target (hide prices)
Section titled “Step 1 – Lock Target (hide prices)”- Go to BSS B2B Lock → Locks. The Lock list opens.
- Click Add lock rule. The Start with a preset modal opens.
- Select Create my own lock and click Continue.
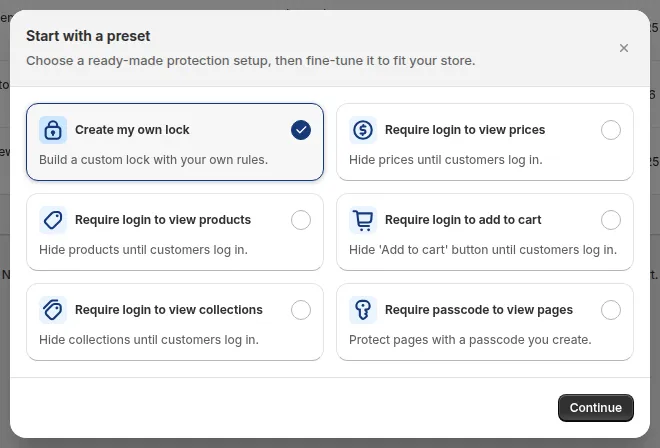
Select Create my own lock, then click Continue.
- In the General Information card, enter a Lock name, for example
Hide prices from guests. Keep Status set to Enable. - In the Lock Target card, open What do you want to lock? and select Price and add to cart.
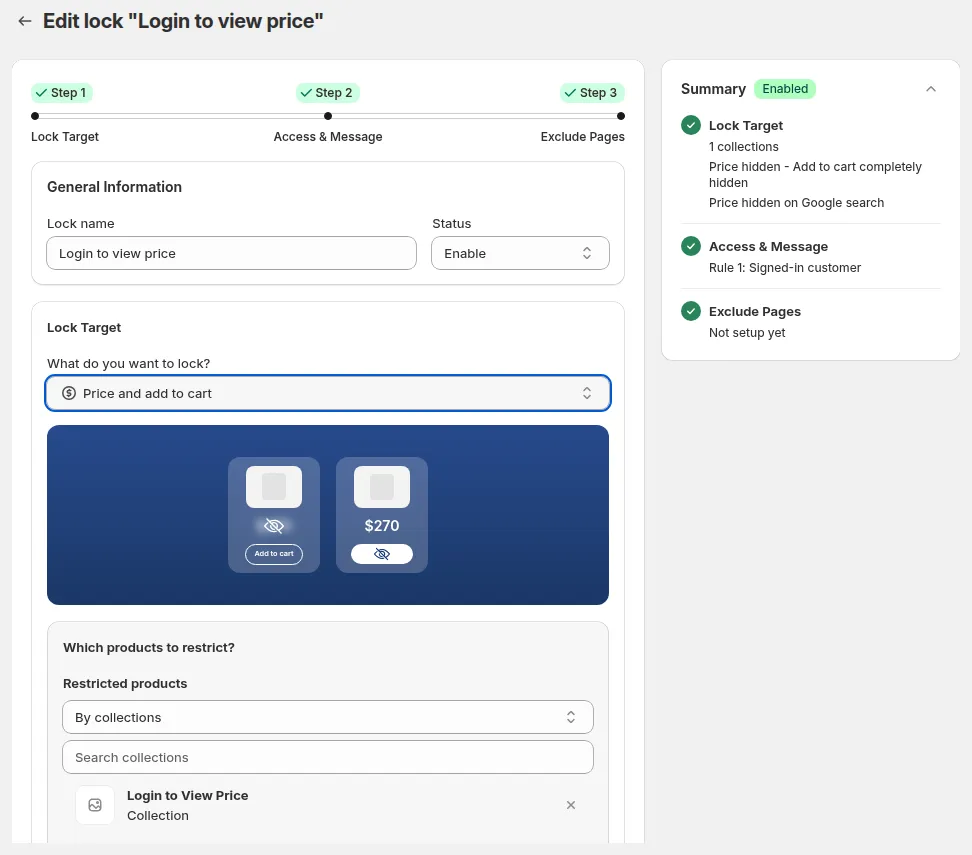
Step 1 – Lock Target: name the lock and choose what to lock.
- Under Which products to restrict?, set Restricted products to All product.
- Under What do you want to hide?, select Hide price, then select Disable Add to cart (the button stays visible but can’t be clicked).
- Optional: under Search visibility, tick Hide price on Google search so wholesale prices won’t appear in search results. Your store must be public, and Google may take up to 24 hours to re-index.
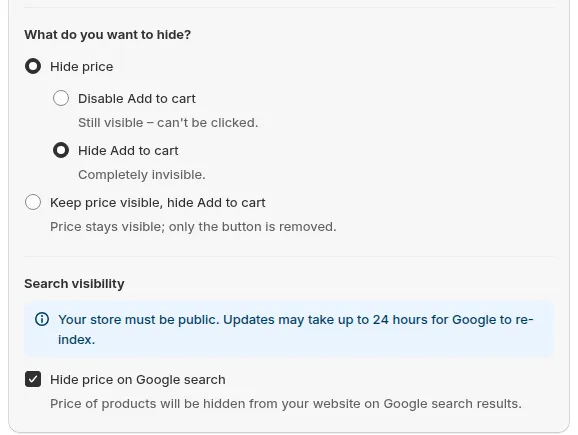
Select Hide price → Disable Add to cart, and optionally Hide price on Google search.
- Check the Summary card on the right. It shows “Applies to all products / Price hidden - Add to cart visible but disabled”.
- Click Next to go to Step 2.
Step 2 – Access & Message (guests vs logged-in)
Section titled “Step 2 – Access & Message (guests vs logged-in)”Now we define who can see the prices.
- In the Rule 1 card, click the User type condition chip.
- In Select access rule, select Signed-in customers - Must be logged in. This means:
- Logged-in customers → see prices as usual.
- Guests (not logged in) → see your hidden-price message instead.
- Click Done. The Summary card shows “Rule 1: Signed-in customer”.
- Check the Preview card on the right. It shows the message guests will see in place of the price. To change the text, click Customize message, edit the text in Preview & customize message, and close the modal.
- Review that the condition is exactly what you want:
- No tags or extra conditions yet – just login state. This keeps the first setup simple.
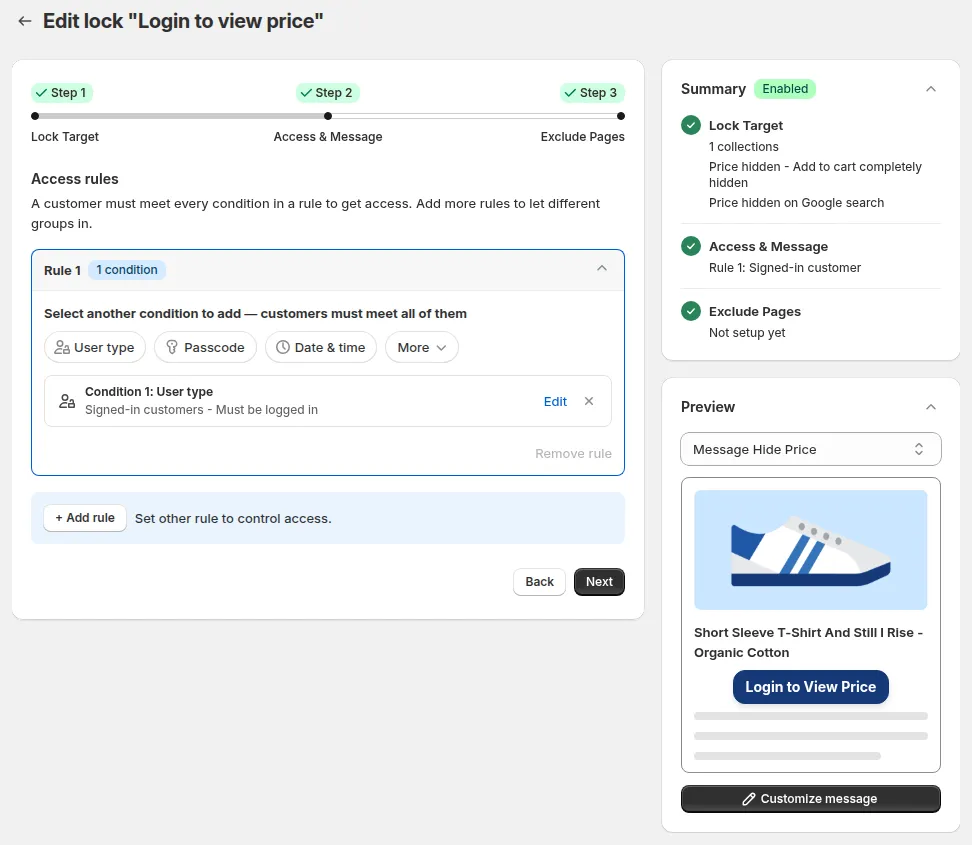
Rule 1 = Signed-in customers. The Preview card shows what guests see.
- Click Next to go to Step 3.
Step 3 – Exclude Pages (optional, then Save)
Section titled “Step 3 – Exclude Pages (optional, then Save)”Step 3 lets you keep some content open even though the lock is active. For this first rule, you can keep it simple.
- In Exclude from lock rules, tick any content that should stay open, such as Home page, Customer areas, Policy pages, Specific pages or Selected products.
- For a quick start, you can leave everything as default.
- Click Save.
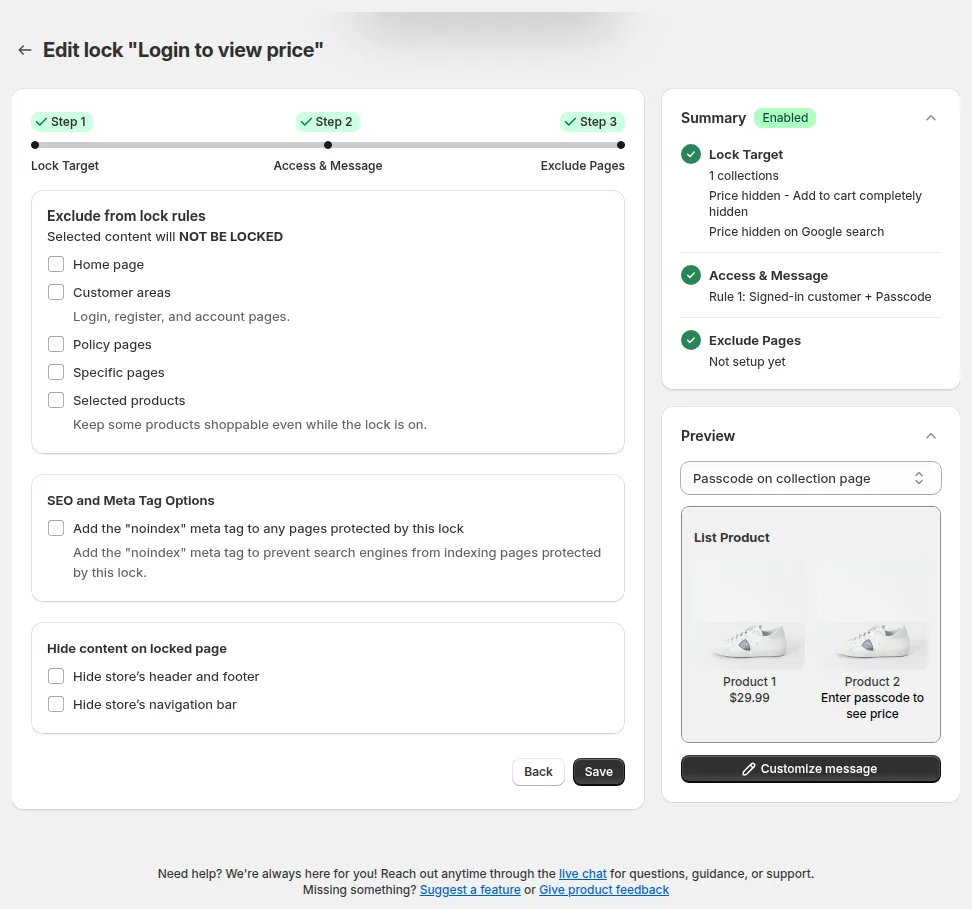
Step 3 – Exclude Pages: choose what stays open, then click Save.
After you click Save:
- You see the toast “Saved lock settings”.
- A banner at the bottom shows “Updating lock, integrate themes and sync with Shopify…” while BSS B2B Lock installs the rule into your theme. This usually takes a few seconds.
- The page title changes to Edit lock, and all 3 steps show a ✓.
Step 4 – Check your storefront
Section titled “Step 4 – Check your storefront”Once the rule is saved and installed:
- Click the Check your store button (if shown), or open your storefront in a new tab.
- As a guest (not logged in):
- Visit one of the products or collections you targeted in Step 1.
- You should no longer see prices, and the Add to cart button is visible but disabled.
- Instead, you’ll see your custom “login to see price” message.
- Log in as a customer:
- Refresh the same product or collection page.
- Prices should now be visible as normal.
If the result isn’t what you expected:
- Double-check that the app embed is enabled in the theme.
- Check the rule’s Status toggle in the Lock list. If you saved the rule with Status set to Enable, the toggle is already on. If the toggle is off, turn it on, then click Save in the Contextual Save Bar to activate the rule.
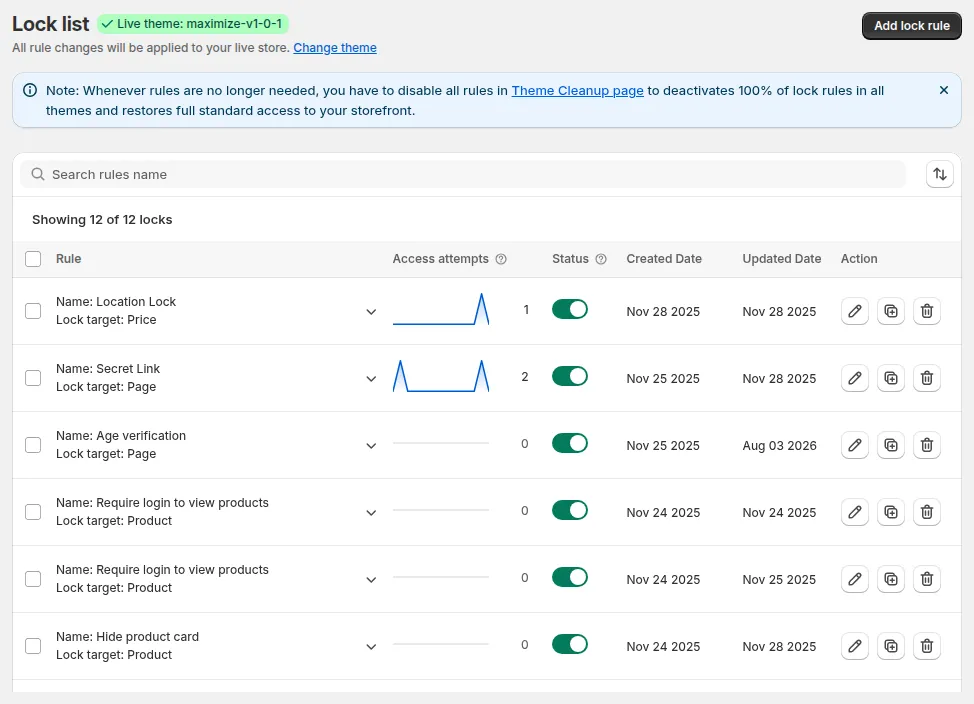
A rule saved with Status set to Enable shows the toggle on. If it is off, turn it on and click Save in the Contextual Save Bar.
- Use the in-app Contact us link or email [email protected] and share your store URL plus screenshots – the BSS Commerce team can help review your setup.
What you’ve just achieved
Section titled “What you’ve just achieved”In under 5 minutes, you have:
- Hidden prices from all guests.
- Shown prices only to logged-in customers.
- Optionally kept your B2B prices off Google search (if you ticked Hide price on Google search in Step 1).
This pattern is the foundation for more advanced B2B setups (e.g., show different catalogs for tagged customers, lock entire site for B2B only, etc.) – which we’ll cover in the next sections.