
With BSS B2B Solution – Registration + Tags
BSS B2B Lock works best when it knows who is B2B and who is not. That’s exactly what BSS B2B Solution is good at: capturing business details, approving applicants, and tagging customers.
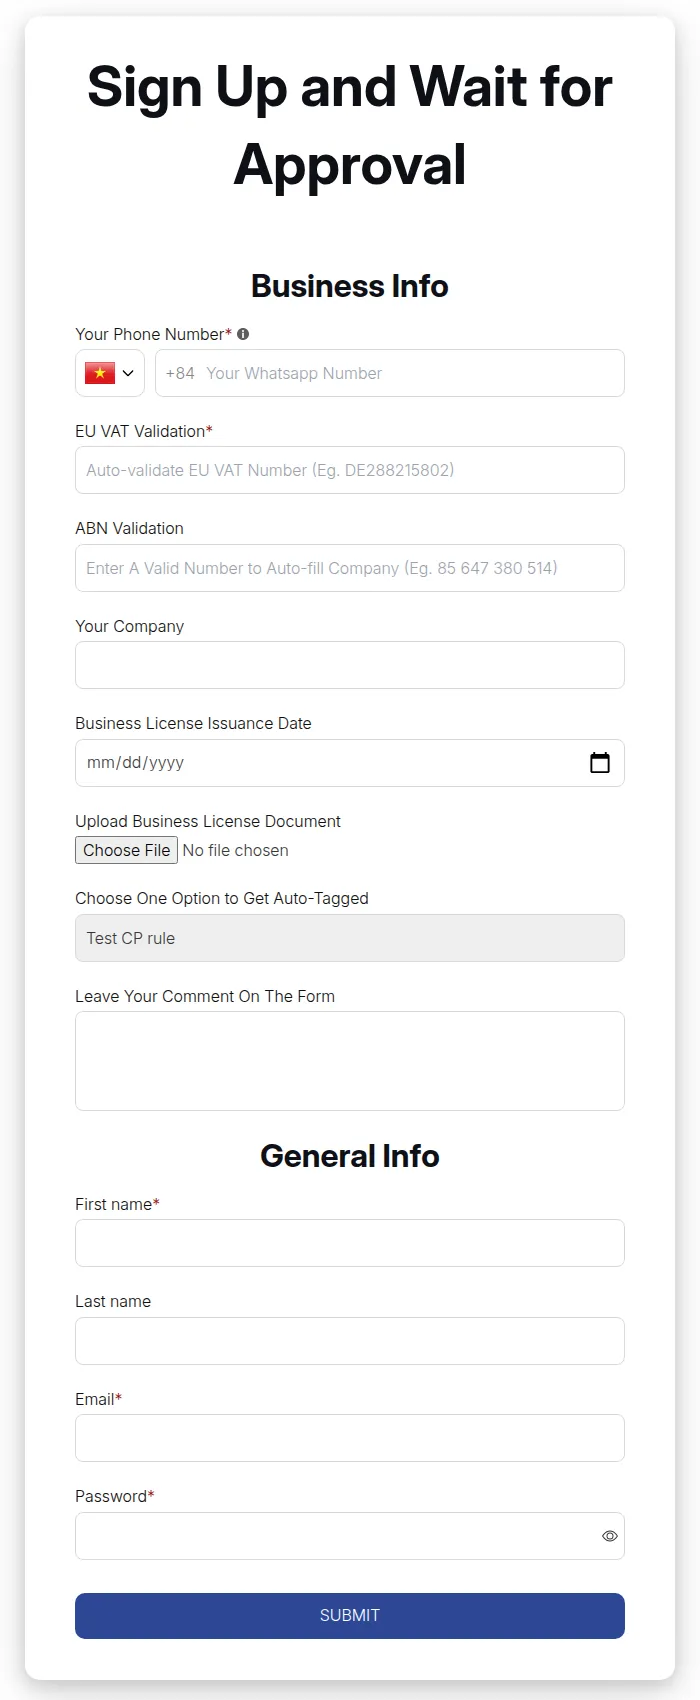
What your customers see on the storefront.
Together, they form a full flow:
Registration → Approval → Tags → Catalog & Access Locks
This page explains how to connect those pieces.
1. High-level flow
- Customer fills in B2B registration form
- Company name, VAT/tax ID, website, expected order volume, etc.
- You (or your team) review and approve
- Approve, reject, or ask for more info.
- On approval, the app adds tags to the customer
- Example:
b2b-approved,wholesale,eu-distributor.
- Example:
- BSS B2B Lock uses those tags
- To unlock B2B-only content (collections/pages).
- To show/hide prices.
- To separate B2B and B2C catalogs.
Once this is in place, your B2B experience becomes:
- Public visitors → see only public catalog.
- Approved B2B visitors → after login, see all the B2B content unlocked by tags.
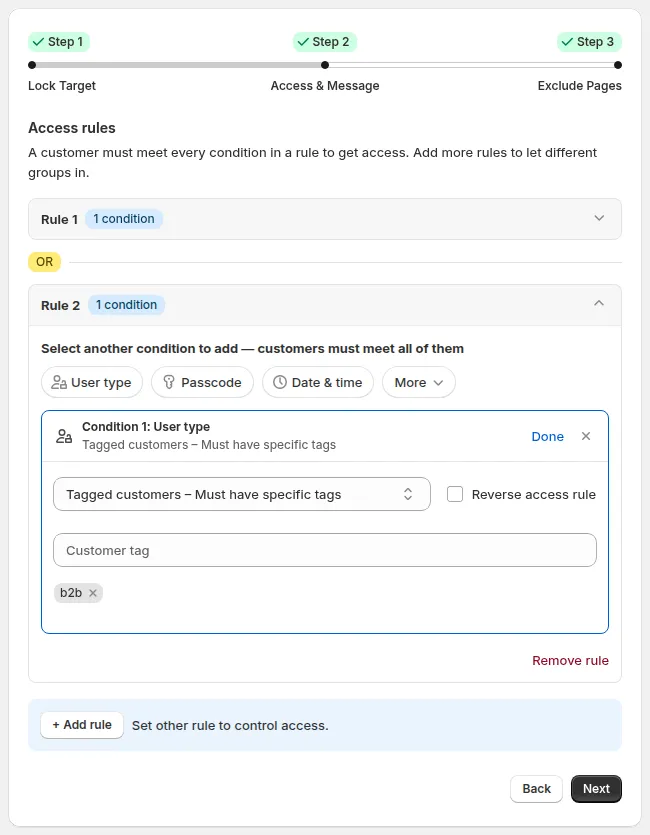
In Step 2 – Access & Message, pick Tagged customers under User type to unlock content by the tags your registration app adds
2. Step-by-step: connect registration to tags
In BSS B2B Solution:
- Set up your B2B registration form (e.g., “Wholesale signup”).
- Configure the approval workflow:
- When you approve an application, the app adds tags to that customer.
- Decide on tag names such as:
b2b-approvedwholesalesilver,gold
- Test:
- Submit a test application.
- Approve it.
- Check the customer record in Shopify → confirm tags are added.
These tags are now your keys for BSS B2B Lock.
3. Step-by-step: use tags in BSS B2B Lock
In BSS B2B Lock, for any rule:
- Go to Locks → Add lock rule, select Create my own lock and click Continue (or edit an existing lock).
- In Step 1 – Lock Target, choose what to lock and click Next.
- In Step 2 – Access & Message, click User type in the Rule 1 card and select Tagged customers – Must have specific tags:
- Enter
b2b-approved - Or specific tags like
wholesale,eu-distributor,silver,gold.
- Enter
- On the Preview card, click Customize message and write a lock message like:
- “This area is for approved B2B customers. Please apply for access or log in with your approved email.”
- Click Save in the Contextual Save Bar (or in Step 3 – Exclude Pages).
Examples:
- Lock wholesale collection:
- Tags:
wholesale,b2b-approved.
- Tags:
- Lock B2B info page:
- Tags:
b2b-approved.
- Tags:
- Hide prices from non-B2B:
- Condition: Tagged customers with
b2b-approved.
- Condition: Tagged customers with
4. Benefits of this integration
- No double work
- You only manage approvals in one place (BSS B2B Solution).
- Tags are automatically updated; BSS B2B Lock just reads them.
- Clean separation of responsibilities
- BSS B2B Solution → registration, approval, data collection, and tags.
- BSS B2B Lock → what each tagged customer can see and access.
- Scalable
- You can add more tags and rules over time: regional B2B, tiers, different catalogs.
Once you think of tags as your “access passes”, integrating BSS B2B Lock with BSS B2B Solution becomes very natural.
Still Need Help?
Section titled “Still Need Help?”If you have questions or need assistance configuring BSS B2B Lock, our dedicated support team is here to help.
- In-App Assistance: Click Need help? or use the in-app chat button within BSS B2B Lock.
- Email Support: Contact us at [email protected] with your store URL and specific rule details.