
Customer Request Access Lock
Set Up Request Access to Approve Which Customers Can View Your Locked Content and Prices
What your customers see on the storefront.
Request Access lets shoppers ask for permission to see content or prices you’ve locked. You review each request and decide who gets in: no passcodes to share, no tags to manage by hand.
This is a great fit for B2B and wholesale stores that want to vet buyers before showing trade prices. Availability may vary by plan, so check the eligibility section below before you start.
Need help at any point? Email us at [email protected].
On this page
Section titled “On this page”- Eligibility requirements
- Understanding Request Access
- Availability & limitations
- Setting up Request Access (Steps 1–4)
- Common questions & quick fixes
Eligibility requirements
Section titled “Eligibility requirements”Before setting up Request Access, make sure your store meets these requirements:
- BSS B2B Lock app is installed and the app embed is enabled in your current theme.
- Customer accounts are enabled in your Shopify settings: shoppers must be able to log in.
- Your store sells through the Online Store channel (this is where locks apply).
- Works for both B2B-only stores and hybrid stores (retail + wholesale on the same storefront).
Understanding Request Access
Section titled “Understanding Request Access”What it is
Section titled “What it is”Request Access is a lock condition in the User type group: “Request access – visitor request, you approve.” Shoppers who hit the lock sign in, send you a request, and wait for your decision.
Until you approve them, they see a friendly message instead of the locked content or price.
What you can do
Section titled “What you can do”- Lock pages, content, or prices behind a personal approval from you.
- Approve, reject, or revoke access for each customer.
- Get an email notification the moment a new request arrives.
- Buyers get an automatic email when you approve or reject their request.
- Customize every message buyers see: request, pending, rejected, revoked, login prompt, and the request form.
Where it applies
Section titled “Where it applies”- On your Online Store: product pages, collections, other pages, and prices you’ve locked.
- Approval is granted per lock rule. A buyer approved for one rule still needs approval for other rules.
What buyers see, step by step
Section titled “What buyers see, step by step”1. A buyer visits the locked page and sees your Request message with a Request access button:
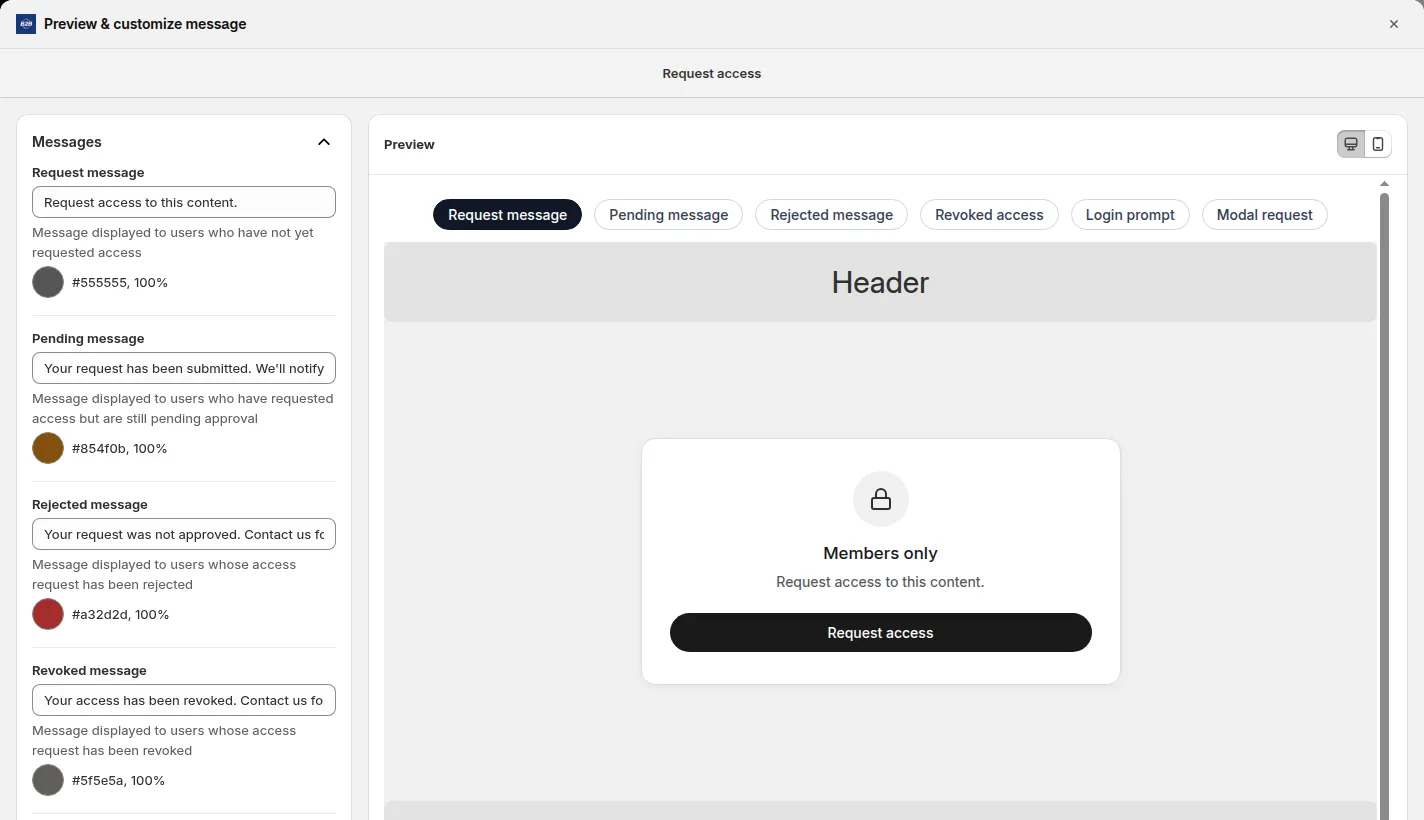
Locked content on the storefront with the Request access button
2. They click Request access and fill in a short form. Their email is taken from their account automatically; they add their name and an optional message (up to 500 characters):
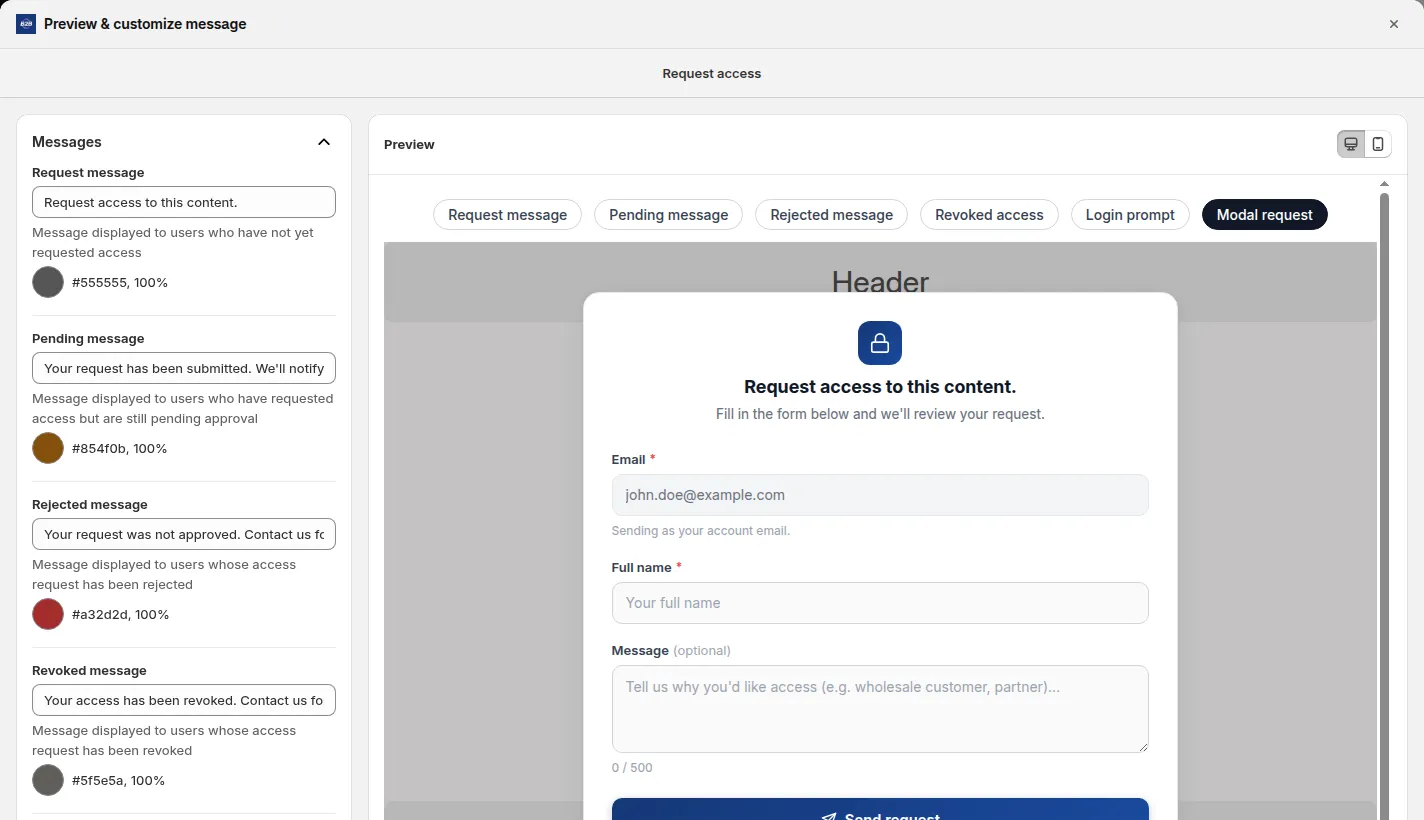
Request access form with email, full name, and optional message
3. Their request is submitted and they see your Pending message until you decide:
4. Depending on your decision, they’ll see the content unlock (approved), your Rejected message, or, if you remove access later, your Revoked message. Visitors who aren’t logged in see a Sign in to continue prompt instead of the form.
Availability & limitations
Section titled “Availability & limitations”- Buyers must have a customer account and be logged in. If you want to grant access without login, use a Passcode lock instead.
- Approval is per rule: approving a buyer once doesn’t unlock your other locked rules for them.
- Approving does not add a customer tag. The app keeps its own list of approved, rejected and revoked customers for each rule. If you also want a tag (for example to use in pricing rules), add it in Shopify or with an Auto Tags rule.
- Each rule comfortably supports thousands of approved customers. If you expect a very large list (5,000+ per rule), contact support first.
- If you publish a new theme, re-enable the BSS B2B Lock app embed so your locks keep working.
Setting up Request Access
Section titled “Setting up Request Access”Step 1: Create a lock with the Request access condition
Section titled “Step 1: Create a lock with the Request access condition”- Go to the BSS B2B Lock app in your Shopify admin.
- Go to Locks and click Add lock rule. In the Start with a preset modal, select Create my own lock and click Continue.
- In Step 1 – Lock Target, enter a Lock name and select what to protect under What do you want to lock? (for example page content or prices), and where it applies. Click Next.
- In Step 2 – Access & Message, click the User type chip in the Rule 1 card.
- In the Select access rule dropdown, select Request access – visitor request, you approve.
- Click Done.
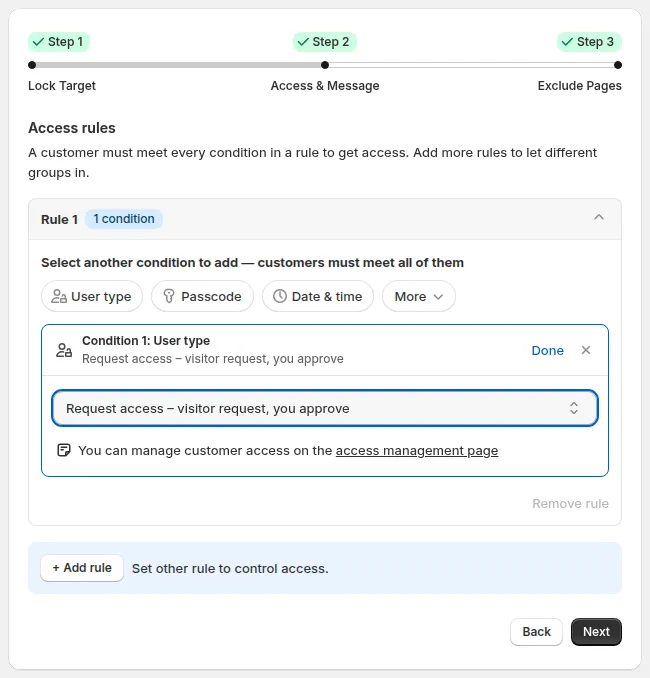
Select Request access – visitor request, you approve under User type
Step 2: Customize your messages
Section titled “Step 2: Customize your messages”- Find the Preview card in the right column, under Summary.
- Select Request Access in the message dropdown.
- Click Customize message to open the Preview & customize message modal.
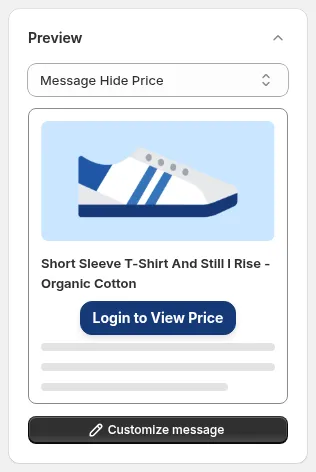
Preview card: pick the message, then click Customize message
- Set your Request message: what buyers see before they ask for access.
- Set your Pending message: shown while you review their request.
- Set your Rejected message and Revoked message: include a way to contact you.
- Set your Login prompt: shown to visitors who aren’t signed in.
- Select a text color for each message to match your brand.
- Click each tab (Request message, Pending message, Rejected message, Revoked access, Login prompt, Modal request) to preview every state, on desktop and mobile.
- Save your changes in the modal, then click Save in the Contextual Save Bar (or in Step 3 – Exclude Pages) to activate the lock.
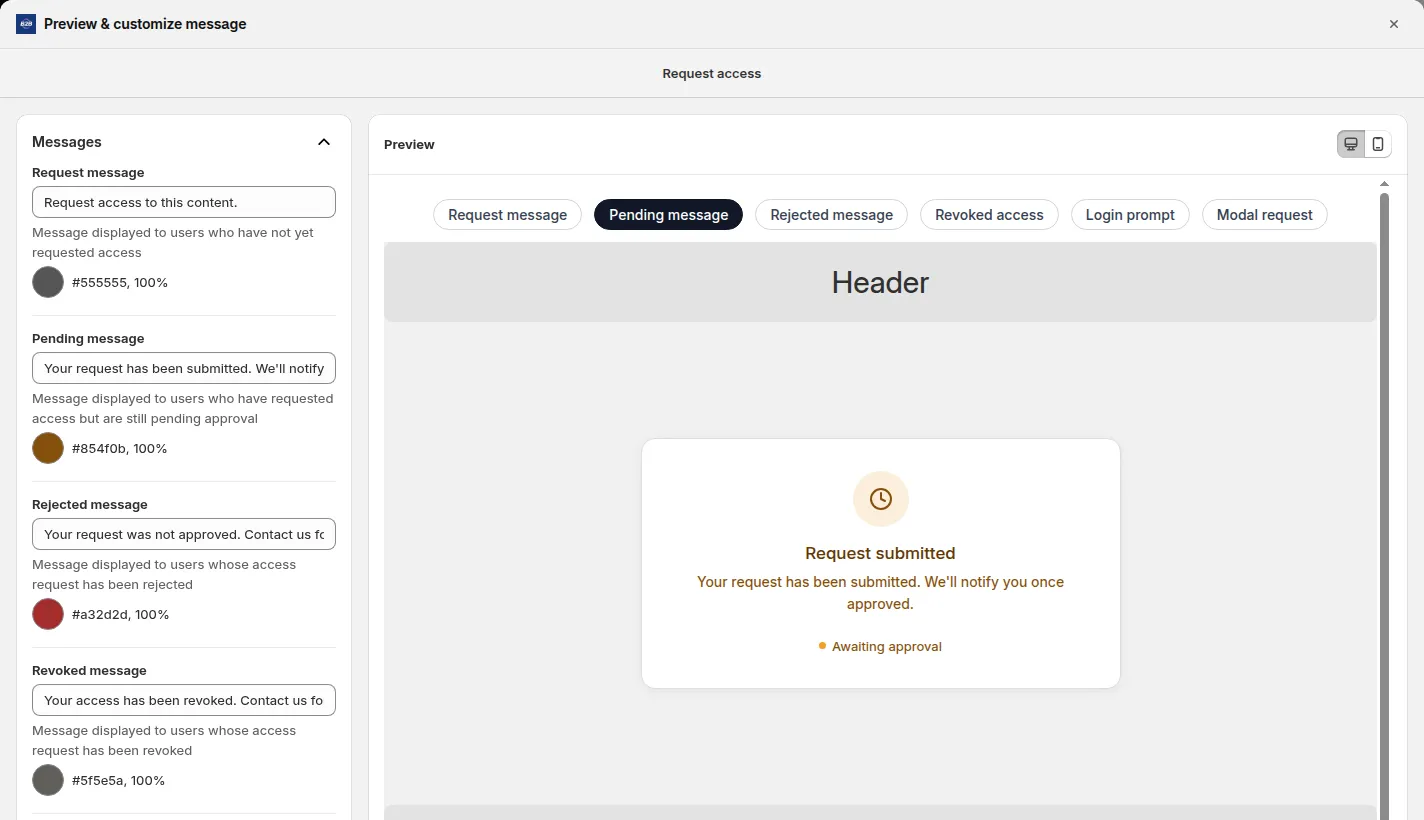
Editing messages and previewing the pending state
Here’s how the other states look to buyers:
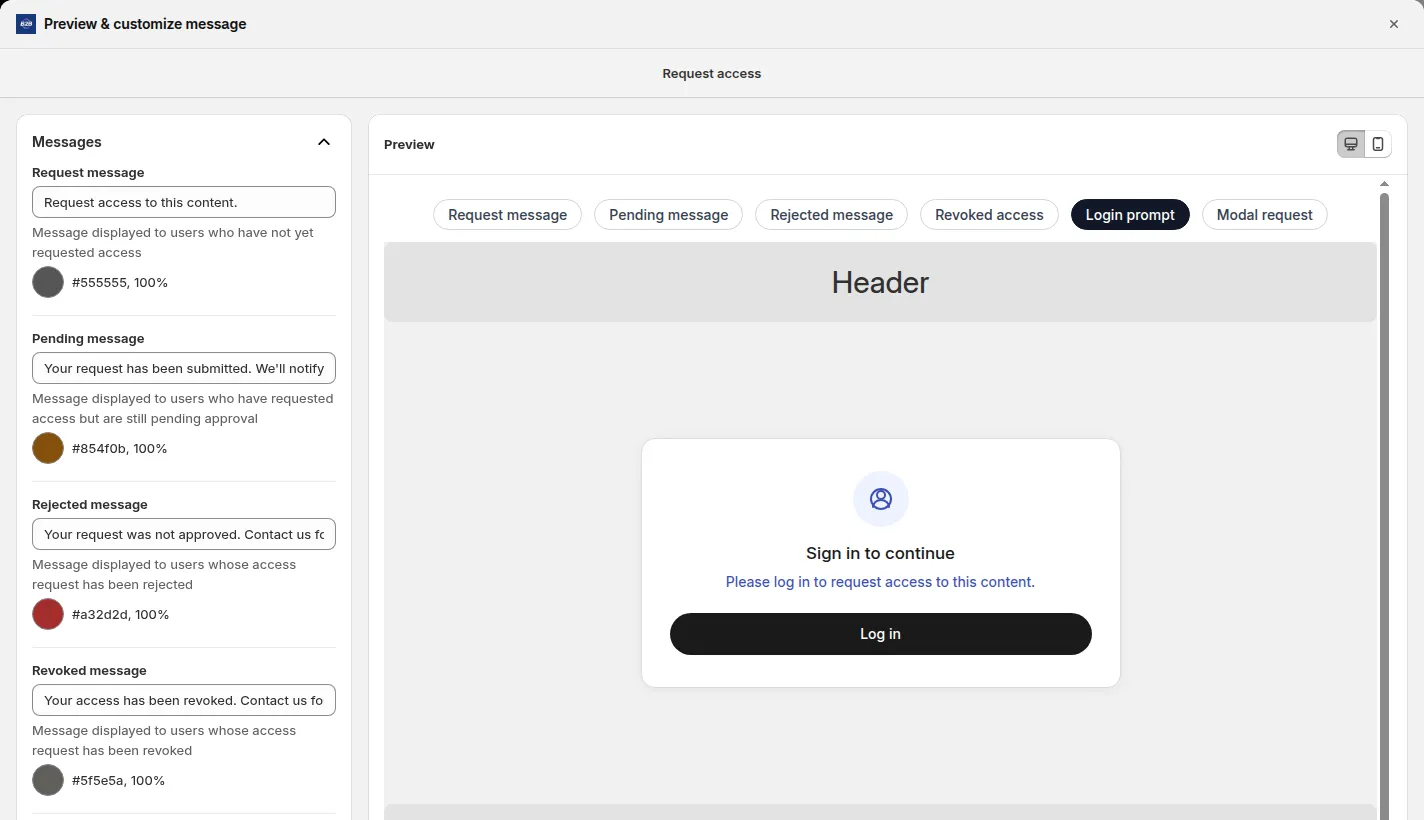
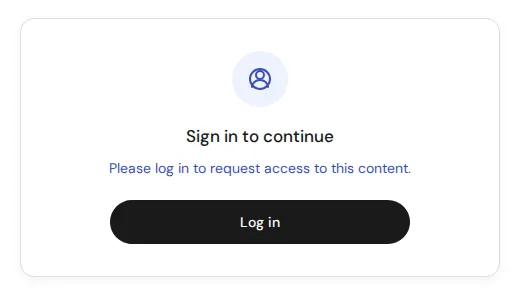
Login prompt preview, Sign in to continue
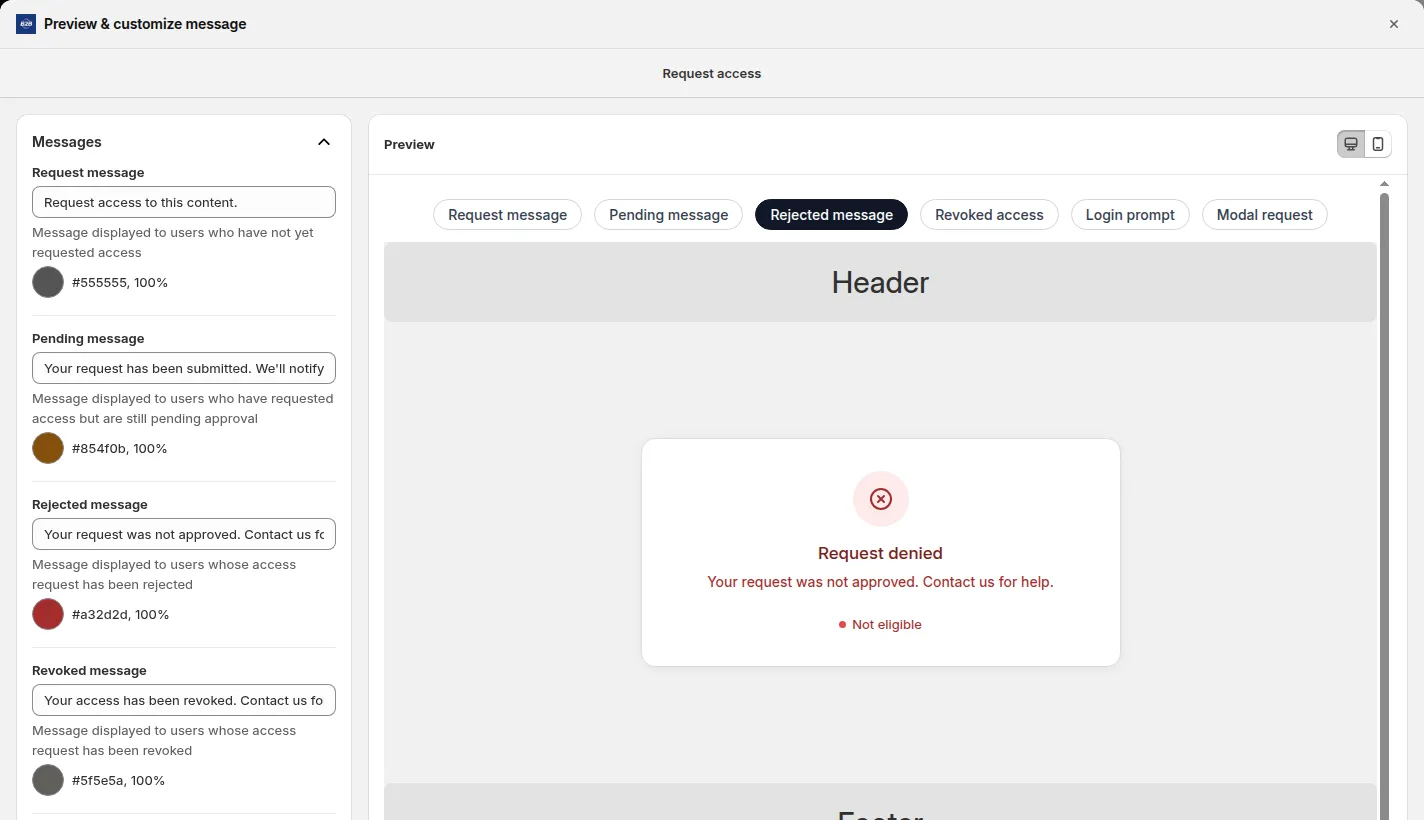
Rejected message preview, Request denied
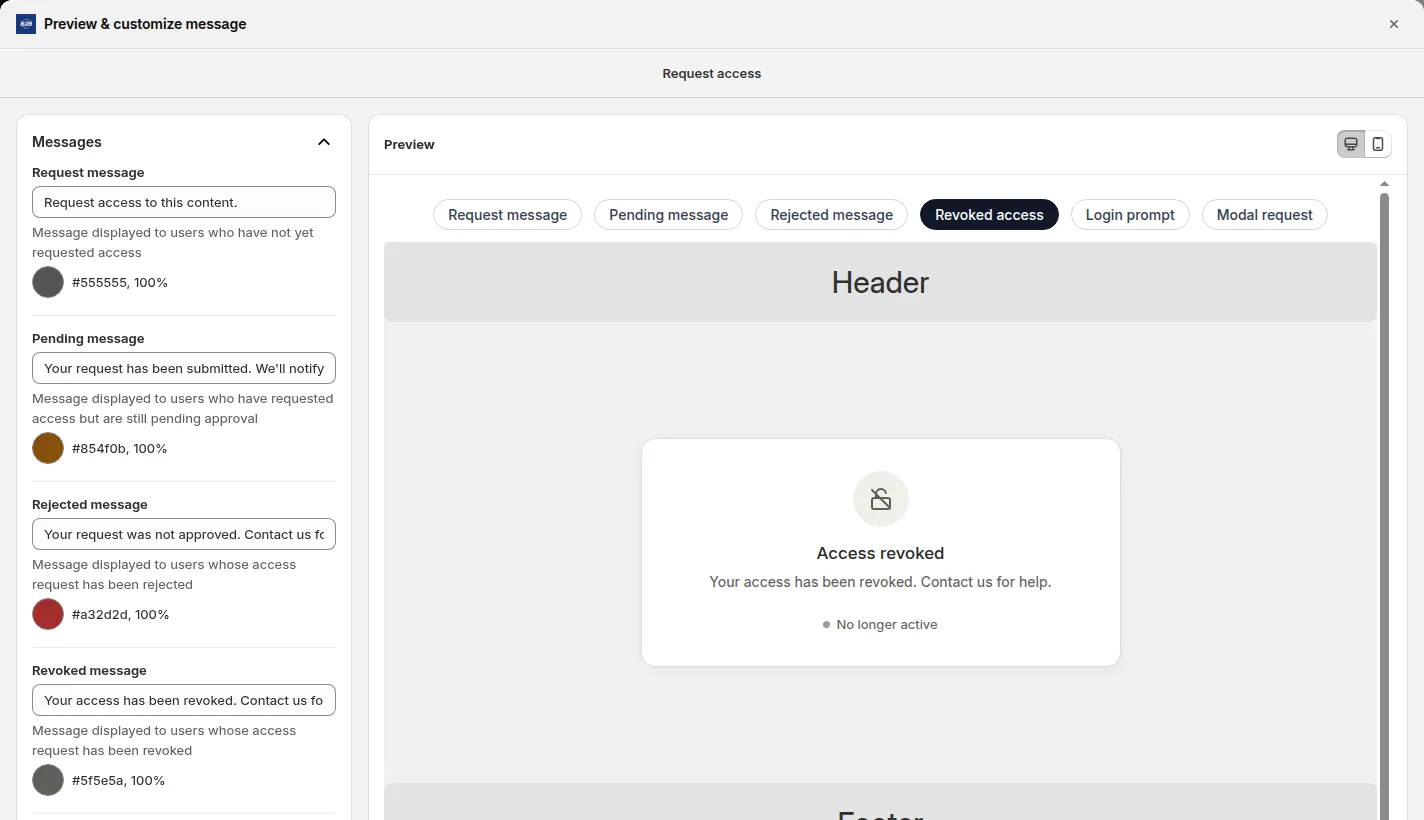
Revoked message preview, Access revoked
Step 3: Review and approve requests
Section titled “Step 3: Review and approve requests”- Go to the access management page in BSS B2B Lock.
- Click the Customer Access Requests tab (next to Passcode Requests).
- Turn on Enable email notification and set the email where new-request alerts should go.
- Use the Status filter or search by name, email, or rule to find requests.
- Click ✓ to approve a request, or ✕ to reject it.
- Click the eye icon to view a request’s details and the buyer’s message.
- To remove access later, find the approved customer and click Revoke.
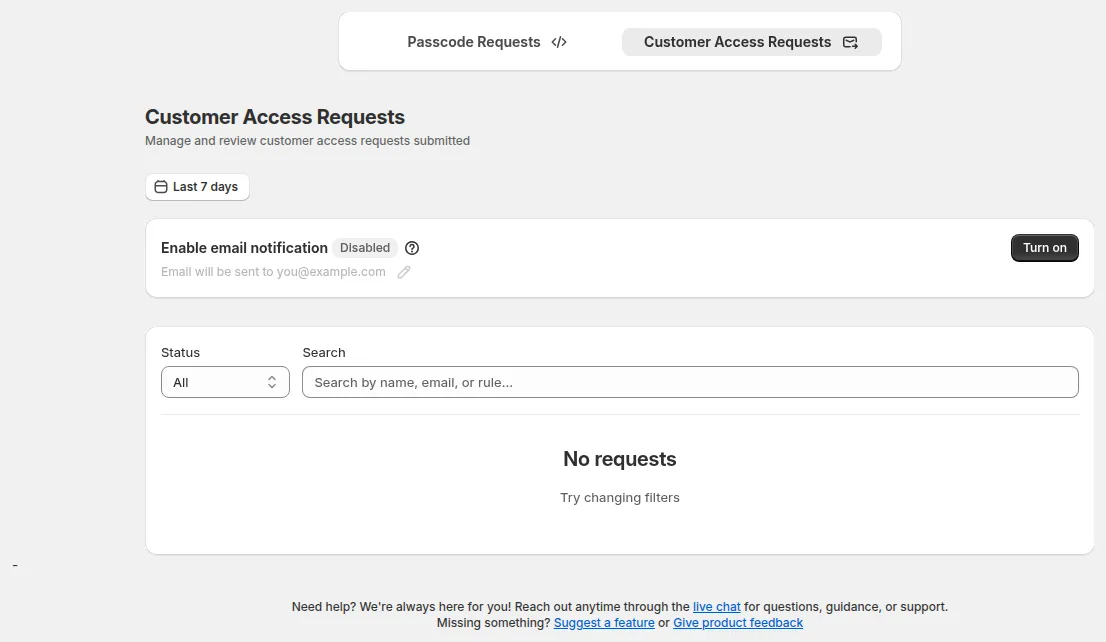
Customer Access Requests page with email notification, filters, and approve/reject actions
Step 4: Verify it works on your storefront
Section titled “Step 4: Verify it works on your storefront”- Open your storefront in an incognito/private window.
- Go to a locked page: you should see the login prompt.
- Log in with a test customer account and click Request access.
- Check that the Pending message appears and you receive the notification email.
- Go back to the app and approve the test request.
- Refresh the storefront: the content or price should now be visible.
Common questions & quick fixes
Section titled “Common questions & quick fixes”A buyer says they never got the approval email.
Ask them to check their spam folder. Their access still works either way; email is just a notification.
A buyer was approved but still sees the lock.
Ask them to refresh the page and confirm they’re logged in with the same account that sent the request.
Can buyers re-request after being rejected?
Yes. They can submit a new request, and it will appear in your list as pending again.
Can I approve a buyer for all my locks at once?
Not yet: approval is per rule. Approve them under each rule they need.
I don’t see the Request access option.
This condition is available on the Advanced plan. Upgrade your plan, then reopen the lock’s User type settings.
Support
Section titled “Support”Still stuck? Email [email protected]: include your store URL and the lock rule name, and we’ll take a look.