Create Quick Order Page
This guide explains how to build and configure high-converting Quick Order pages for B2B wholesale buyers, spare part ordering, or repeat catalog purchases.
1. Creating a New Page
Section titled “1. Creating a New Page”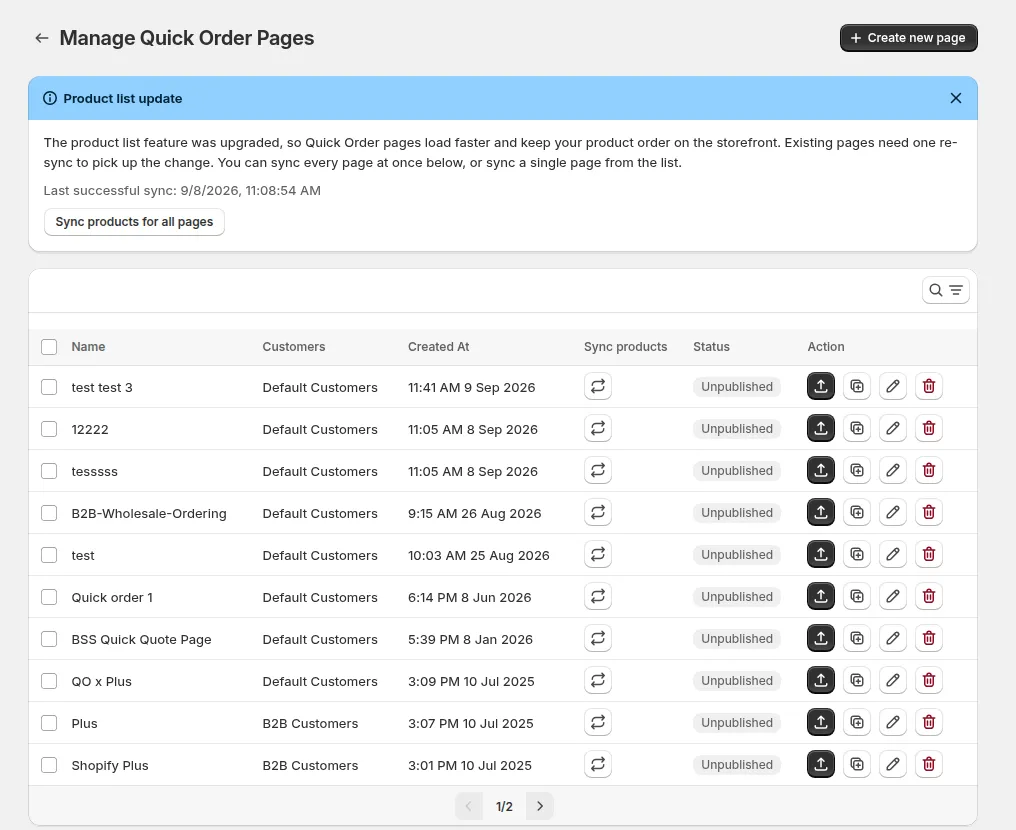
In Shopify Admin, open BSS B2B Quote > Quick Order:
- Click Set up pages, then Create new page (or start from a preset in Quick Order Template).
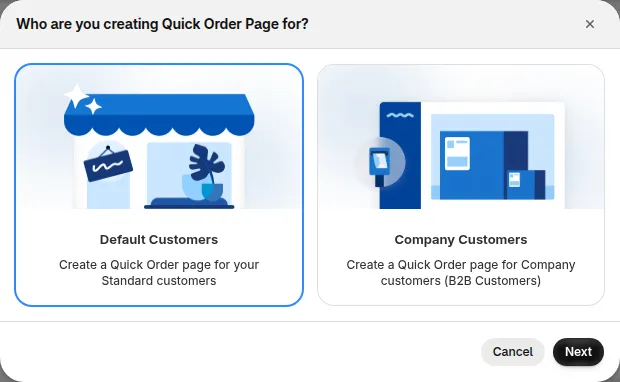
- Choose the customer type: Default Customers (your standard customers) or Company Customers (Shopify B2B companies, Enterprise plan only).
- Configuration Lifecycle:
- Internal Form Name: Enter a descriptive internal name (e.g. Wholesale Tier 1 Catalog) in the General tab.
- Page Description: Add optional introductory text, guidance, or banners in the Customize tab.
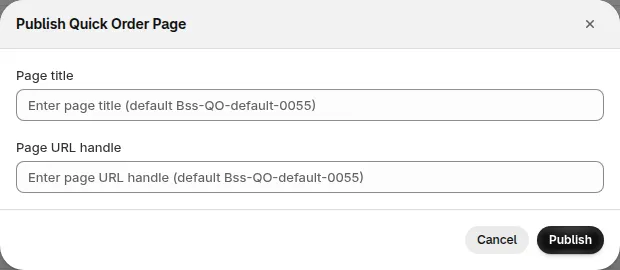
- Storefront Page Title & URL Slug: When you click Publish, a modal prompts you to define the customer-facing Page Title (e.g. Wholesale Quick Order) and URL Handle (e.g.
/pages/wholesale-order).
2. Product Source & Catalog Scope
Section titled “2. Product Source & Catalog Scope”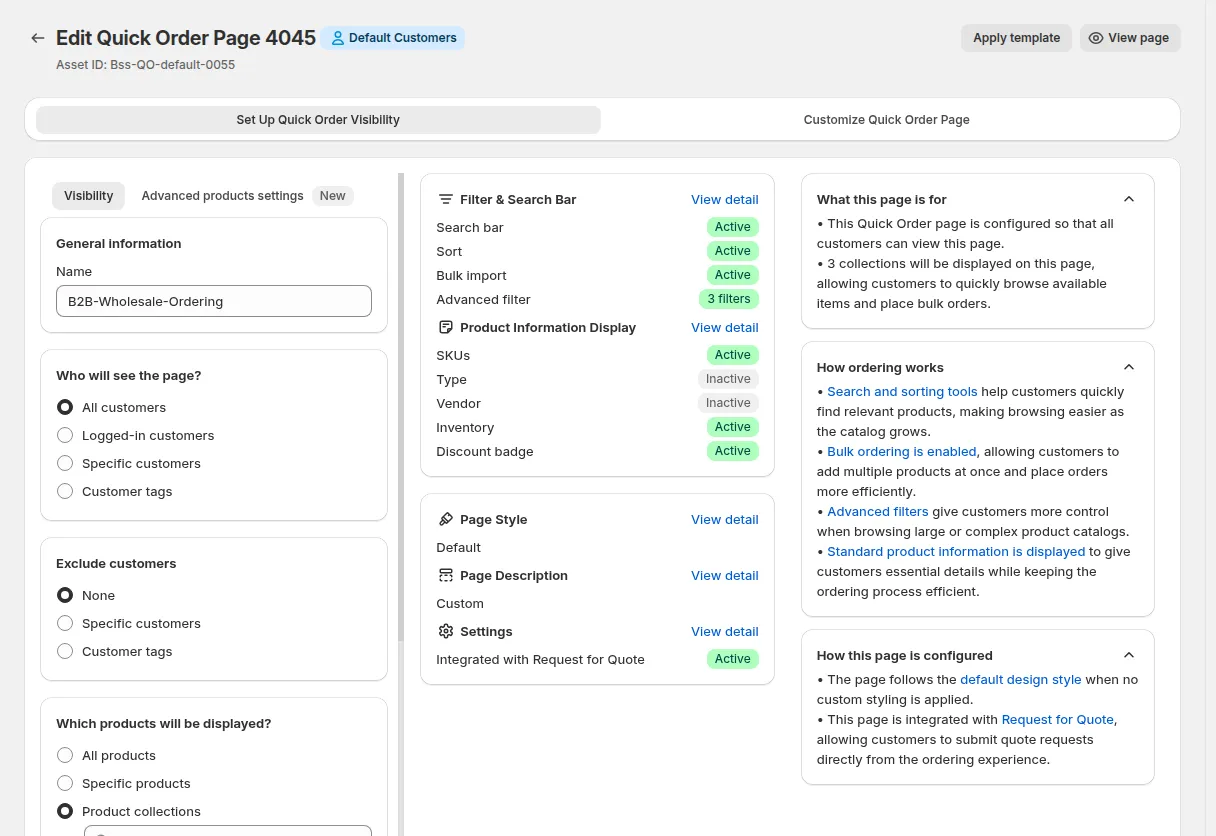
Choose which catalog items appear on the Quick Order page:
2.1 Product Inclusion Options
Section titled “2.1 Product Inclusion Options”- All Products: Entire active store catalog.
- Selected Collections: Focus on specific product categories (e.g. Beverages Wholesale, Industrial Tools).
- Product Tags: Target items dynamically using product tags.
- Specific Products: Curate a dedicated top-seller list.
- Shopify B2B Catalogs (Enterprise Tier): Restrict product visibility based on the buyer’s assigned Shopify B2B Company Catalog.
2.2 Exclude Filters (Default Store)
Section titled “2.2 Exclude Filters (Default Store)”For Default Store configurations, you can apply granular exclusion rules:
- Exclude Customers: Prevent specific customer accounts or customer tags from accessing the page.
- Exclude Products: Exclude designated tags, clearance collections, or specific product SKUs from appearing in the table.
3. Layout & Display Settings
Section titled “3. Layout & Display Settings”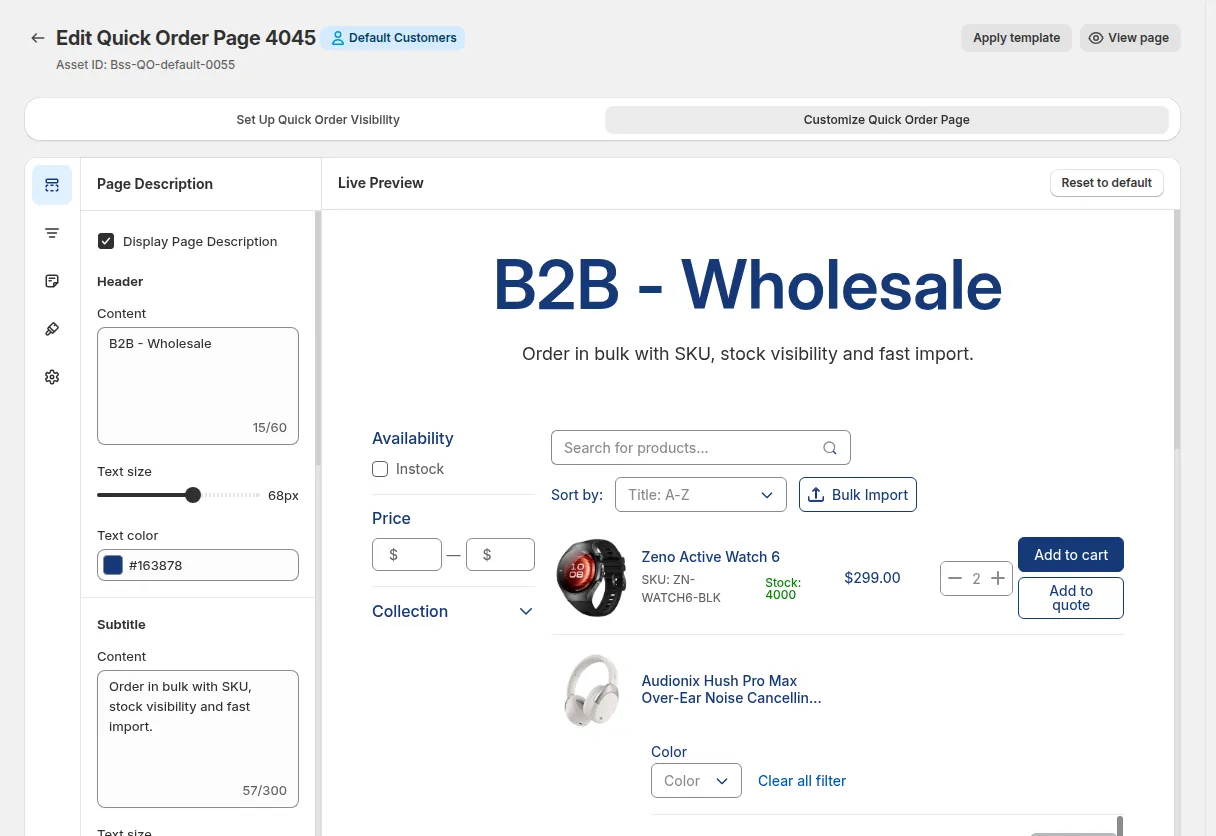
3.1 Variant Display Mode
Section titled “3.1 Variant Display Mode”Choose how product variants are presented on the page:
- Show All Variants: Lists every variant (size, color, pack) directly in the table with inline quantity boxes. Ideal for fast B2B bulk orders.
- Modal Variant: Displays one row per product with a modal popup to select variants. Ideal for large catalogs with dozens of options per item.
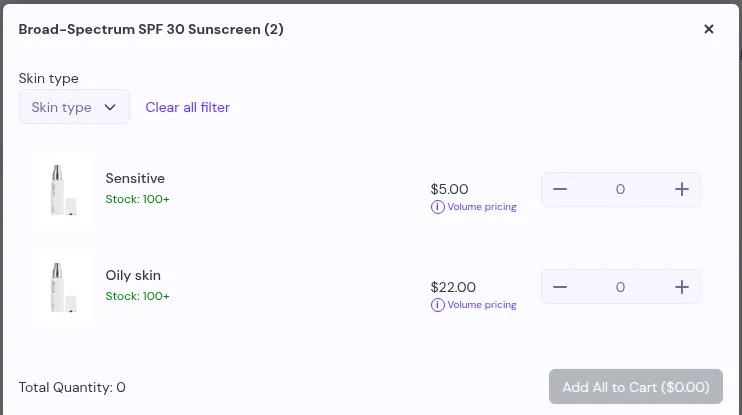
3.2 Sorting & Collection Default Order
Section titled “3.2 Sorting & Collection Default Order”Choose how products are ordered within the table:
- Default Collection Order: When selecting a single Shopify Collection as the product source, select this option to preserve the exact custom manual sorting defined in your Shopify Admin Collection.
- Product Title: Alphabetical (
A–ZorZ–A). - Price: Numerical (
Low to HighorHigh to Low). - Product Tag: Alphabetical order by tag.
3.3 Metafield Selection & Live Preview
Section titled “3.3 Metafield Selection & Live Preview”- Connect to Shopify GraphQL to fetch product and variant metafield definitions (e.g., technical specs, pack dimensions, certifications).
- Choose which metafields display as table columns and preview the layout in real time.
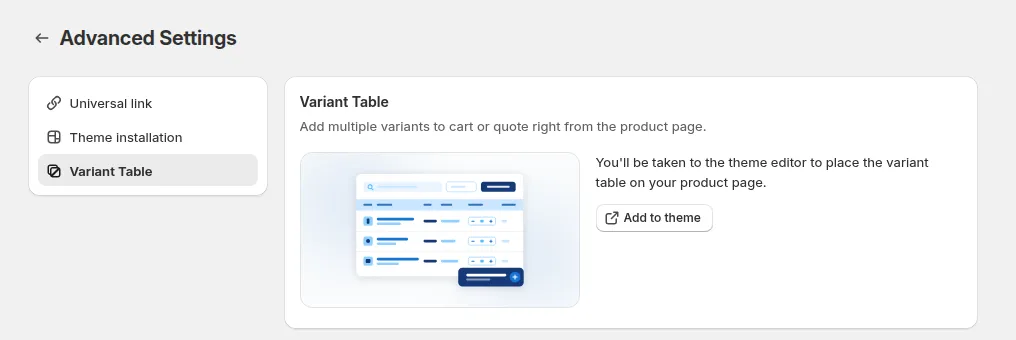
4. Product Page Variant Table Integration
Section titled “4. Product Page Variant Table Integration”To enable bulk variant ordering directly on individual product detail pages (PDP) rather than a standalone page, use the dedicated Product Page Variant Table Theme App Block.
5. Filters & Search Configuration
Section titled “5. Filters & Search Configuration”- Search Engine: Enable real-time instant search across Product Title, SKU, Barcode, and Vendor.
- Faceted Filters: Add sidebar or top-bar filters by Collection, Product Type, Vendor, Tags, and In-Stock Availability.
6. Access Control & Publishing
Section titled “6. Access Control & Publishing”- Public: Accessible to all visitors.
- Logged-in Customers: Requires standard Shopify account authentication.
- Customer Tags / B2B Companies: Restricted to designated wholesale customer tags or Shopify B2B Companies.
- Click Publish to enter your customer-facing Page Title and URL Slug, then click Publish in the modal to launch the live storefront page.