
Full Setup Guide
Learn how to configure, customize access, set up delivery options, and publish your store’s Re-Order page.
This guide provides a comprehensive step-by-step walkthrough for store administrators to set up the Re-Order page, configure customer eligibility rules, manage delivery options, complete guided onboarding, and publish the storefront page without touching any liquid code.
1. Before You Begin
Section titled “1. Before You Begin”Before setting up the Re-Order page, ensure your store meets the following prerequisites:
- App Installed & Active: Verify that the BSS B2B Quote app is installed and active on your Shopify store.
- Theme App Embed Enabled: The app requires the B2B Portal app embed to be enabled in your active Shopify theme editor (
Online Store > Themes > Customize > Theme settings > App embeds).
2. Reorder Settings Overview & UI Callouts
Section titled “2. Reorder Settings Overview & UI Callouts”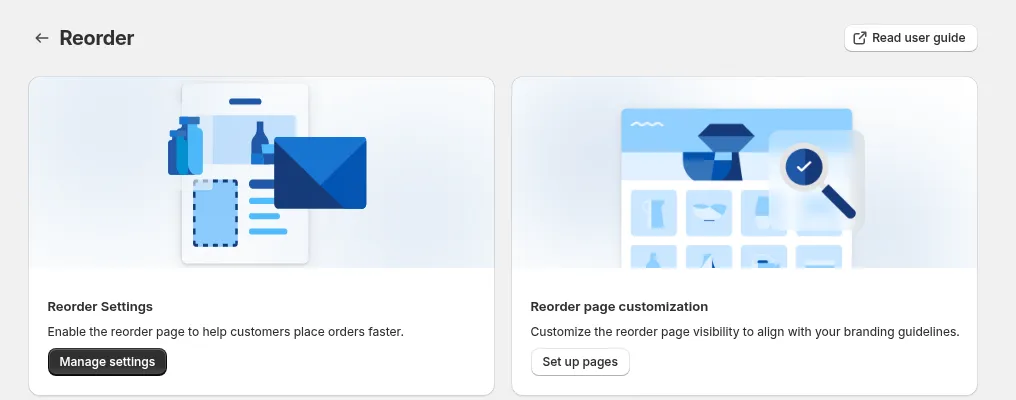
To access the Re-Order configuration panel in your Shopify Admin:
- Navigate to Shopify Admin > Apps > BSS B2B Quote.
- From the app sidebar navigation, select Reorder > Reorder Settings.
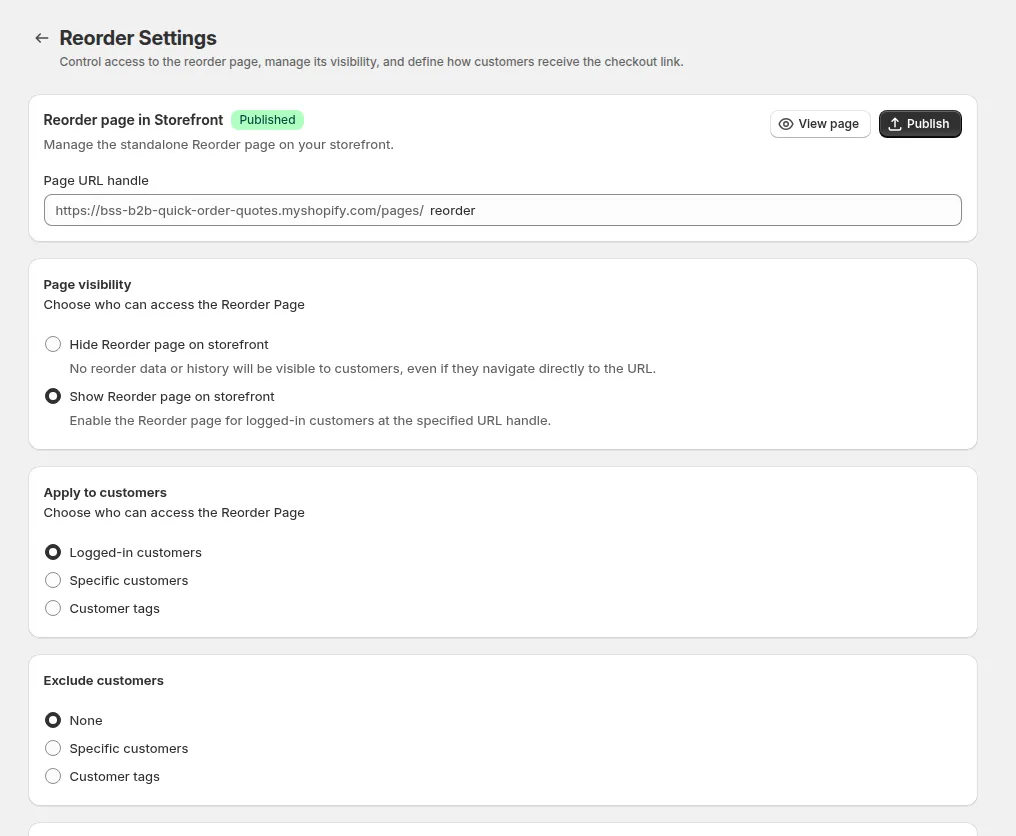
Interface Callouts:
Section titled “Interface Callouts:”- Page Status Badge: Displays current state: Published (green) or Unpublished (grey).
- URL Handle: the URL of the Reorder page (default
reorder, so/pages/reorder). - Page visibility: Show Reorder page on storefront or Hide Reorder page on storefront (the default for a new store).
- Apply to customers: who can access the Reorder page (Logged-in customers, Specific customers or Customer tags).
- Exclude Customers Filter: Configure exclusion rules (None, Specific Customers, or Customer Tags). Exclusion rules always take priority over eligibility rules!
- Checkout Link Visibility: how customers get the checkout link: Display Checkout Link on storefront, Send Checkout Link through email, or Both (the default).
- Action Toolbar (Save / Publish / View Page / Edit Template): Syncs with Shopify Contextual Save Bar, publishes changes, previews the live page, or opens the Template Editor.
3. Step-by-Step Configuration Walkthrough
Section titled “3. Step-by-Step Configuration Walkthrough”Step 1: Verify Theme App Embed
Section titled “Step 1: Verify Theme App Embed”- In your Shopify Admin, go to Online Store > Themes.
- Click Customize next to your active theme.
- On the left sidebar, click the App embeds icon (3rd tab).
- Locate the B2B Portal app embed.
- Toggle the switch to On and click Save in the top-right corner.
Step 2: Configure Page Visibility & URL Handle
Section titled “Step 2: Configure Page Visibility & URL Handle”- Navigate to Reorder > Reorder Settings in the app admin.
- In the Page Settings section:
- URL Handle: Enter your desired URL slug (e.g.,
reorder). This creates the page athttps://yourstore.myshopify.com/pages/reorder. - Page visibility: choose Show Reorder page on storefront to open the page to eligible logged-in customers. With Hide Reorder page on storefront (the default), no reorder data is visible, even if a customer opens the URL directly.
- URL Handle: Enter your desired URL slug (e.g.,
Step 3: Configure Customer Eligibility & Exclude Rules
Section titled “Step 3: Configure Customer Eligibility & Exclude Rules”Control exactly who can view and place reorders on your storefront.
1. Apply to Customers (Eligibility)
Section titled “1. Apply to Customers (Eligibility)”Choose who can access the Re-Order page:
- All (logged-in and not-logged-in customers) or Logged-in customers: the Reorder page is for logged-in customers: they see their past orders and can reorder.
- Specific customers: Restrict access to designated customer accounts selected via the Shopify customer picker.
- Customer tags: Restrict access to customers who possess specific tags (e.g.,
wholesale,vip,b2b-tier-1).
2. Exclude Customers (Exclusion Rule)
Section titled “2. Exclude Customers (Exclusion Rule)”Define customers who must never access the Re-Order page, even if they match the “Apply to Customers” criteria above:
- None (Default): No exclusion applied.
- Specific Customers: Select individual customer accounts to exclude.
- Customer Tags: Exclude any customer carrying specific tags (e.g.,
blacklisted,banned-reorder,inactive).
Step 4: Choose the Checkout Link Visibility
Section titled “Step 4: Choose the Checkout Link Visibility”Checkout Link Visibility decides how customers get the checkout link after they submit a reorder:
- Display Checkout Link on storefront:
- Storefront Outcome: Upon clicking “Place Order” in the reorder modal, the system displays a direct Shopify checkout URL on screen.
- Customer Experience: Customer clicks the link or “Proceed to Checkout” button to immediately complete payment.
- Best For: Fast, direct DTC reordering and immediate credit card checkouts.
- Send Checkout Link through email:
- Storefront Outcome: Creates a Shopify Draft Order in status
INVOICE_SENTand triggers an automated invoice email to the customer’s account email. - Customer Experience: Storefront displays confirmation: “Invoice sent! Please check your email inbox to complete payment.”
- Best For: B2B merchants who require formal invoice delivery, approval workflows, or offline payment terms.
- Storefront Outcome: Creates a Shopify Draft Order in status
- Both (default): shown on the storefront and sent by email.
- Storefront Outcome: Creates the draft order, displays the instant checkout link on screen, and sends the invoice email simultaneously.
- Customer Experience: Buyers can choose between clicking the instant link on screen or accessing the email invoice later.
- Best For: Maximum flexibility for B2B buyers who need immediate checkout access and email record-keeping.
4. Preview & Publish Flow
Section titled “4. Preview & Publish Flow”Once your settings are configured, publishing makes the Re-Order page live on your storefront.
How to Publish Your Page
Section titled “How to Publish Your Page”- Review your settings in Reorder Settings.
- Click Save in the top-right Shopify Contextual Save Bar (or action bar).
- Click the Publish button in the action header.
- The system validates page handle availability, creates/updates the Shopify Page, and binds the Re-Order storefront template.
- The Page Status Badge updates to Published (green).
- Click View Page to launch the live storefront Re-Order page in a new browser tab (
/pages/reorder).
5. Key Rules & Edge Cases
Section titled “5. Key Rules & Edge Cases”- Exclude Rule Precedence: Customer evaluation order:
Exclude Rules > Apply Rules. - Draft Order Scoping & Tenant Isolation: Reorder requests create Shopify Draft Orders tied specifically to the logged-in customer’s ID and email. Customers can never view or access draft orders created by another customer.
- Cart Independence: The Re-Order workflow operates entirely through Shopify Draft Orders and invoice URLs. Placing a reorder never overwrites, mutates, or clears items currently in the buyer’s active storefront cart.
- Theme App Embed Dependency: If the Theme App Embed is disabled, the storefront page
/pages/reorderwill display a blank or unstyled container. Always verify Theme App Embed state when troubleshooting. - URL Handle Conflicts & Page Content Override: If the specified URL handle (e.g.,
reorder) is already used by an existing Shopify page on your store, the app gives you the option to override the content of the existing page to bind the Re-Order template, or specify a unique page handle during publishing.
6. Related Topics
Section titled “6. Related Topics”- Reorder Overview: Feature vision, customer journey diagram, and core user scenarios.
- Reorder Page & Order Tabs: How buyers navigate the “Order” tab and “Waiting for Checkout” tab.
- Draft Order Detail Page: Inspecting pending draft order details, line items, and invoice links.
- Reorder Review & Edit Modal: Adjusting quantities, searching/adding products, and stock validation rules.
- Template Customization: Customizing colors, typography, buttons, and section element visibility.
- Storefront Translation: Overriding storefront text labels and managing dynamic placeholders.