
Full Setup Guide
Required Step
Section titled “Required Step”Before creating a Quote Logic, make sure the app has been embedded into your current theme.
You can check the embed status on your app dashboard.
If it hasn’t been embedded yet, follow the instructions to enable the app on your current theme.
Step 1: Create a New Quote Logic
Section titled “Step 1: Create a New Quote Logic”- Click Request for Quote in the app navigation.
- In the Quote Settings card, click Set up logics, then click Create new logic.
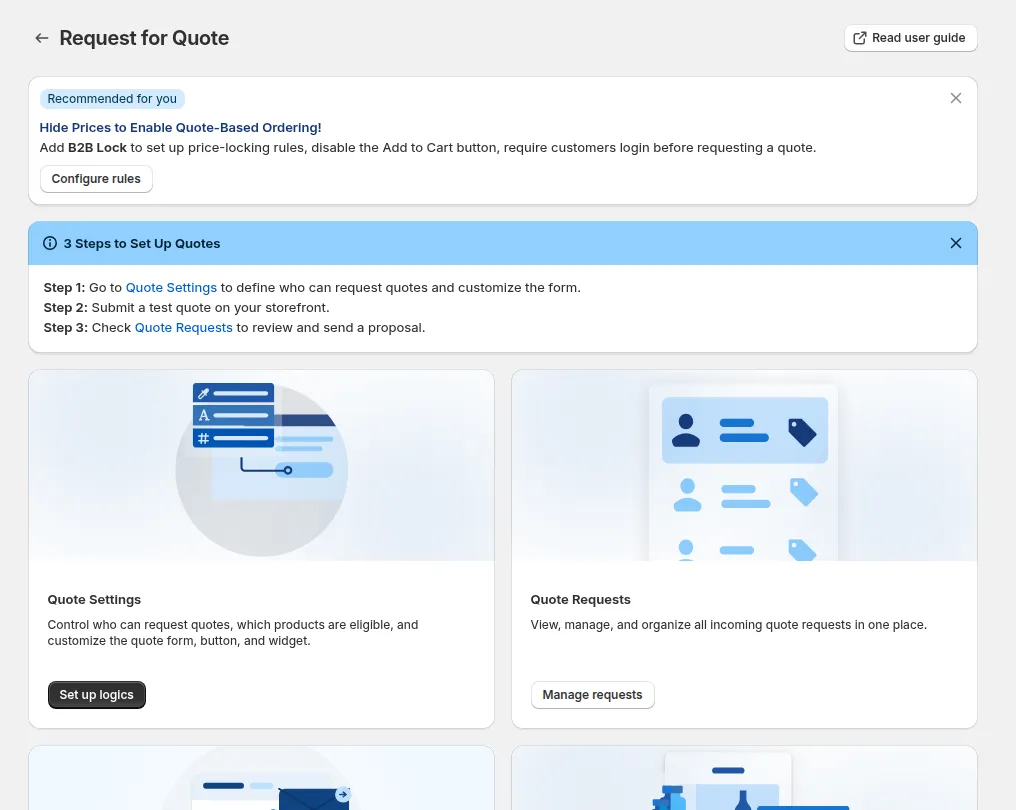
Request for Quote > Set up logics
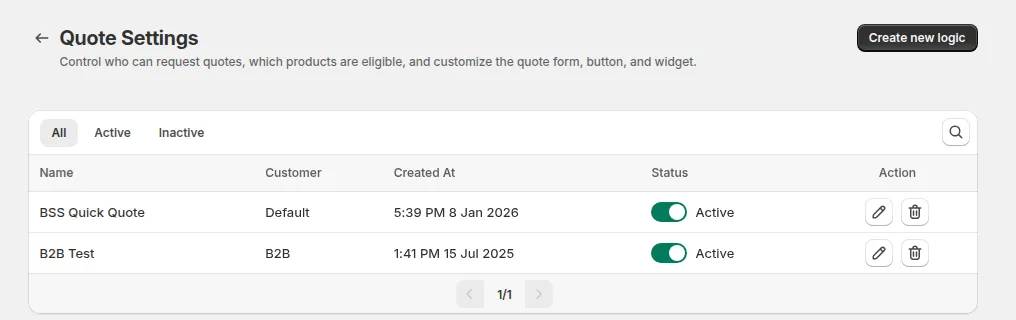
Click Create new logic
Step 2: Choose Who the Logic Is For
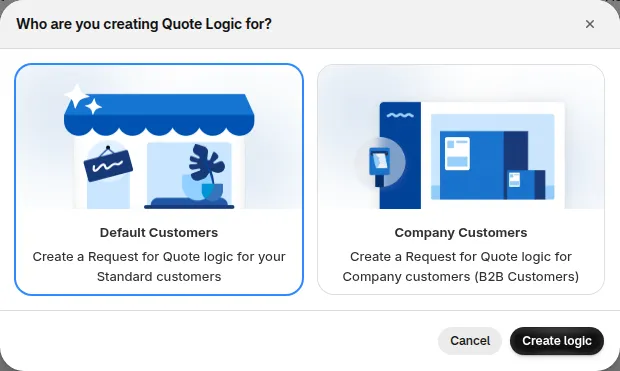
Section titled “Step 2: Choose Who the Logic Is For”A pop-up asks Who are you creating Quote Logic for?
- Default Customers: a Request for Quote logic for your standard customers.
- Company Customers: a logic for Shopify B2B company customers. This option needs the Enterprise plan; on other plans it is greyed out with a link to upgrade.
Then click Create logic.
The logic editor has 3 tabs:
- Set Up Quote Visibility & Quote Catalogs
- Set Up Quote Button & Widget
- Customize Quote Form
Inside each tab, the icons on the left switch between the sections of that tab.
Step 3: Set Up Quote Visibility & Quote Catalogs
Section titled “Step 3: Set Up Quote Visibility & Quote Catalogs”Here you define who can request a quote and which products can be quoted.
Quote Visibility (first icon):
- General information: enter a name for the logic, set its Status and, optionally, a priority from 0 to 99 (0 is the highest).
- Who can request a quote?: choose the customers who see the quote option.
- Exclude customers: leave out specific customers or customer tags.
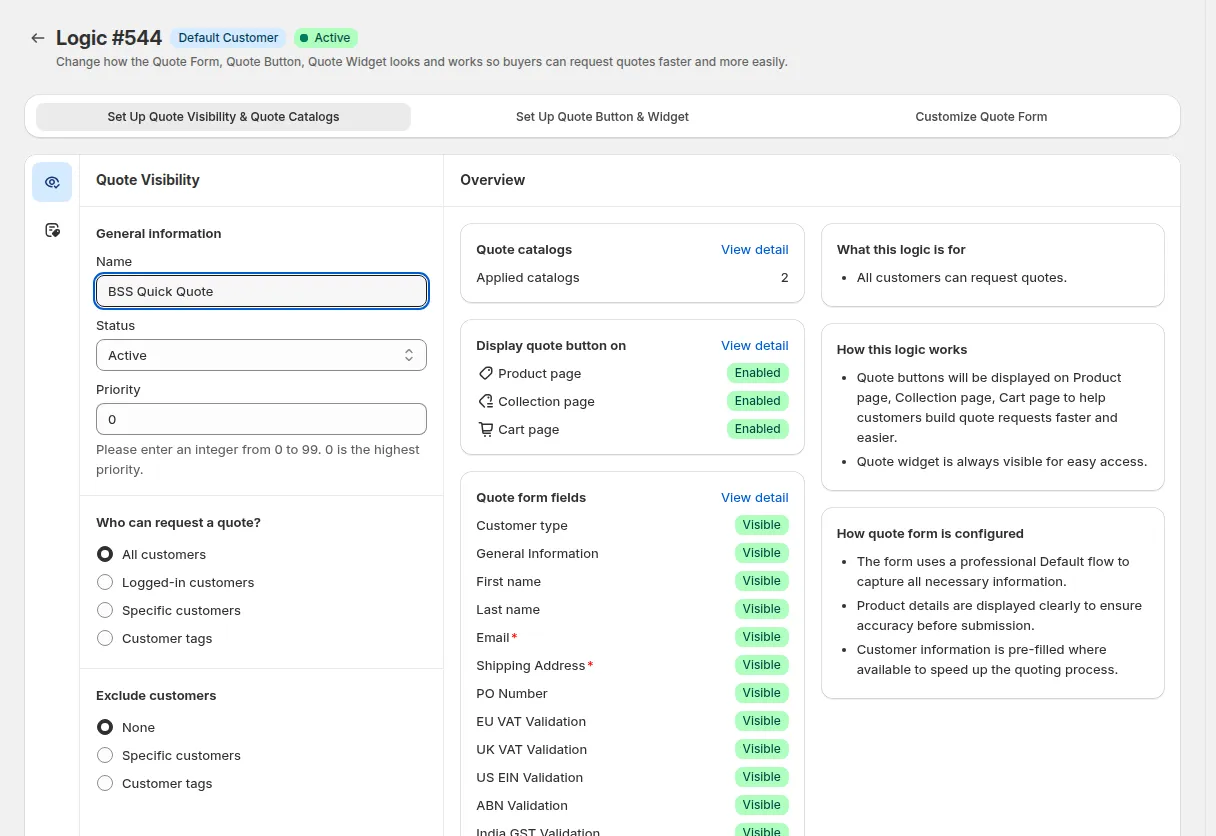
Quote Visibility
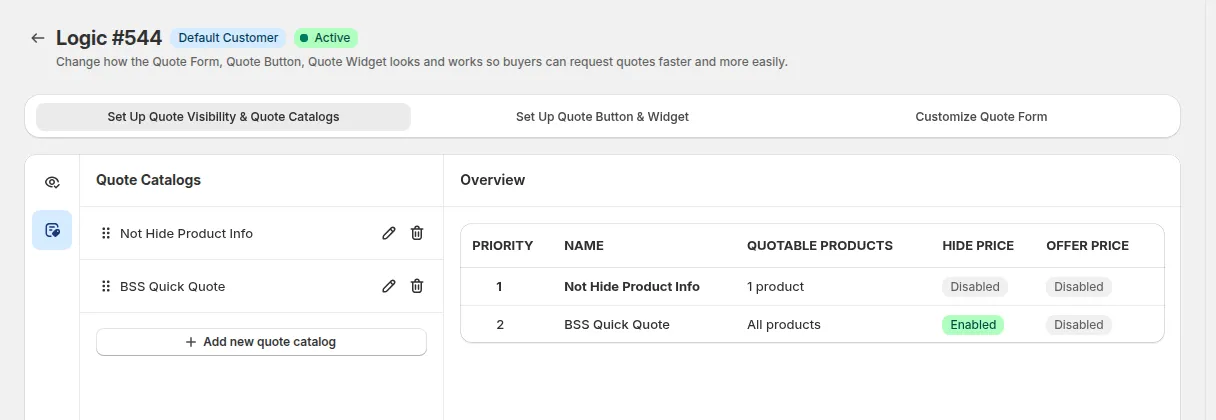
Quote Catalogs (second icon): add one or more catalogs with Add new quote catalog. The Overview table lists each catalog with its priority, quotable products, and whether it hides prices or allows offer prices. Drag catalogs to change their order.
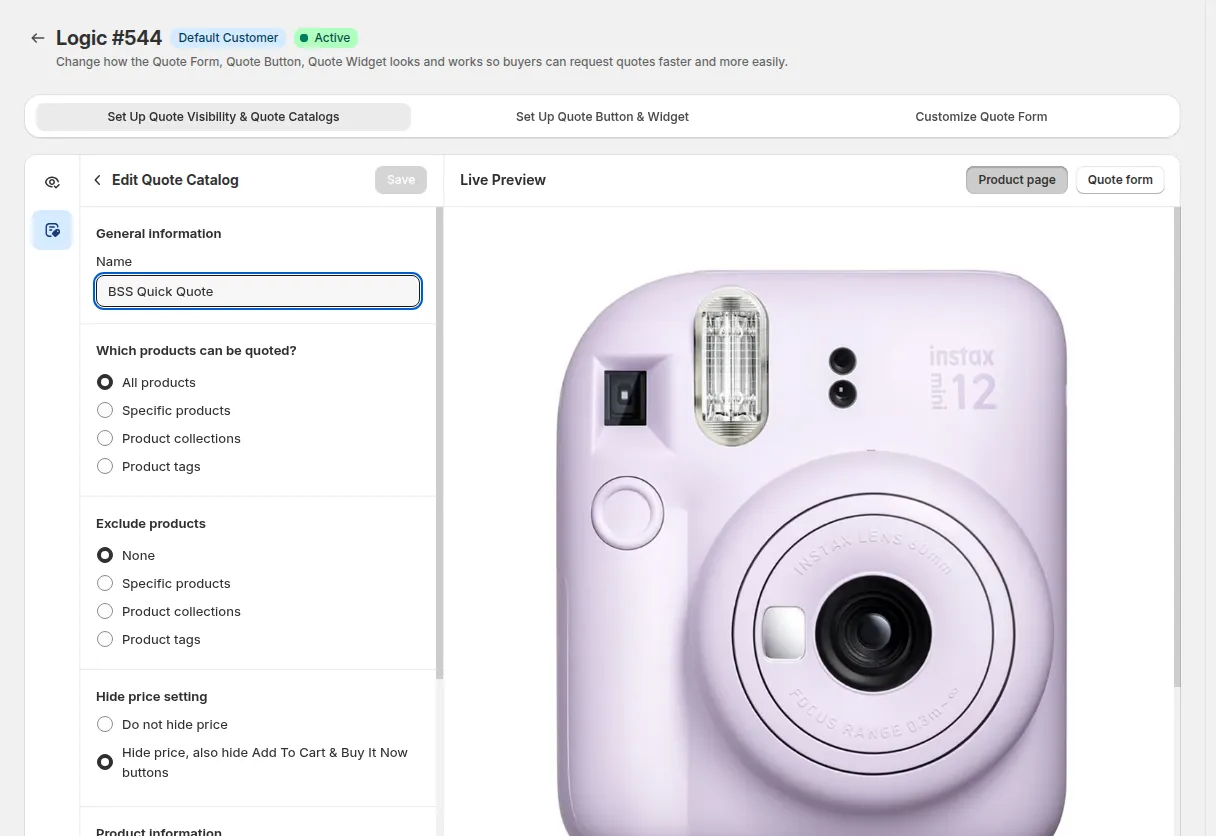
Click the pencil icon of a catalog to edit it. Each catalog sets:
- Which products can be quoted?: All products, Specific products, Product collections or Product tags, plus Exclude products.
- Hide price setting:
- Do not hide price: prices stay visible. You can still tick Hide ‘Add To Cart’ button and Hide ‘Buy It Now’ button.
- Hide price, also hide Add To Cart & Buy It Now buttons: available from the Growth plan.
- Product information: the product details shown in the quote form, such as Variant, SKU, Available quantity, and under advanced information Vendor, Barcode, Type, Offer price (lets buyers enter the price they want), Note and Metafields.
Edit Quote Catalog
When done, open the next tab, Set Up Quote Button & Widget.
Step 4: Set Up Quote Button & Widget
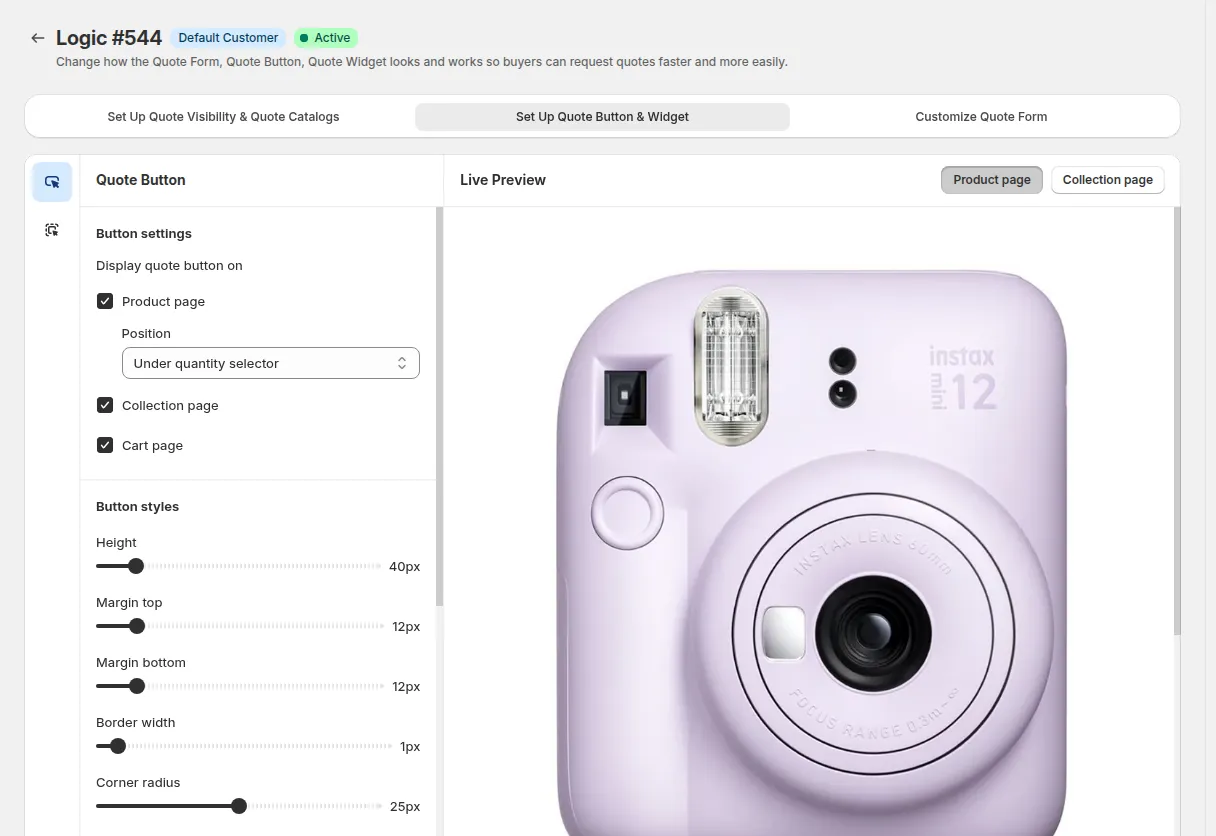
Section titled “Step 4: Set Up Quote Button & Widget”- Quote Button (first icon): choose where the button shows (Display quote button on product page, collection page and cart page), its Position (Under product title, Under product price, Under variant picker, Under quantity selector, Under ‘Add to cart’ button or Under ‘Buy it now’ button), and its size, margins, border, corner radius and text styles.
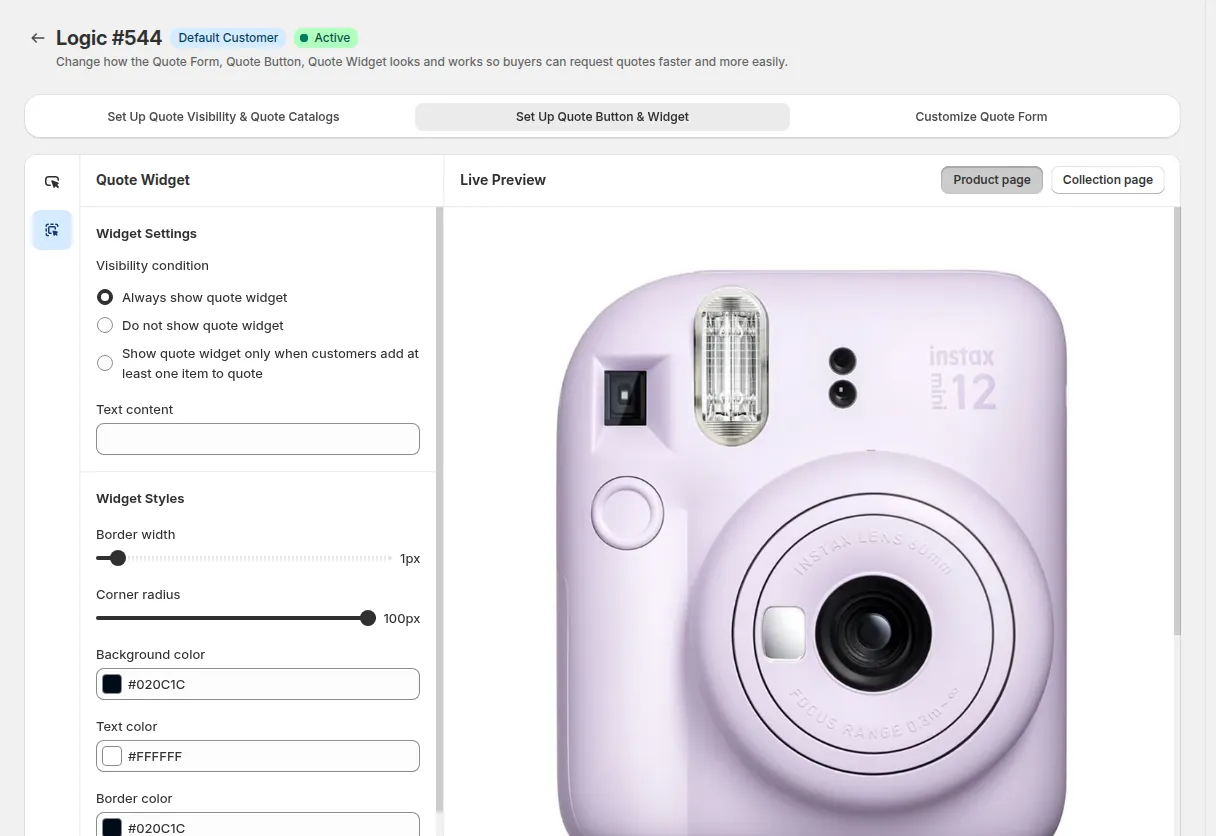
- Quote Widget (second icon): the floating button that opens the list of products a customer is quoting. Under Visibility condition, choose Always show quote widget, Do not show quote widget, or Show quote widget only when customers add at least one item to quote, then set its text and styles.
Open the next tab, Customize Quote Form, to continue.
Step 5: Customize Quote Form
Section titled “Step 5: Customize Quote Form”This tab has 2 sections on the left-hand menu:
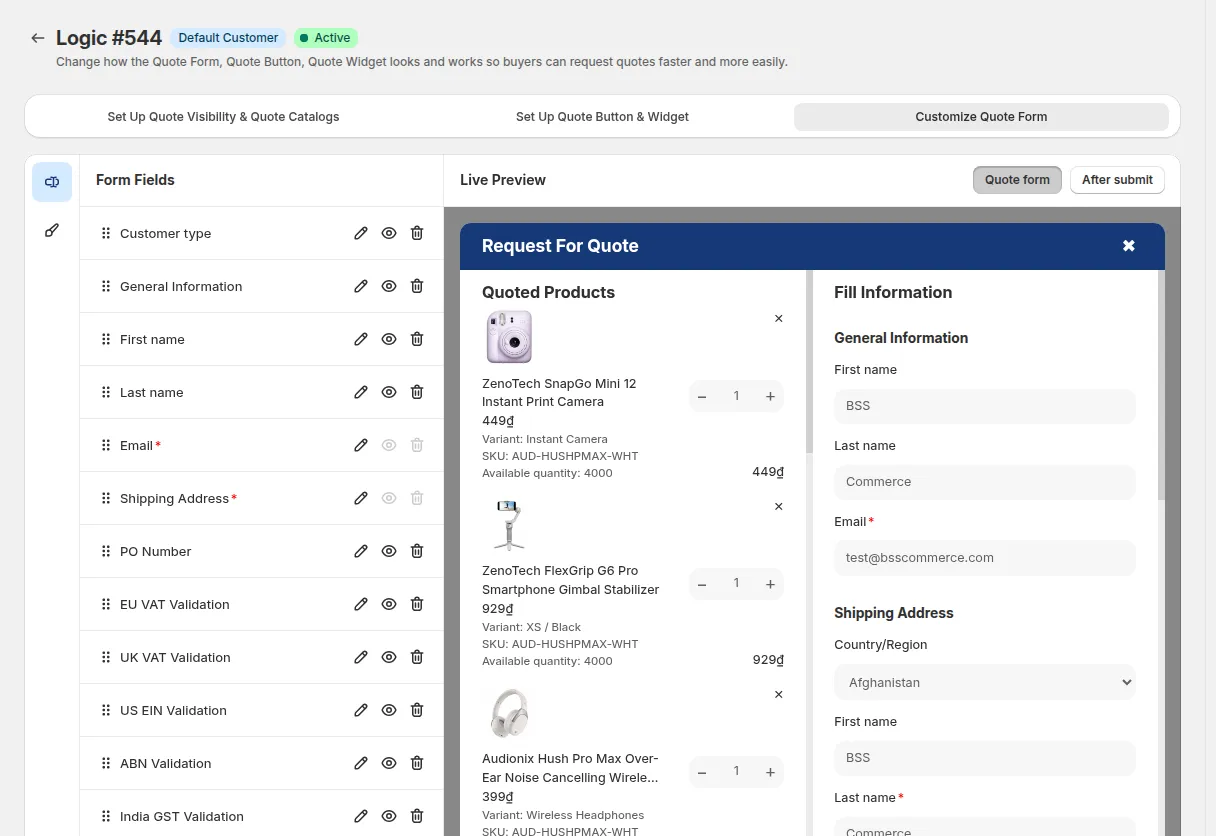
1. Form Fields
This section allows you to add, remove, hide, reorder or edit form fields shown in the quote form: customer type, general information, name, email, shipping address, PO number, tax ID validations and custom fields.
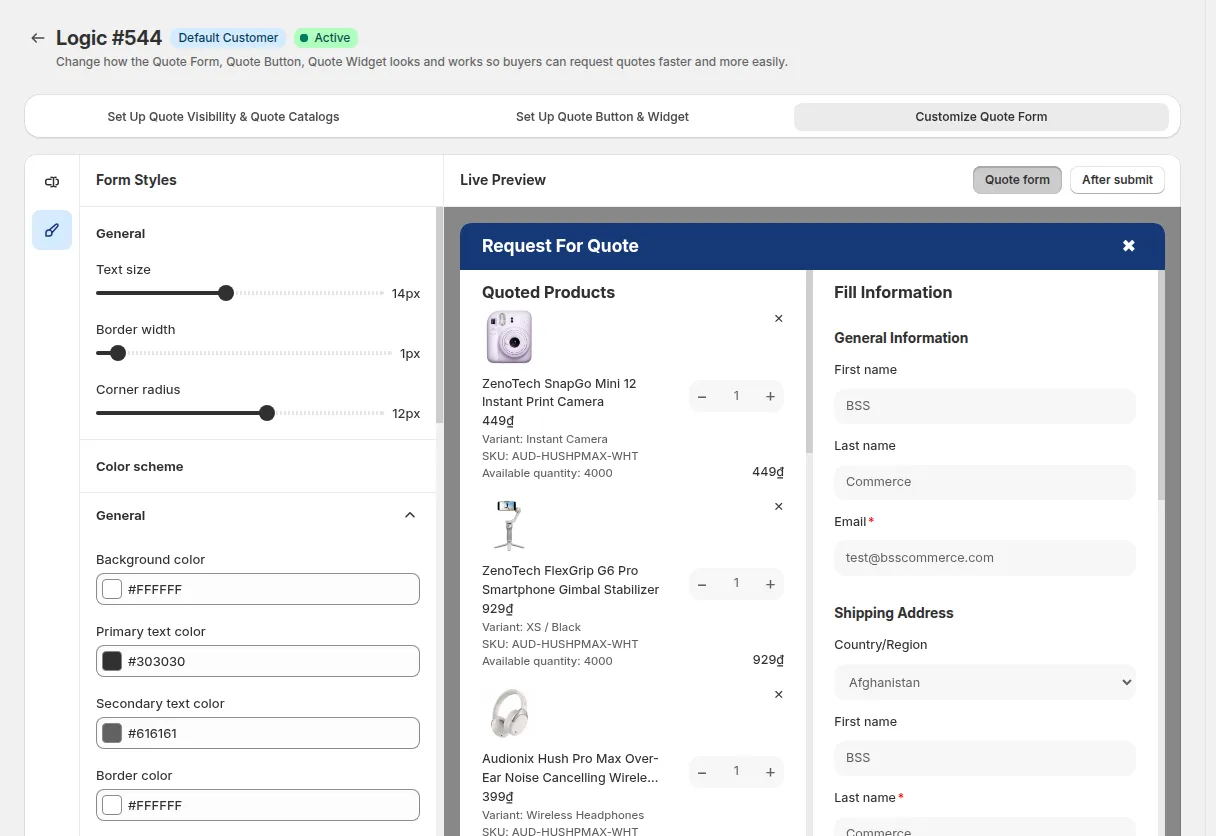
2. Form Styles
Customize the form’s appearance to match your store’s branding: text size, border width, corner radius, and the color scheme of the general area, form header, buttons and boxes.
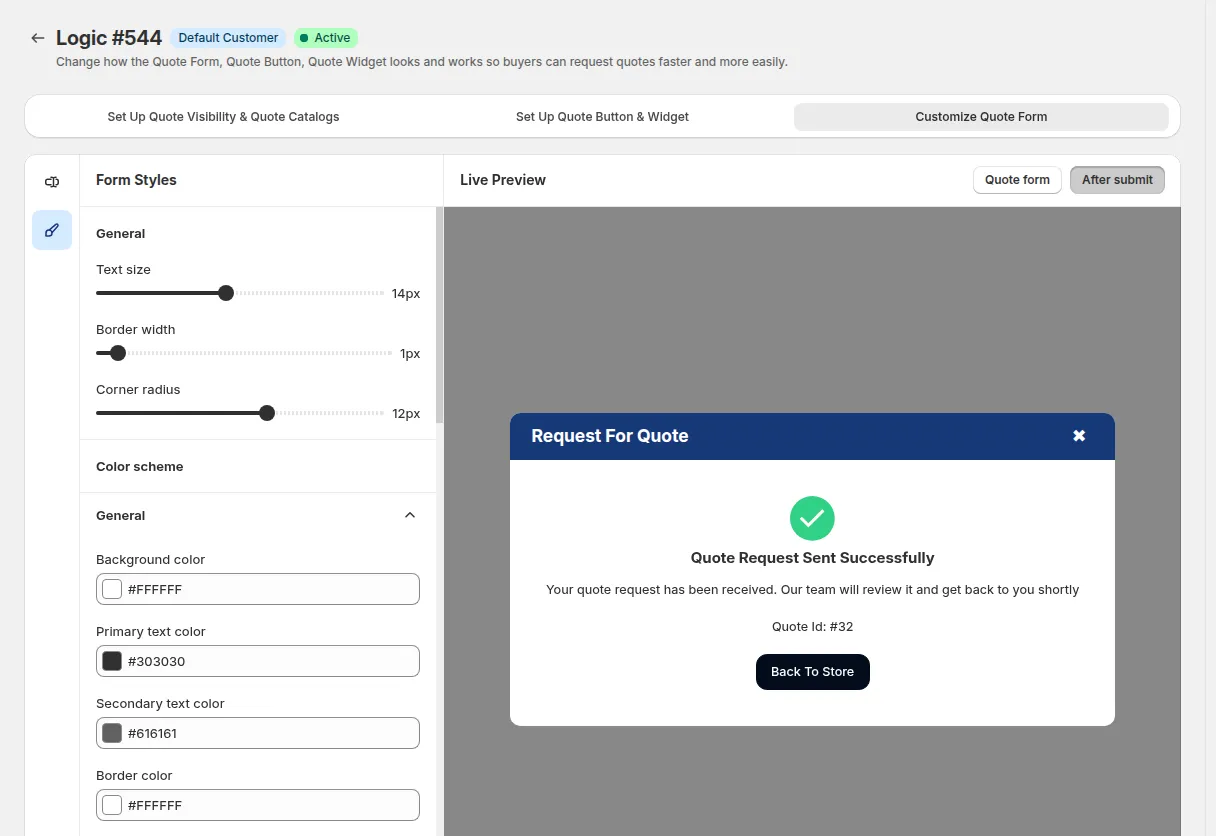
Switch the preview to After submit to see the message that appears after a customer submits a quote.
When everything is set, click Save, then click the back arrow next to the logic name to return to the list.
Step 6: Test the Quote Form on Your Storefront
Section titled “Step 6: Test the Quote Form on Your Storefront”- Go to your store and log in as a customer who matches the logic you just set. If you choose all customers, you won’t need to log in.
- Navigate to a product or collection with the quote form enabled. Click Add to quote, fill in the form, and click Submit Request.
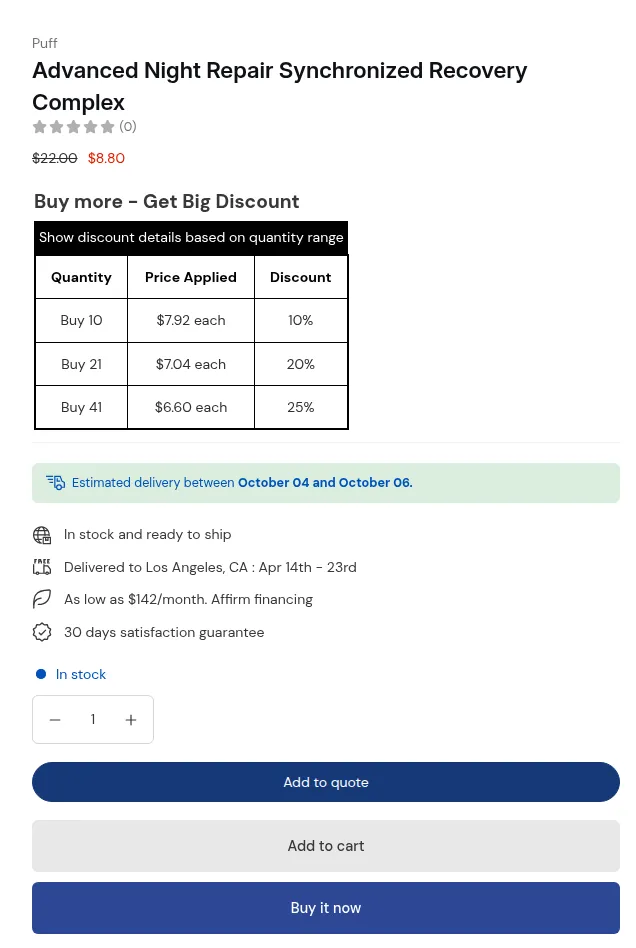
Click Add to quote
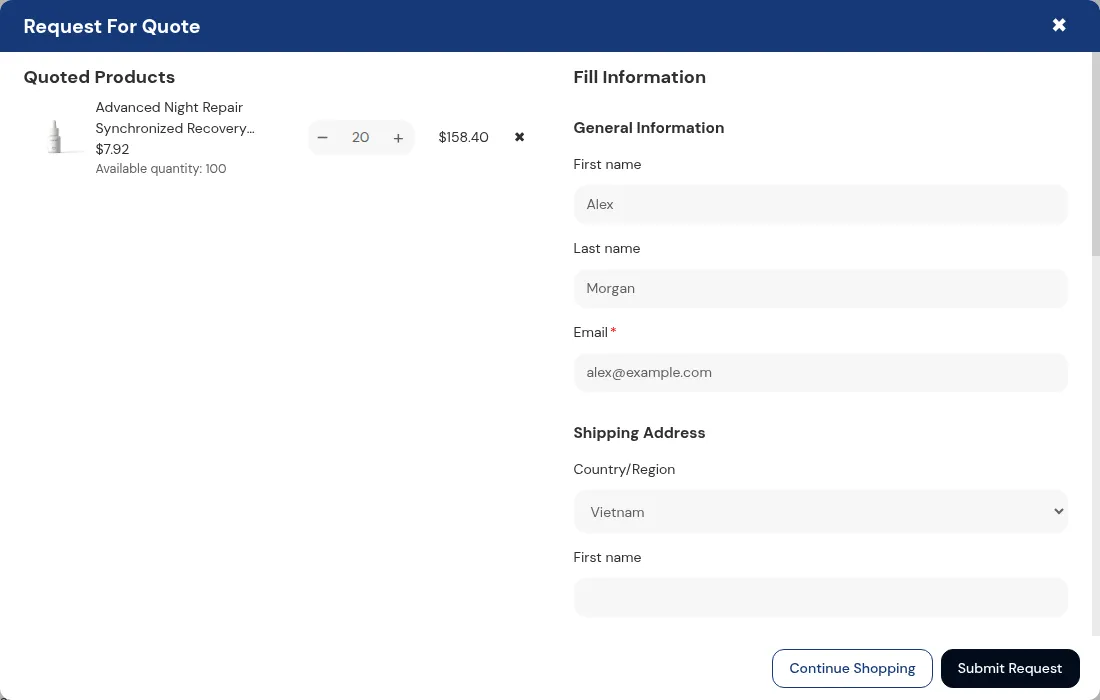
Click Submit Request
After submitting, the customer sees the Quote Request Sent Successfully message with the quote ID, as in the After submit preview above.
Step 7: Review the Quote in Admin
Section titled “Step 7: Review the Quote in Admin”Return to the app. Go to Request for Quote, and in the Quote Requests card click Manage requests. New quotes show the Unread status.
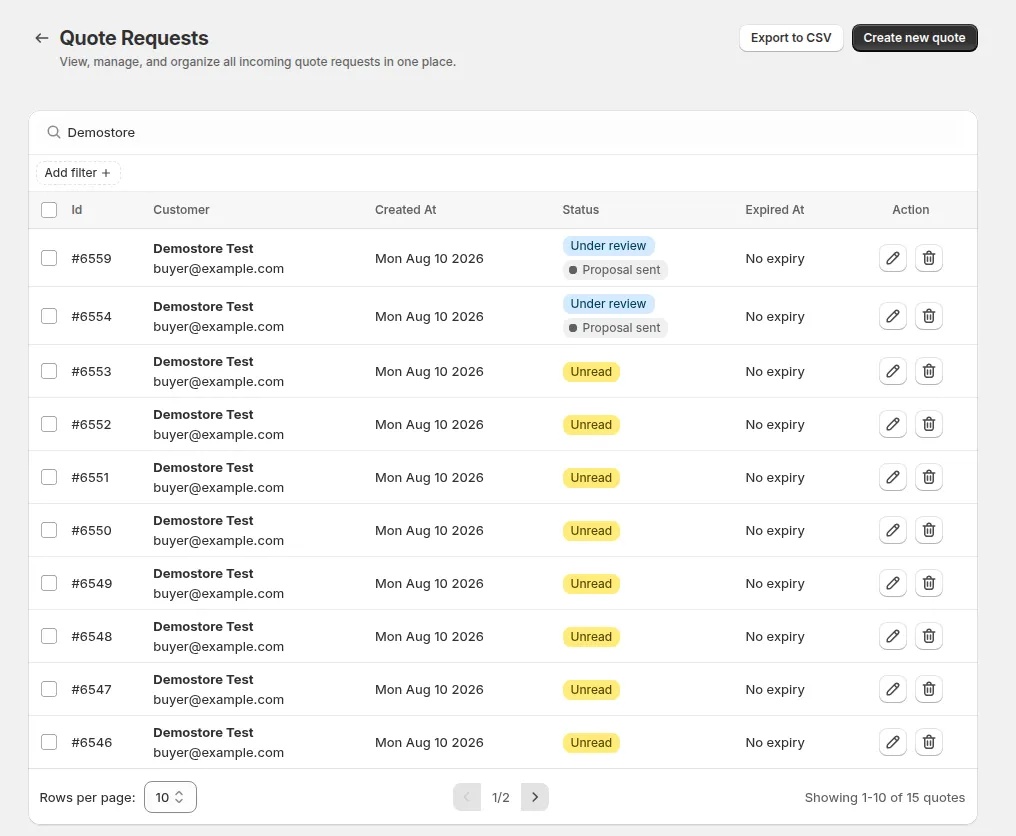
Find the quote you just submitted and click the pencil icon.
You’ll see all quote details, including: Products & quantities, Customer info, shipping address, payment terms, expiry, note and PO number.
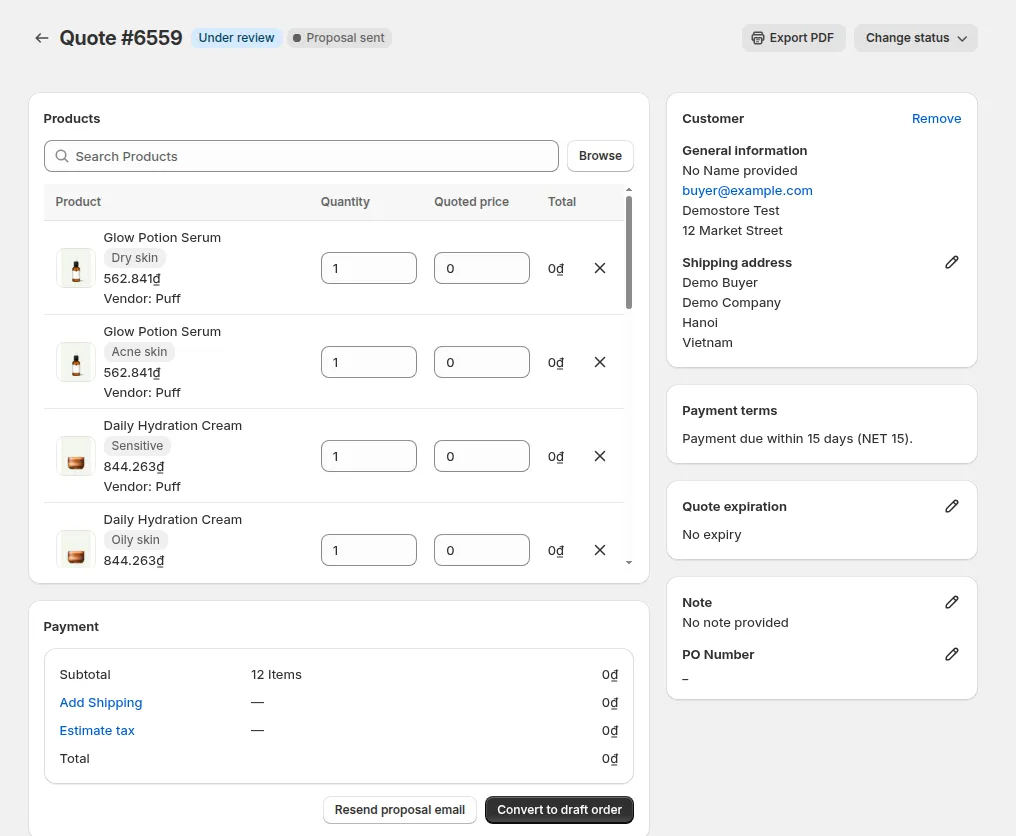
Customer details in this example are placeholders.
Here, you can:
- Edit the quote: adjust quantity, enter a Quoted price, add products with Browse, add shipping or estimate tax.
- Click Send proposal email to send the quote to the customer. A window shows the From, To and Subject of the email, an optional Custom message, and a preview; click Send. After the first send, the button reads Resend proposal email.
- Use Export PDF or Change status at the top of the page.
The customer receives the quote proposal email in the mailbox they entered on the quote form.
Step 8: Finalize & Convert to Draft Order
Section titled “Step 8: Finalize & Convert to Draft Order”- Once you and the customer agree on pricing via email, phone, or other methods, return to the quote in the list. Update the quote with final prices, quantities, and notes.
- Click Convert to draft order.
The quote is converted into a Shopify Draft Order, where you can send an invoice directly from Shopify admin.