
Approve or Reject Quotes
Now, every proposal email contains two action buttons: Approve Quote and Reject Quote. Buyers can respond in one click, directly from their inbox, without logging in.
1. How to set it up?
Section titled “1. How to set it up?”Step 1 - Enable Approve/Reject button
- Go to Request for Quote → Quote Automation → Auto Convert to Draft Order
- Change Status from Disabled to Enabled
- Under Which button would you like to display?, tick Approve button, Reject button or both, then click Save
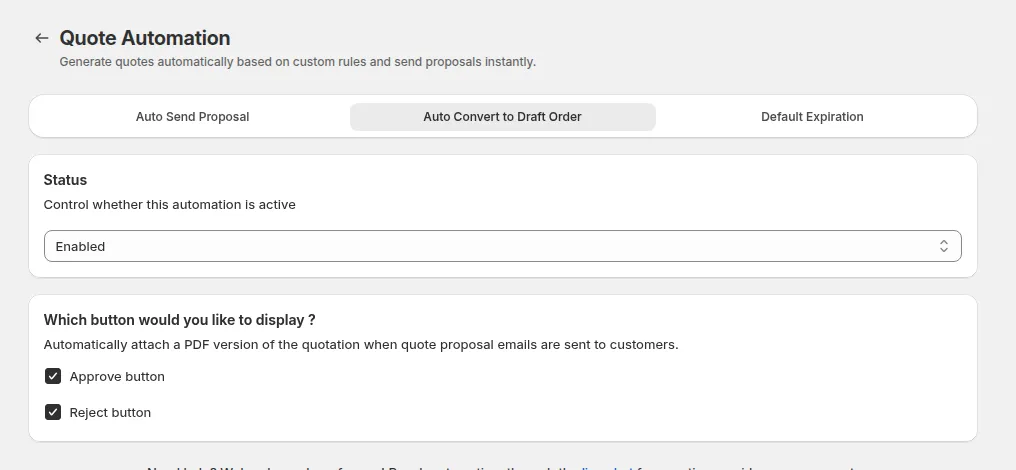
The Approve and Reject buttons are automatically added to all proposal emails - both those you send manually from Quote Details, and those sent automatically via Auto Send rules.
Step 2 - Publish your Quote History page
The Approve / Reject buttons require your Quote History page to be active. Go to Request for Quote → Advanced Settings → Quote History Page and confirm Quote History in Storefront shows Published and Show quote history on storefront is selected. If it is not, click Publish first.
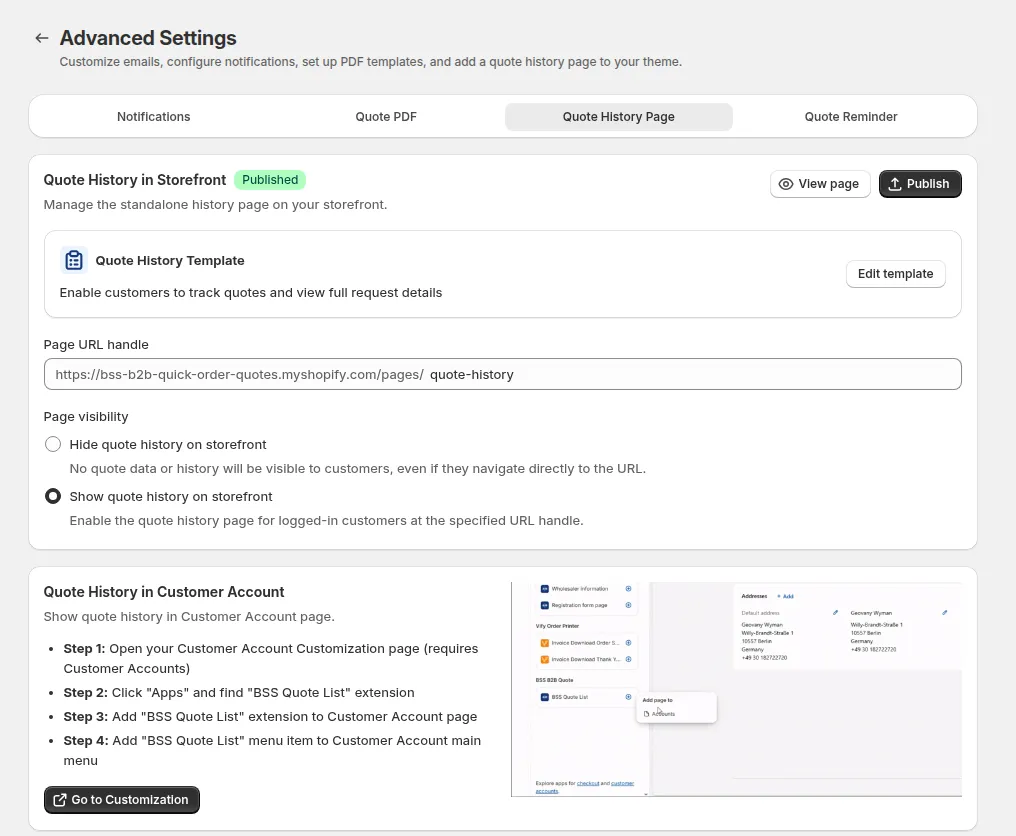
Step 3 - Customize the button appearance (optional)
You can change the button colors, text labels, and style to match your brand.
- Go to Request for Quote → Advanced Settings → Notifications.
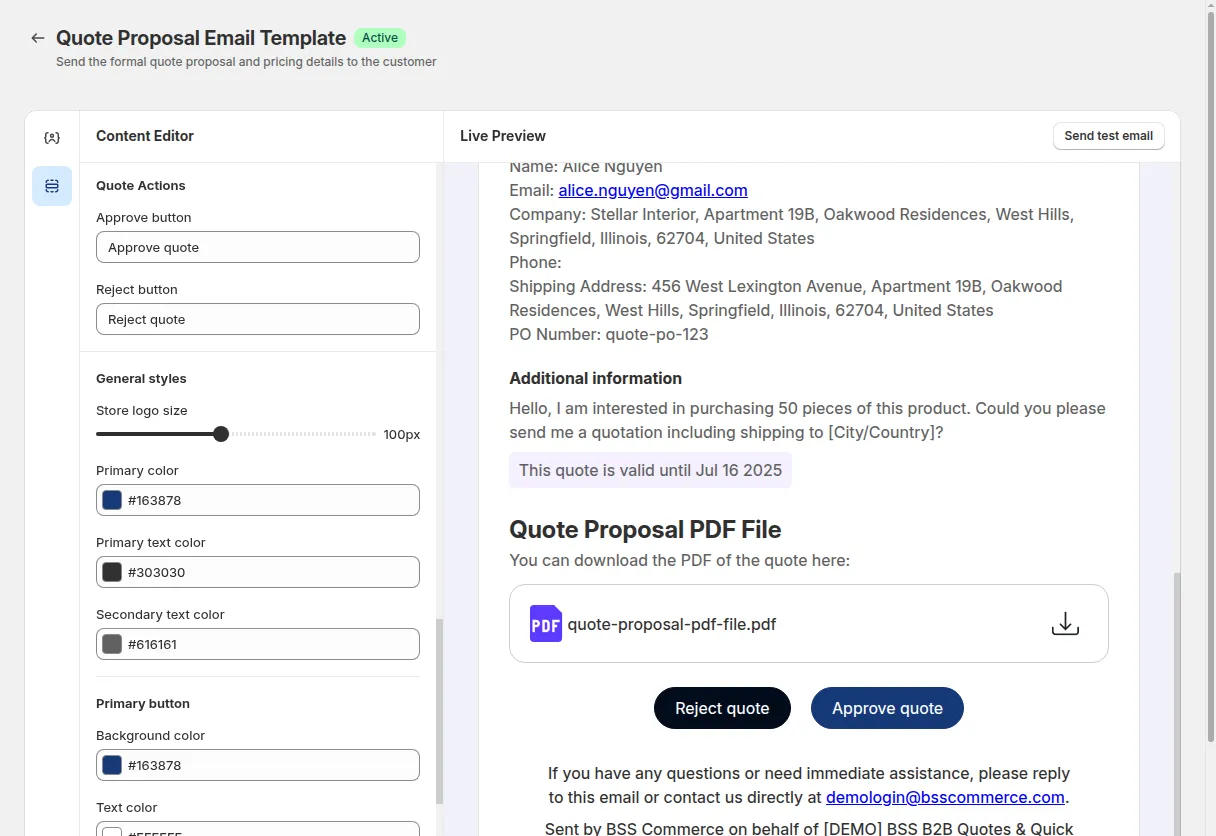
- Under Quote Proposal Email Template, click Edit template.
- In the Content Editor, find the Quote Actions section and change the Approve button and Reject button labels.
- Adjust the colors in Primary button and Secondary button.
- The Live Preview updates in real time on the right side. Use Send test email to check it in your mailbox.
- Click Save.
Tip: The default label text is “Approve Quote” and “Reject Quote”. You can change these to anything. For example, “Accept this offer” and “Decline” - to match your store’s tone.
- Plan requirement: This feature is available on the Business plan and above. Buyers on stores with lower plans will not see the Approve / Reject buttons in proposal emails.
- Token expiry: Each proposal email contains a secure, single-use token. The default expiry is 72 hours. Once expired, the buttons will no longer work, and buyers will see a message asking them to contact the merchant for a new proposal.
- One action per quote: After a buyer approves or rejects a quote, all existing tokens associated with that quote are immediately invalidated. Clicking links from previously sent proposal emails will display an error message.
- The Quote History page must be published for this feature to work. If the page is unpublished, the Approve and Reject buttons will not be activated, even if the feature is enabled in the app.
2. Auto-convert to Draft Order
Section titled “2. Auto-convert to Draft Order”| Scenario | What happens |
|---|---|
| Buyer clicks Approve Quote | The app checks the link, converts the quote into a Shopify draft order (status Converted) and emails the buyer the Shopify invoice. The page shows “Quote Approved Successfully” and asks the buyer to check their mailbox; they pay from the invoice email. |
| Buyer clicks Reject Quote | App shows a confirmation page → buyer can optionally enter a reason → quote status updates to “Rejected” in your admin |