Quick Start (5–10 mins setup)
Get BSS B2B Quote up and running on your storefront in just a few minutes using the 4-step Setup Guide on your dashboard.
This guide walks you through:
- Step 1: Enable app embed on your theme
- Step 2: Create your first Quick Order page
- Step 3: Set up Reorder
- Step 4: Create your first Quote Logic
Step 1: Enable App Embed on Your Theme
Section titled “Step 1: Enable App Embed on Your Theme”Activating the app embed in your Shopify theme is an essential prerequisite for Quick Order, Reorder, and Quote widgets to render properly on your storefront.
- In the Dashboard Setup Guide, click the action button next to “Enable app embed”.
- The system opens Shopify Theme Editor directly focused on the B2B Portal app embed block.
- Toggle the app embed switch to ON in the left sidebar and click Save in the top-right corner.
- Return to your app dashboard. The system automatically inspects your live published theme, verifies the embed status, and automatically checks off Step 1 as completed.
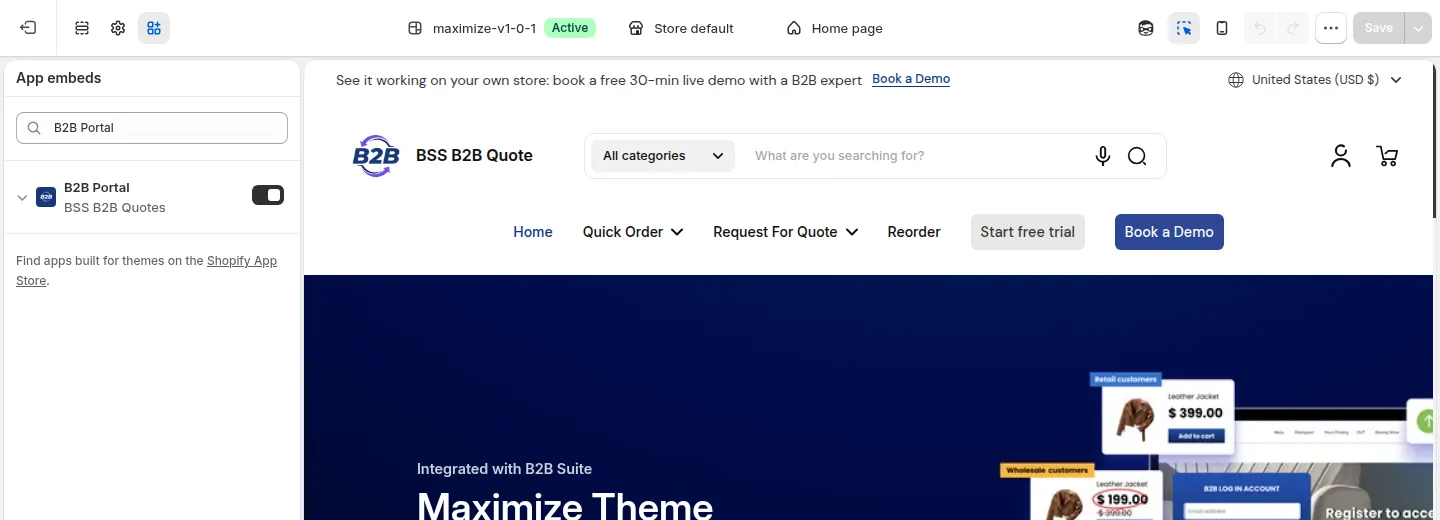
Turn on the B2B Portal app embed and click Save
Back in the app, App overview > App Status shows App Embed: Enabled once the embed is on in your live theme.

Step 2: Create a Quick Order Page
Section titled “Step 2: Create a Quick Order Page”2.1. Create a New Page
Section titled “2.1. Create a New Page”- In the app, click Quick Order in the navigation bar.
- Under Set up Quick Order pages, click Set up pages. The Manage Quick Order Pages list opens.
- Click Create new page.
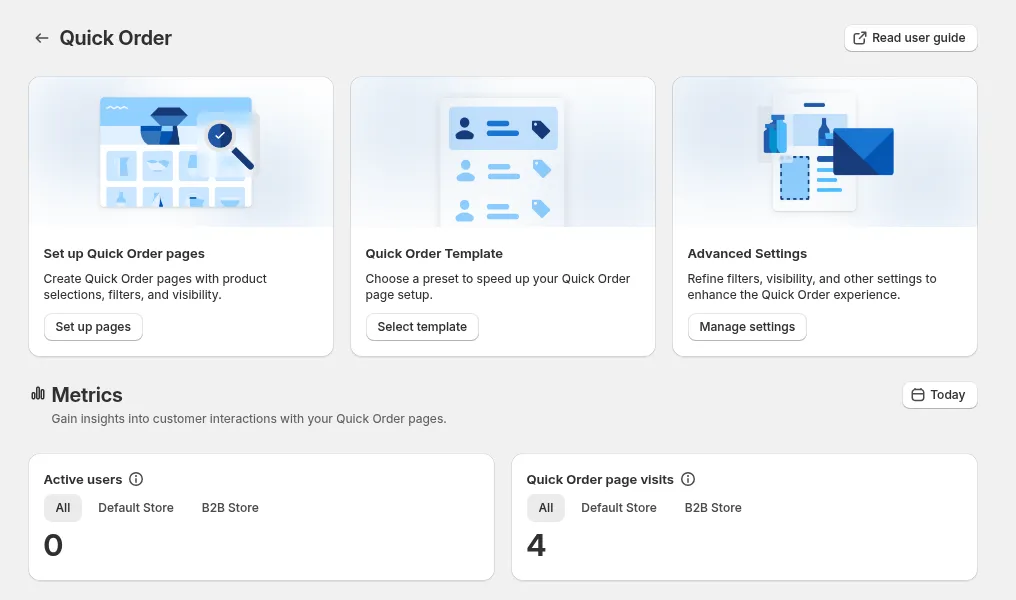
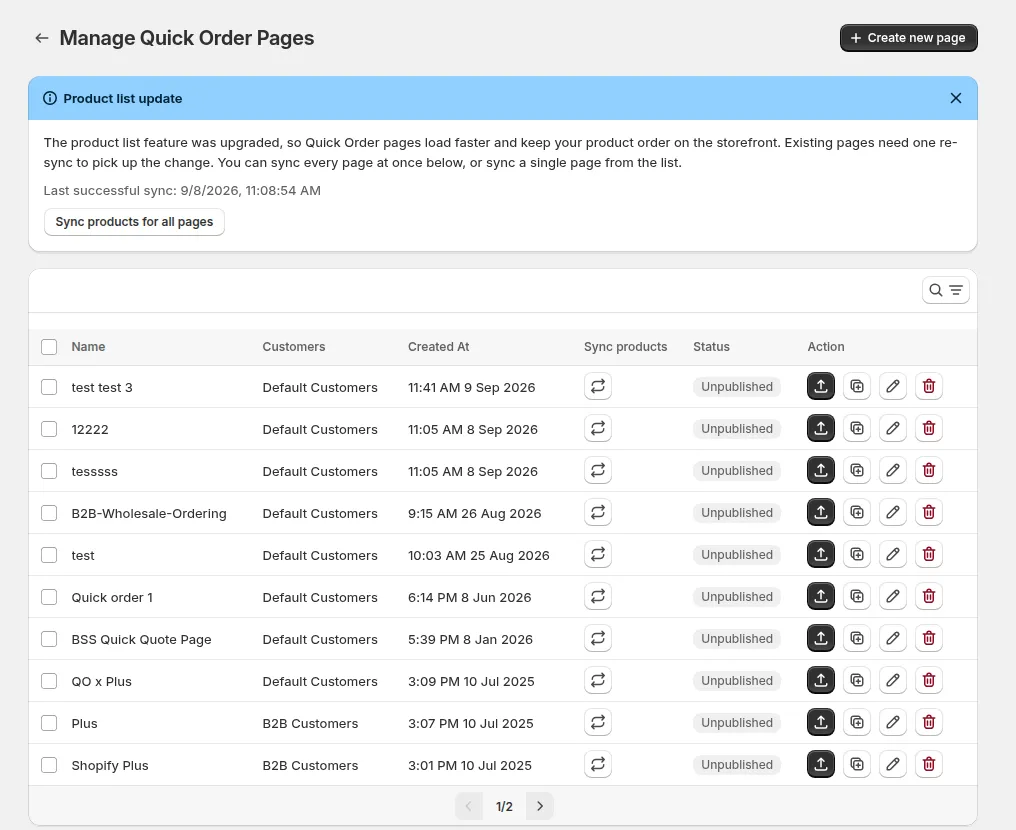
Click Create new page
2.2. Choose Who the Page Is For (Shopify Plus Only)
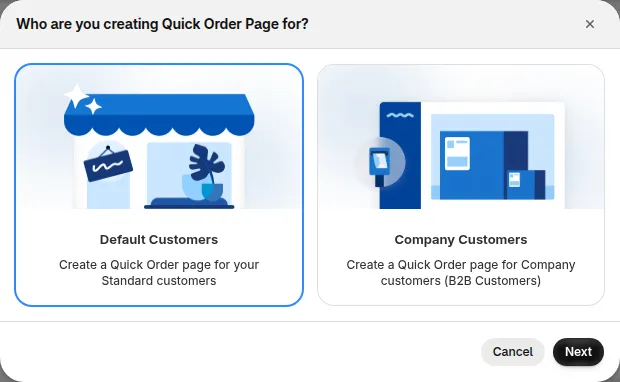
Section titled “2.2. Choose Who the Page Is For (Shopify Plus Only)”If you’re on Shopify Plus using Shopify B2B, a modal asks Who are you creating Quick Order Page for?
- Default Customers: a Quick Order page for your standard customers
- Company Customers: a Quick Order page for Company customers (B2B customers)
Select the option that matches, then click Next.
If you’re not on Shopify Plus, this modal won’t appear; you go straight to a page for Default Customers.
The Edit Quick Order Page screen opens with 2 tabs at the top:
- Set Up Quick Order Visibility
- Customize Quick Order Page
You’ll start with the first tab: Set Up Quick Order Visibility
2.3. Set Up Quick Order Visibility
Section titled “2.3. Set Up Quick Order Visibility”In this tab, define who can see this page and what products appear. The Overview column on the right sums up the current setup.
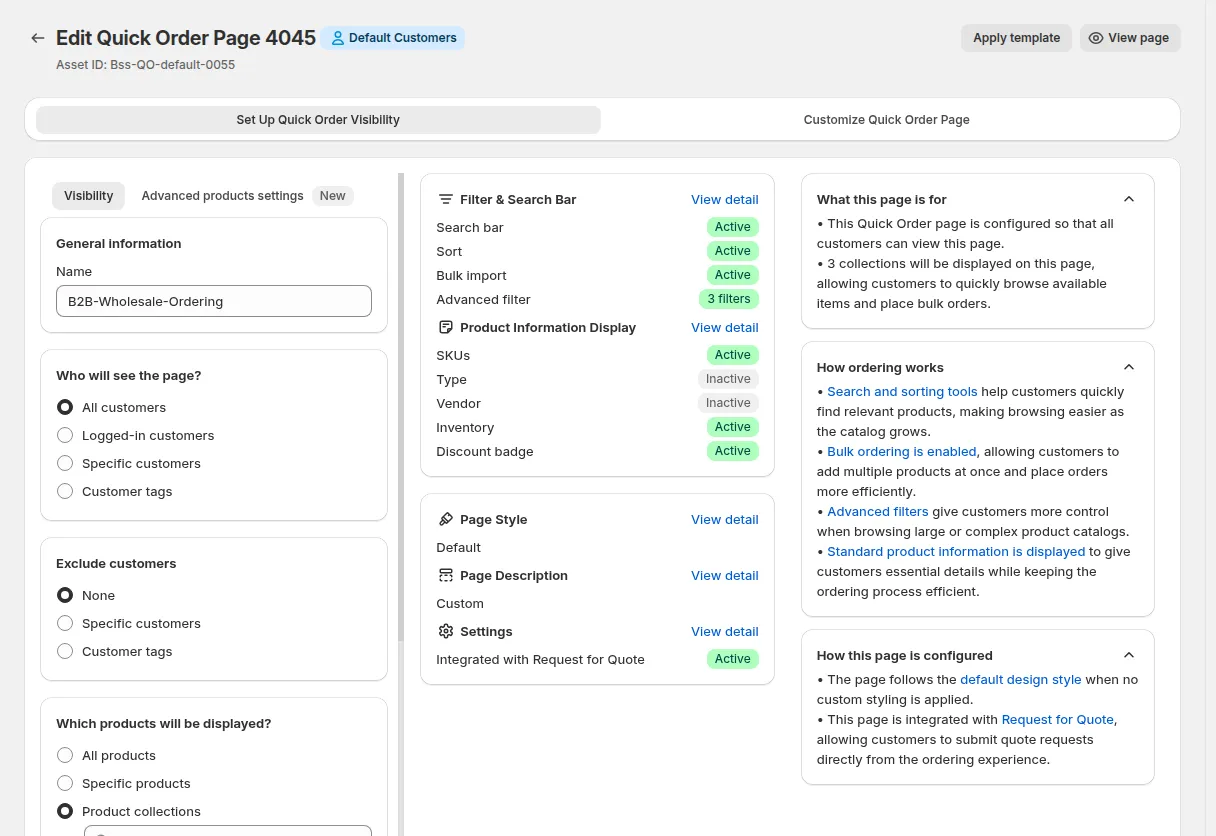
You should:
- Enter a clear Name, for example “Wholesale Quick Order” or “B2B Essentials”.
- Under Who will see the page?, choose All customers, Logged-in customers, Specific customers or Customer tags (for example
wholesale,dealer). Use Exclude customers to leave some out. - Under Which products will be displayed?, choose All products, Specific products or Product collections.
When done, click the next tab: Customize Quick Order Page.
2.4. Customize Quick Order Page
Section titled “2.4. Customize Quick Order Page”In this tab, you control the layout and information shown on the Quick Order page, with a Live Preview on the right:
- Show/hide elements (Page description, search bar, filters, etc.)
- Choose which product details appear in the table: SKU, Type, stock, Discount badge…
- Align styling with your brand (header text, text size and color)
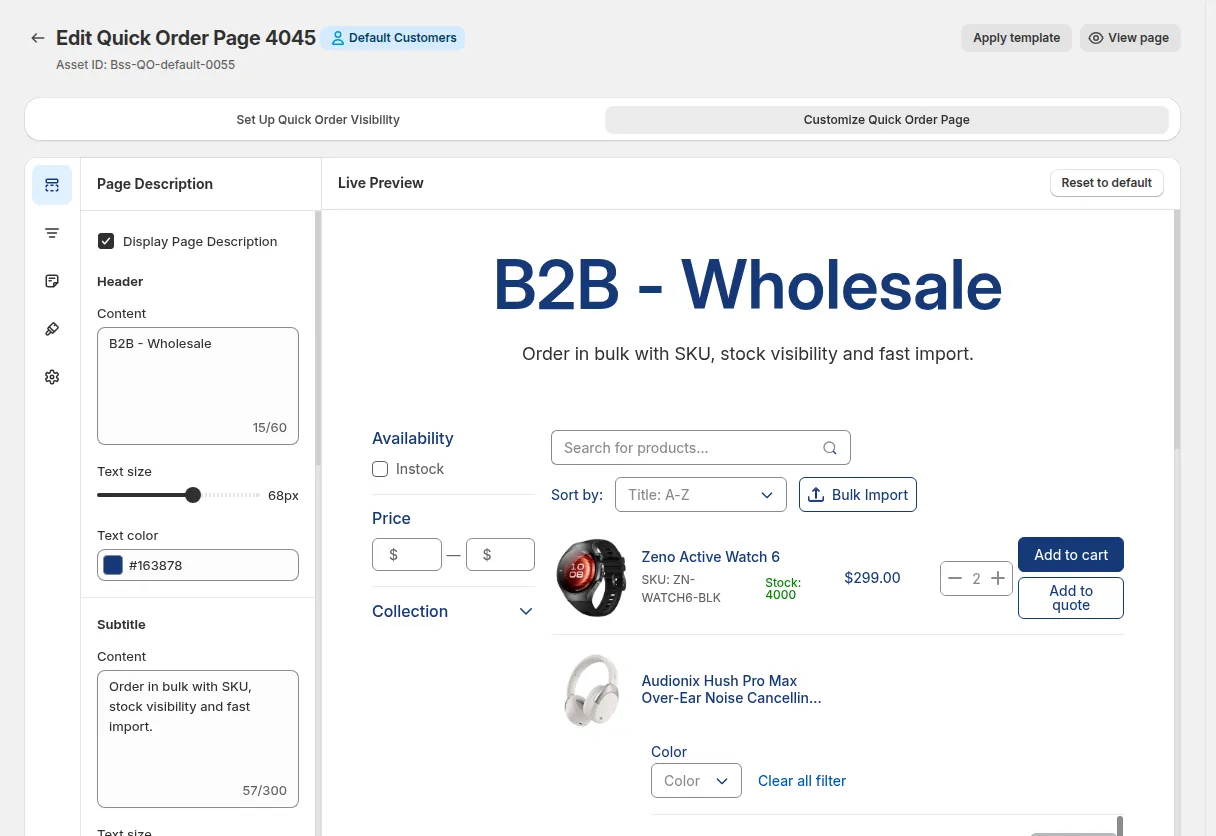
Once you’re satisfied, click Save, then click the back arrow next to the page title to return to the list.
2.5. Publish Your Page
Section titled “2.5. Publish Your Page”- In Manage Quick Order Pages, click the Publish icon (the first icon under Action) on your page’s row.
- Enter a Page title and Page URL handle, then click Publish.
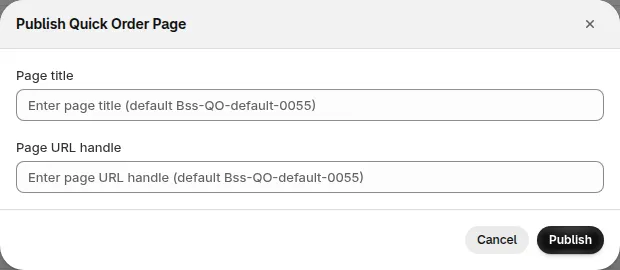
Enter the page title and URL handle, then click Publish
- Open the page on your storefront (or click View page in the page editor) to see your live Quick Order page.
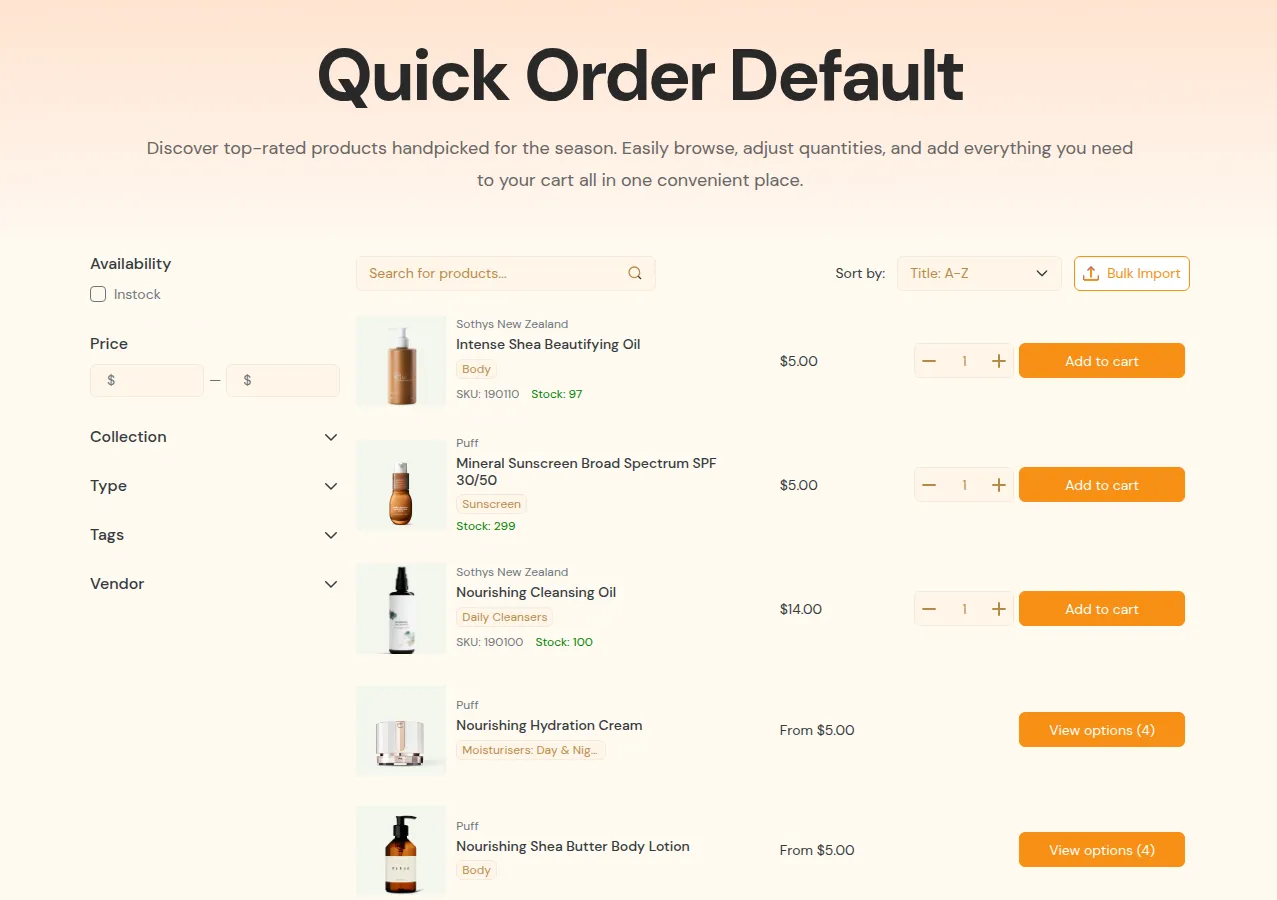
Quick Order Page is now visible on your storefront! 🚀
Step 3: Set Up Reorder (Repeat Orders)
Section titled “Step 3: Set Up Reorder (Repeat Orders)”Allow your existing B2B buyers to repeat previous orders or pending draft orders with a single click:
- In the app navigation, click Reorder.
- Review customer eligibility in Settings (All logged-in customers or specific buyer tags).
- Confirm your order tabs are active:
- Orders: Repurchase items directly from past order history.
- Waiting for Checkout: Instant checkout for merchant-sent draft orders.
- Click Publish to make the Reorder portal live at
/pages/reorder.
- For complete configuration, see the Reorder Full Setup Guide.
Step 4: Create Quote Logic (Request for Quote)
Section titled “Step 4: Create Quote Logic (Request for Quote)”4.1. Open The Quote Logic Configuration
Section titled “4.1. Open The Quote Logic Configuration”Click Request for Quote in the navigation bar. In the Quote Settings card, click Set up logics, then click Create new logic.
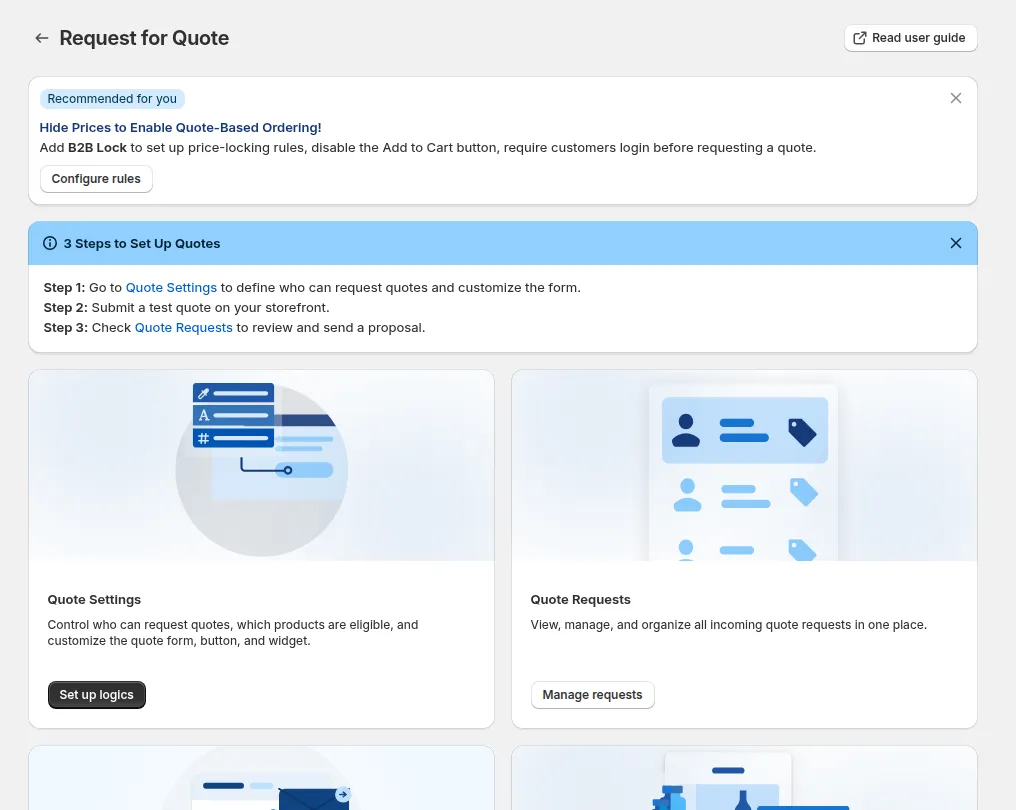
In Quote Settings, click Set up logics
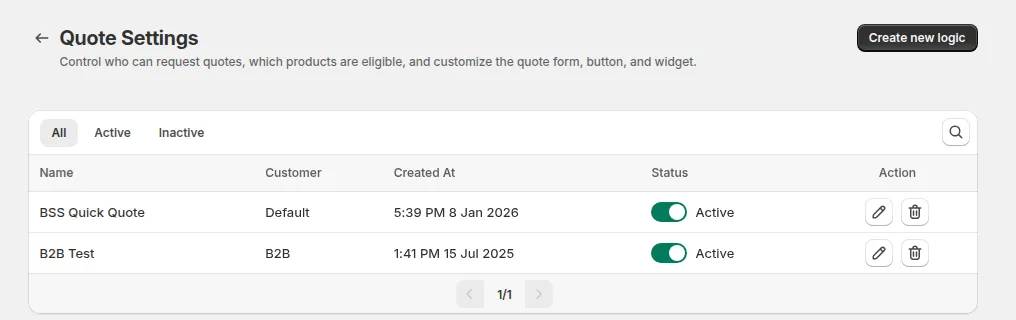
4.2. Choose Who the Logic Is For
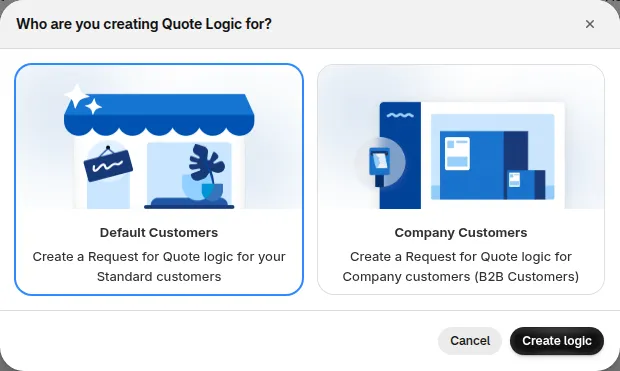
Section titled “4.2. Choose Who the Logic Is For”After clicking Create new logic, a modal asks Who are you creating Quote Logic for?
- Default Customers
- Company Customers (B2B customers, available on Shopify Plus)
Select one, then click Create logic.
The logic editor opens with 3 tabs at the top:
- Set Up Quote Visibility & Quote Catalogs
- Set Up Quote Button & Widget
- Customize Quote Form
You’ll start with the first tab: Set Up Quote Visibility & Quote Catalogs.
4.3. Set Up Quote Visibility & Quote Catalogs
Section titled “4.3. Set Up Quote Visibility & Quote Catalogs”In this tab: You must enter a name for your quote logic, set its Status, (Optional) set a Priority (0 to 99, 0 is the highest), choose which customers can request a quote, and exclude customers if needed. The Overview column shows the catalogs, pages and form fields the logic uses.
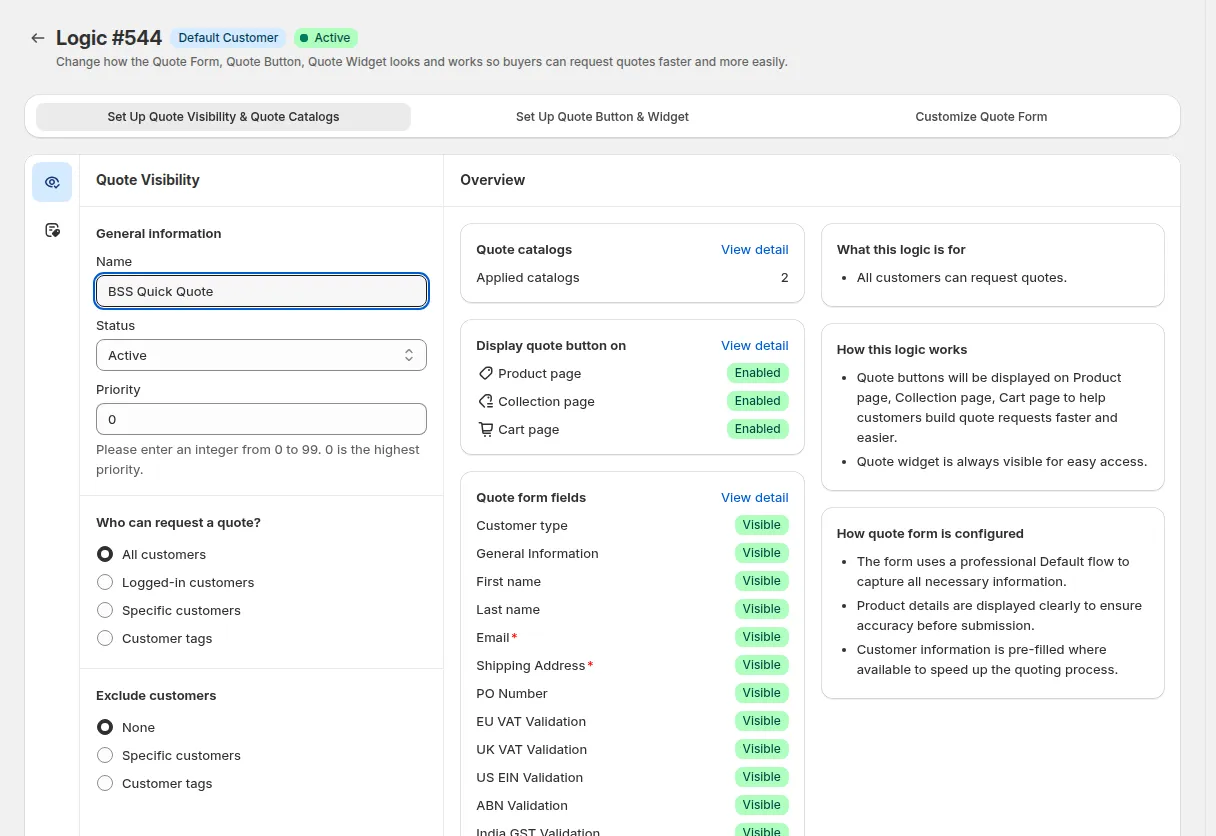
Click the next tab: Set Up Quote Button & Widget.
4.4. Set Up Quote Button & Widget
Section titled “4.4. Set Up Quote Button & Widget”In this tab: choose where the quote button shows (Product page, Collection page, Cart page) and its position, then style it (height, margins, border, corner radius, text). The Live Preview switches between Product page and Collection page.
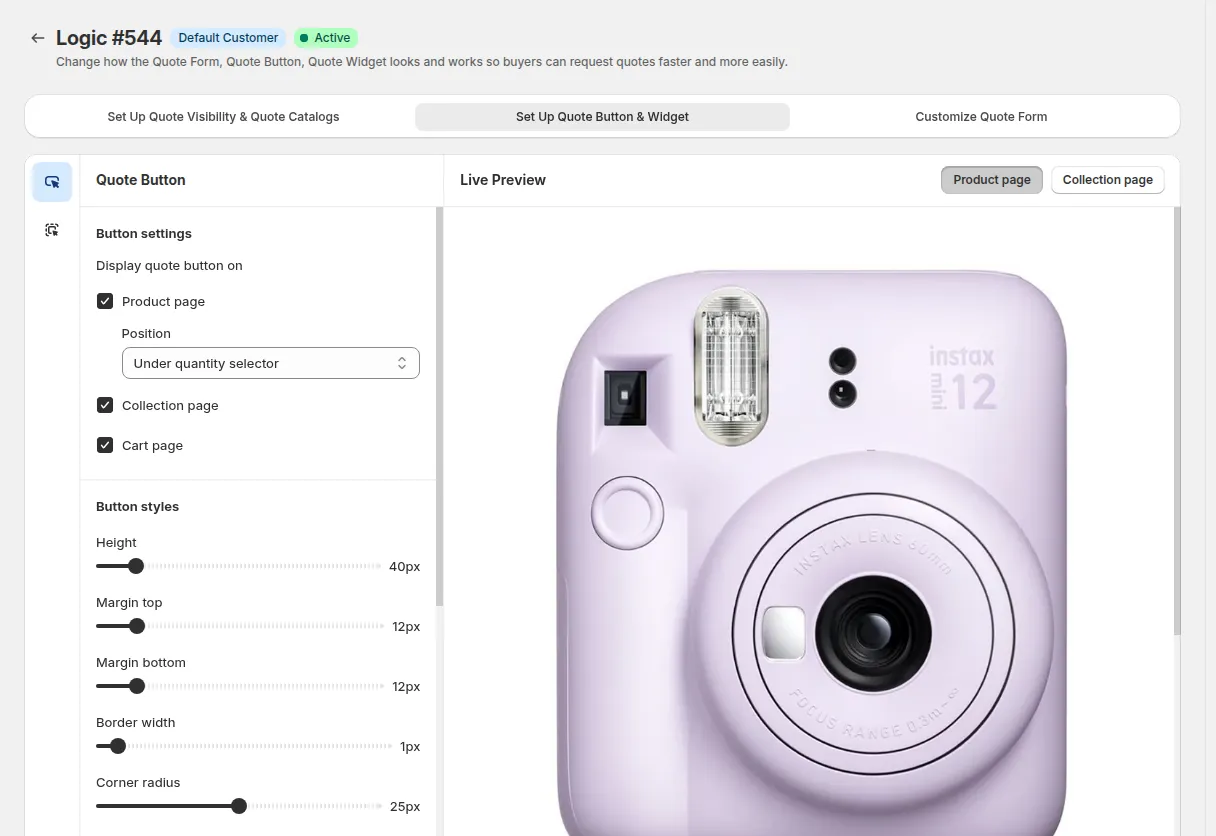
Click the next tab: Customize Quote Form.
4.5. Customize Quote Form
Section titled “4.5. Customize Quote Form”In this tab: add, edit, reorder, hide or remove form fields (customer type, general information, shipping address, PO number, tax ID validations and more). The Live Preview shows the Quote form and the After submit message.
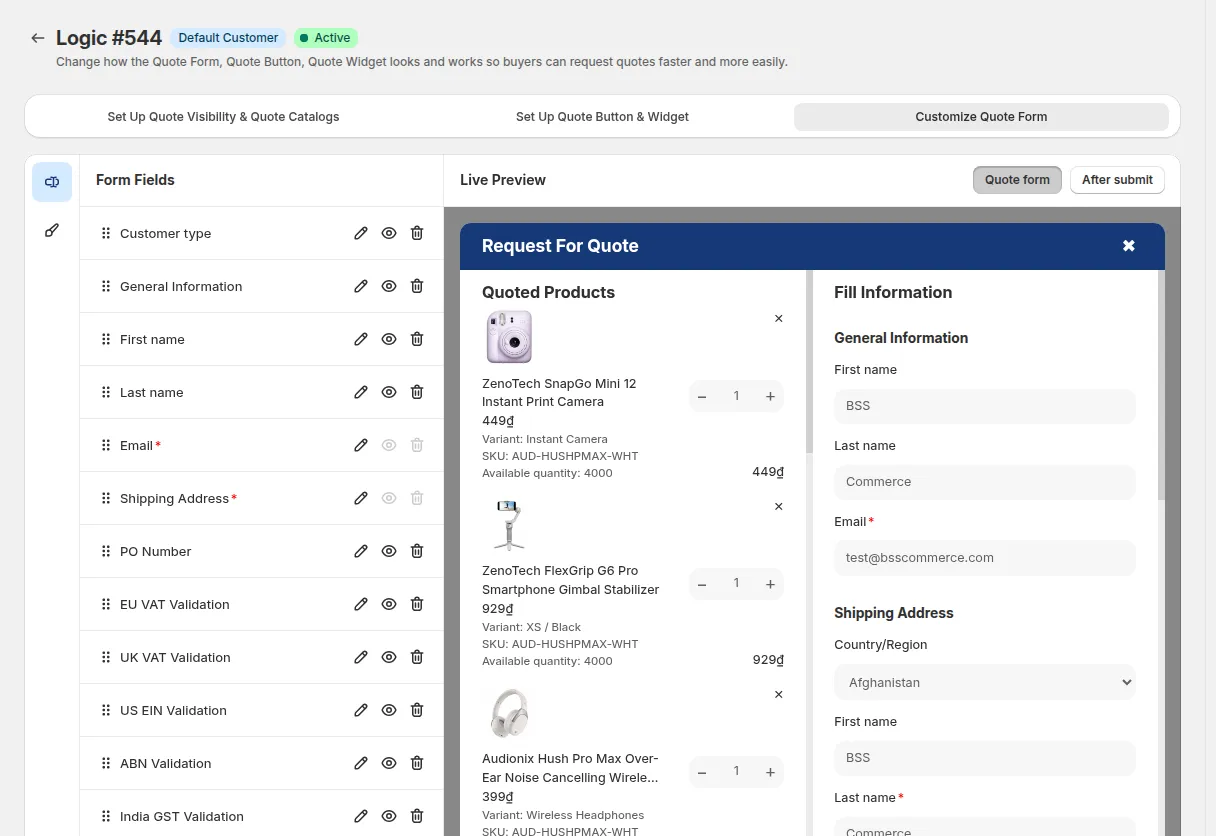
Once everything is set up, click Save, then click the back arrow next to the logic name to return to the list.
4.6. Preview Your Store
Section titled “4.6. Preview Your Store”Open your storefront and test the quote form! Try submitting a quote request to confirm it appears in your Quote Submission List.