
Import & Export Volume Pricing Rules
Use bulk import/export to manage many volume pricing rules at once, ideal when you have large product catalogs or need to replicate rules across multiple stores.
Need to manage many pricing rules at once? Our Import / Export feature for Volume Pricing makes it simple. You can bulk create, edit, or migrate discount rules without having to configure each one manually, saving time and reducing errors.
Export Existing Rules
Section titled “Export Existing Rules”- Go to B2B pricing > Volume Pricing.
- Click Export above the rule list, or open More actions > Import & export and click Export.
- Choose an export scope: the current page, the rules you selected, the rules matching your current filter, or all rules.
- Choose a file format: CSV or Excel (.xlsx).
- The export runs as a background job. A progress indicator shows how far along it is; you can keep working while it finishes.
- When it completes, click the download link.
Use the exported file as a backup or starting point for bulk edits.
Import New or Updated Rules
Section titled “Import New or Updated Rules”Step 1: Download the Sample Template
Section titled “Step 1: Download the Sample Template”- Open More actions > Import & export and click Import.
- In the Import rules by CSV dialog, click Download sample CSV.
- Open the file in Excel or Google Sheets.
The sample file includes all required columns and a guidelines sheet explaining valid values.
Step 2: Fill In Your Rules
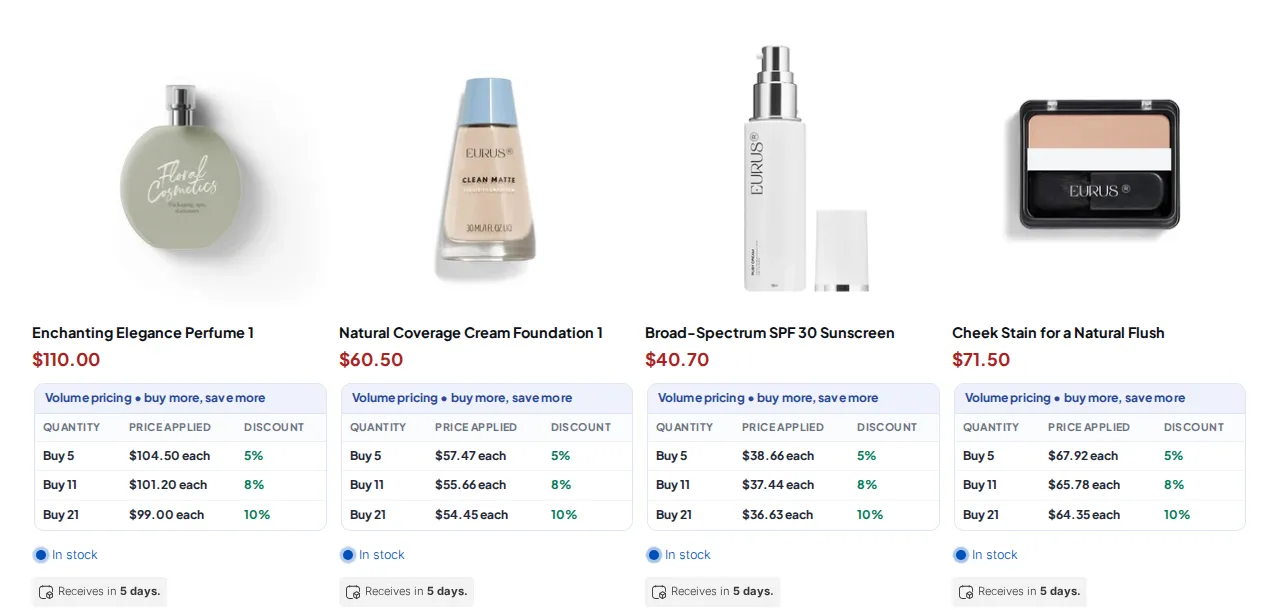
Section titled “Step 2: Fill In Your Rules”Each row of the CSV is one pricing tier. A rule with three tiers takes three rows that share the same ID and Name; only the tier columns (From, To, Discount type, Discount value) change from row to row.
| Scenario | What to do |
|---|---|
| Creating a new rule | Leave the ID column blank |
| Updating an existing rule | Keep the rule’s ID and tick Overwrite rules with matching IDs when you import |
| Rebuilding everything from the file | Tick Replace all existing rules when you import |
CSV columns (the header row must match the sample file). Separate several values in one cell with commas.
| Column | Accepted values |
|---|---|
| ID | Blank for a new rule, or the ID of an existing rule |
| Name | Any text |
| Priority | 0 to 99. A lower number wins when several rules match |
| Status | Enable or Disable |
| Market | All, or the names of the markets the rule targets |
| Customer condition | All, Logged-in, Not logged-in, Specific customers, Customer tags, Company locations |
| Customers | Customer emails, customer tags or company location names, matching Customer condition |
| Exclude customer condition | None, Customer tags, Specific customers, Company locations |
| Exclude customers | Values matching Exclude customer condition |
| Product condition | All, Specific products, Specific collections, Specific tags, Specific variants |
| Products | Product titles (or a variant SKU/barcode), collection titles, product tags, or variant SKUs/barcodes/IDs, matching Product condition |
| Exclude product condition | None, Specific products, Specific collections, Specific tags, Specific variants |
| Exclude products | Values matching Exclude product condition |
| Volume pricing type | Quantity (quantity-based pricing) or Value (value-based pricing) |
| Apply level | Product (all eligible products in the order), Order (entire order) or Variant (all eligible product’s variants in the order) |
| Table style | One of the 10 table style names in the sample file, for example From & Discounts, Full range & Discounted prices or Legacy 1 |
| From | Start of the tier (quantity or order value) |
| To | End of the tier. Leave blank for “and above” |
| Discount type | Fixed price, Decrease fixed amount, Decrease fixed percentage |
| Discount value | Number. For a percentage, enter 10 for 10% |
When Customer condition, Product condition or an exclude condition is anything other than All / None, its value column must not be empty, and every customer, product, collection, variant, market or company location listed must exist in your store. Values that cannot be found are reported in the error file.
Step 3: Upload & Import
Section titled “Step 3: Upload & Import”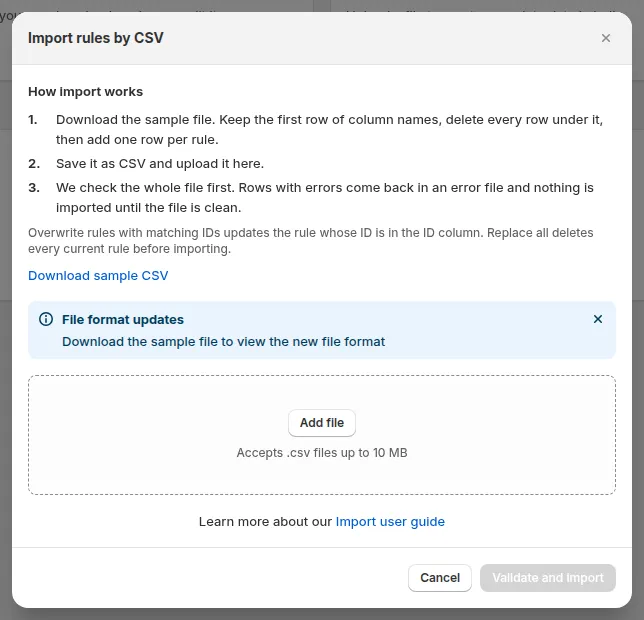
- On the Import & export page, click Import.
- Click Add file and choose your file. Only
.csvis accepted, maximum 10 MB. - Choose how the file is applied (both are optional):
- Overwrite rules with matching IDs: existing values are replaced for all columns included in the file.
- Replace all existing rules: removes all current rules and replaces them with the rules in the file.
- Click Validate and import. The app validates the file first, then imports it in the background. A progress banner shows the percentage validated and imported.
- If some rows fail, the app shows how many rules failed and gives you a file with the error for each row. Fix those rows and import the file again.
Best Practices
Section titled “Best Practices”- Export your current rules first before using Replace all existing rules, so you have a backup to restore.
- Start from the sample file of the current version: the banner “File format updates” in the import dialog means the column layout has changed since older exports.
- Double-check customer emails, product titles and variant SKUs: a value that does not exist in your store fails the row.
- Keep priority numbers deliberate: when several rules match the same product, the rule with the lowest number applies.
- Leave Overwrite rules with matching IDs off when you only want to add new rules.