
Build a Powerful Wholesale Registration Form
Create a wholesale registration form that works with legacy customer accounts: fields, approval, tags, spam protection and publishing.
Make onboarding B2B customers seamless, professional and secure, without coding. With the Registration Form module you create sign-up forms that collect business information, run an approval workflow and unlock wholesale prices through customer tags.

The form editor is a four-step wizard: Basics, Form Editor, Settings and Publish. Each step is checked before you can click Next.
Step 1: Turn On Registration Forms and Create a Form
Section titled “Step 1: Turn On Registration Forms and Create a Form”- Go to B2B customers > Registration Forms and switch the module on.
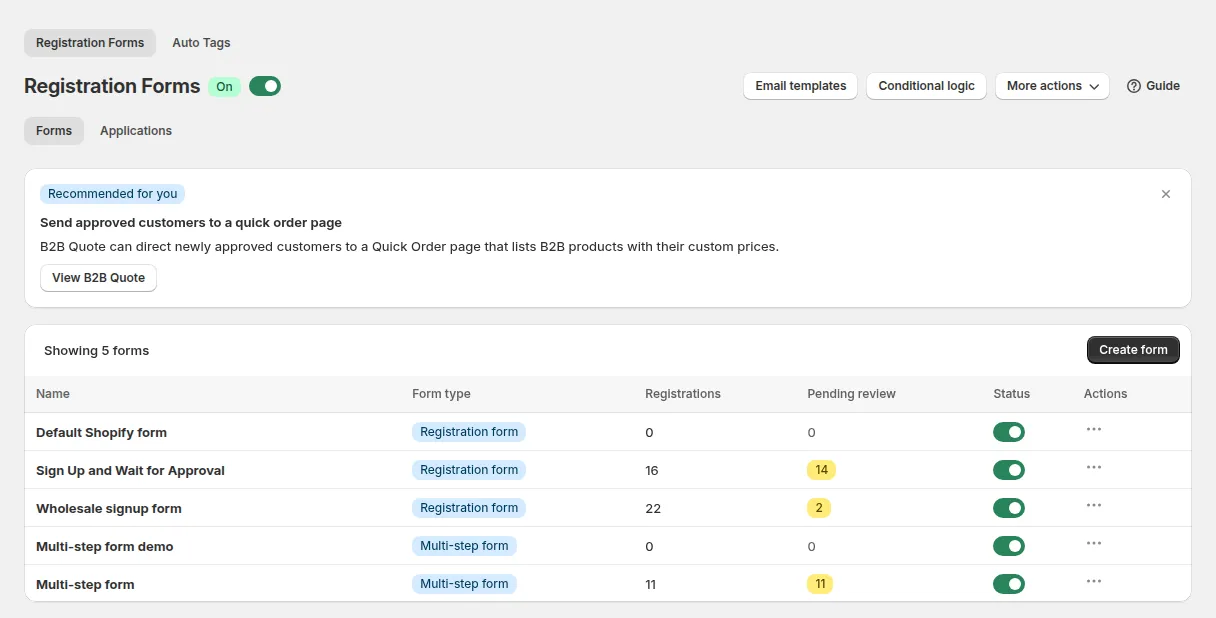
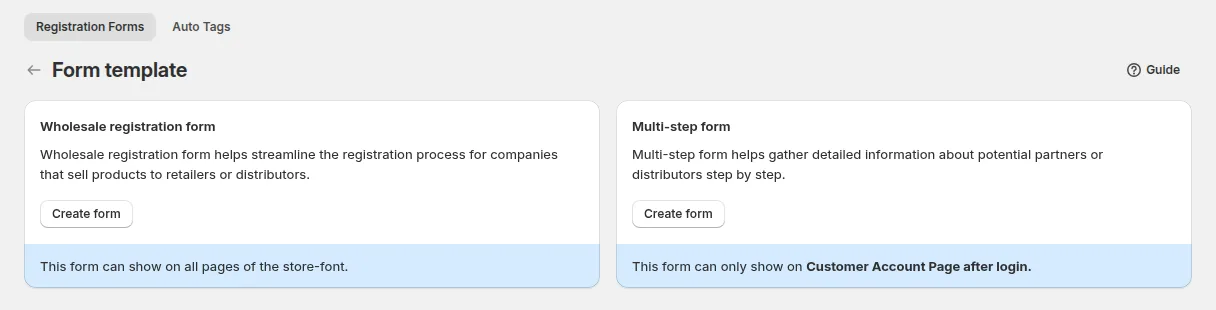
- Click Create form, then pick the form type: Wholesale registration form or Multi-step form.
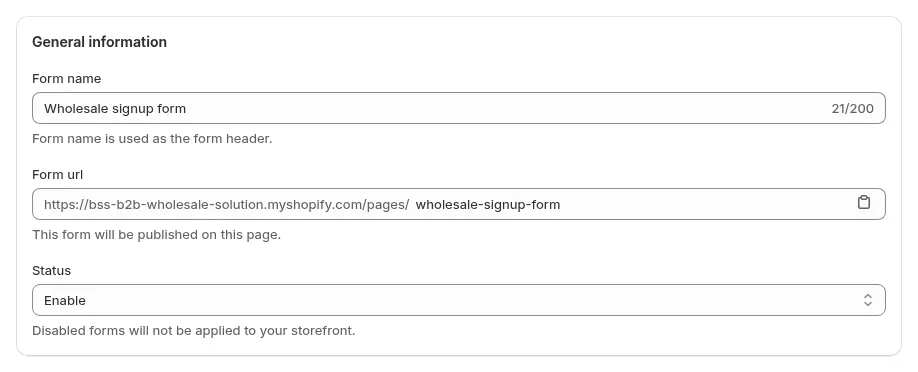
In Basics, enter:
- Form name: must be unique in your store (otherwise you see “Form name has already been taken”).
- Form URL: the page handle, for example
wholesale-apply. The form is published athttps://your-store.com/pages/wholesale-apply, so the handle must not be used by another Shopify page. - Status.
To change Shopify’s own sign-up page instead, use Edit default Create account form. That form always lives at /account/register.
Step 2: Form Editor

Section titled “Step 2: Form Editor”Drag fields into the form and watch the live preview as you edit.
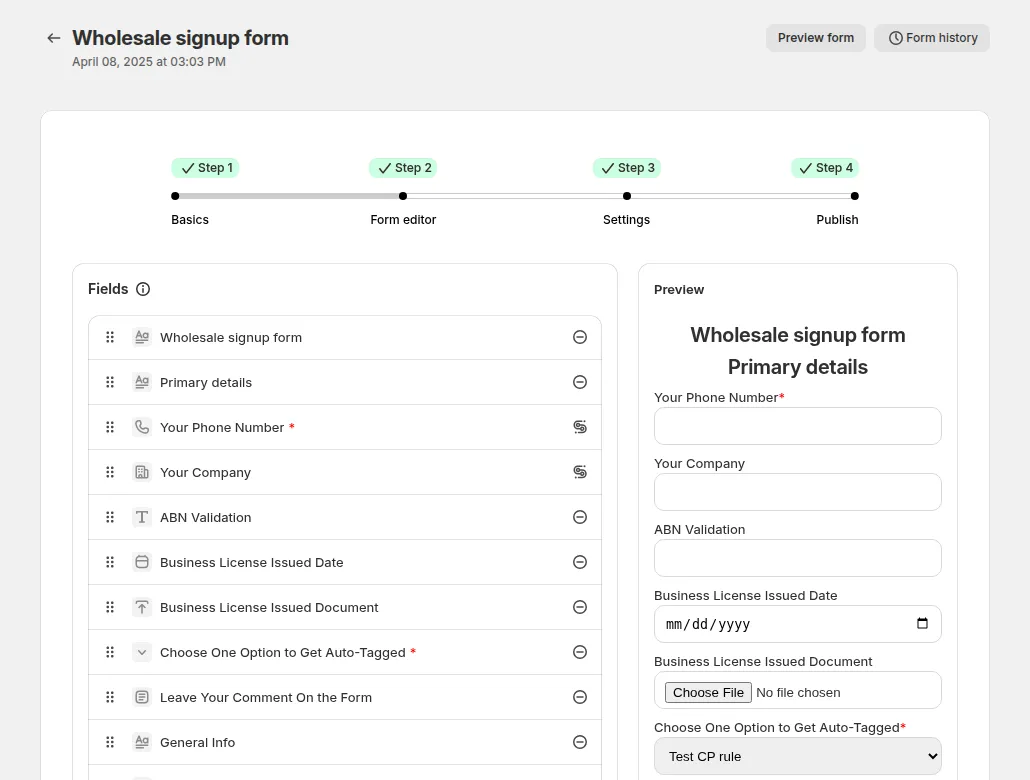
| Group | Fields |
|---|---|
| Always present | First name, Last name, Email, Password |
| System fields | Address, Apartment/suite, City, Zip code, Country (optionally with State/Province), Company, Phone, Subscribe to newsletter |
| Tax ID validation | EU VAT, UK VAT, US EIN, Australian ABN, India GST: checked live while the customer types |
| Custom fields | Text field, Text area, Number, Date, File upload, Dropdown, Multiple checkbox, Radio options, Heading |
- Phone is saved to the customer’s phone number in Shopify when the account is approved.
- File upload accepts documents and images up to 10 MB per file (MP4 video is supported; images are capped at 25 megapixels).
- Each field has a Label, Required switch, Help text, Placeholder and Field width (30%, 50%, 70% or 100%).
- The Password field can require a minimum length (5 to 40 characters), digits, uppercase letters or special characters.
- Custom field answers are saved as customer metafields, so you can see them in Shopify admin.
In the same step you can also set:
- Form title and alignment: the title is a Heading field in the form. Choose the heading level and Left, Center or Right alignment.
- Conditional logic: show or hide a field based on other answers. See Set up conditional logic.
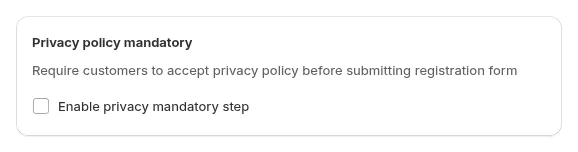
- Privacy policy mandatory: tick Enable privacy mandatory step on this form to add a required consent checkbox. Use the Link tool in the text editor to point to your policy page.
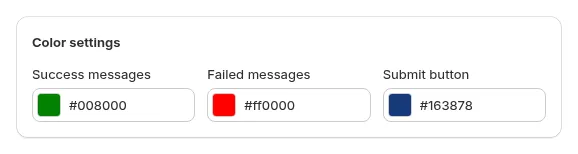
- Color settings: success message color, error message color and Submit button color (default
#163878). These are saved per form and work on every storefront version.
Step 3: Settings
Section titled “Step 3: Settings”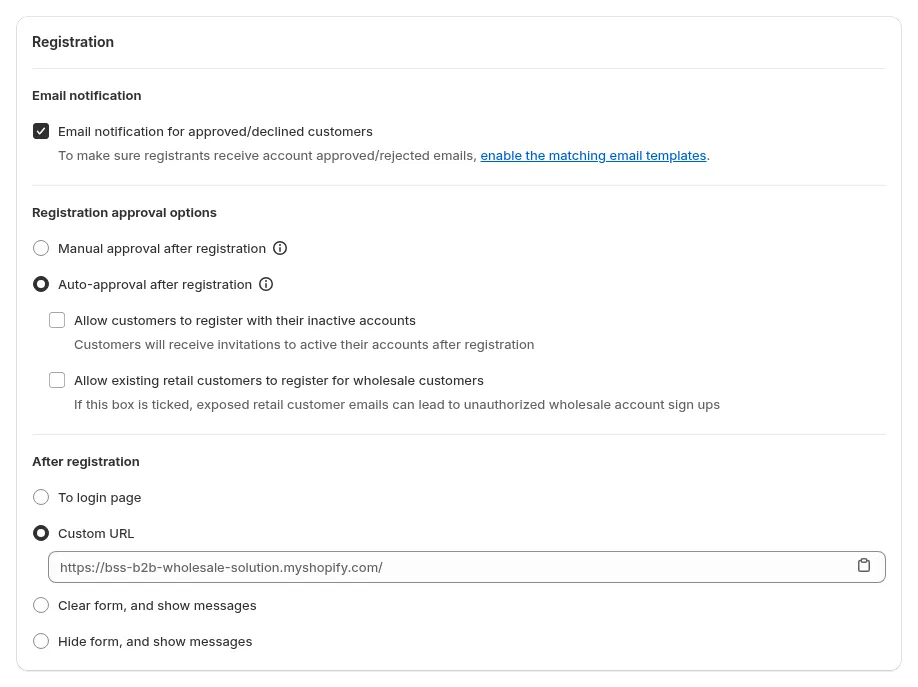
Email notification for approved/declined customers: sends the applicant an email when you approve or reject them. Follow the link below the option to review the Account approved and Account rejected templates. See Email configuration.
Customer approval options
| Option | What happens on submit | Extra options |
|---|---|---|
| Manual approval after registration | The application waits as Pending until you approve it in Registration Management | Hide password field on the form (customer sets a password after approval), Auto approve if email contains (for example your partners’ email domain) |
| Auto-approval after registration | The Shopify customer account is created right away | Allow customers to register with their inactive accounts, Allow existing retail customers to register for wholesale customers |
Tags: Assign tag when customer is approved, for example wholesale. Your pricing rules that target this tag start working for the customer as soon as the account is approved.
Auto exempt tax for customers registered with this form: marks approved customers as tax exempt in Shopify.
Spam protection: Enable Google reCAPTCHA on “Create account” pages.


After registration, choose what the customer sees:
| Option | Result |
|---|---|
| To login page | Sends the customer to the login page. Only available with auto-approval |
| Custom URL | Sends the customer to a page you choose |
| Clear form, and show messages | Empties the form and shows your success message |
| Hide form, and show messages | Hides the form and shows your success message |
Step 4: Publish
Section titled “Step 4: Publish”Save the form, then publish it. The app creates the page at your form URL; you can also place the form anywhere with the Registration Form app block (paste the form ID shown under Copy and paste form ID in the app block setting to publish the form). See Publish your form to your storefront.
Pro Tips
Section titled “Pro Tips”- Test the form yourself (submit, approve, check the tag and email) before sharing the link.
- Translations for other languages are managed on the Translations page. See Translate your registration form.