
Email Sender
Changing email sender helps notification email go to the MAIN INBOX!
By default, the BSS B2B Solution app sends notification emails using the address [email protected].
While this works out of the box, some messages may be marked as spam due to sender domain mismatches.
To ensure your emails are delivered successfully and appear professional, we strongly recommend customizing your sender email.
1. Default Settings
Section titled “1. Default Settings”- All automatic notifications (to merchants or their customers) are sent from:
✉️ [email protected] - Since this address is not connected to your store’s domain, messages may occasionally land in the Spam or Promotions folder.
2. Sender Email settings
Section titled “2. Sender Email settings”Customizing your Sender Email helps prevent spam issues and ensures your emails look like they’re coming directly from your brand (e.g., [email protected]).
Follow these steps to update your sender information:
Step 1: Open Advanced Settings
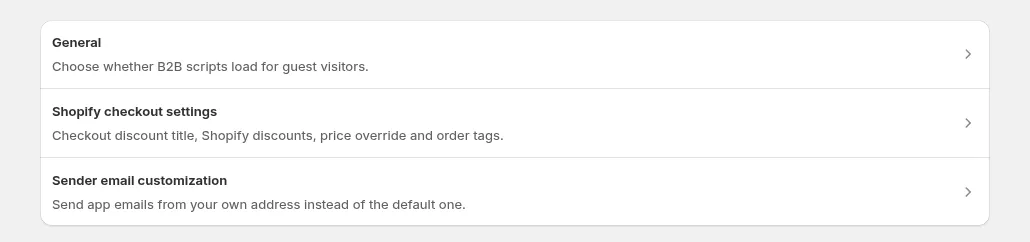
Section titled “Step 1: Open Advanced Settings”In the app menu, click Settings.
Step 2: Go to “Sender Email Customization”
Section titled “Step 2: Go to “Sender Email Customization””Open Sender email customization.
You’ll see a card that allows you to update your sender email details.

Click Change Sender Email to begin.
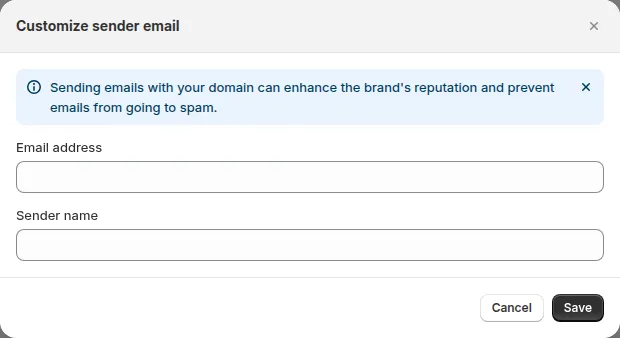
Step 3: Enter Email Address and Sender Name
Section titled “Step 3: Enter Email Address and Sender Name”Fill in the fields for:
- Email address (e.g., [email protected])
- Sender name (e.g., Your Store Name)
- Once submitted, a confirmation email will be sent immediately to the address you entered.
Step 4: Confirm Your Email
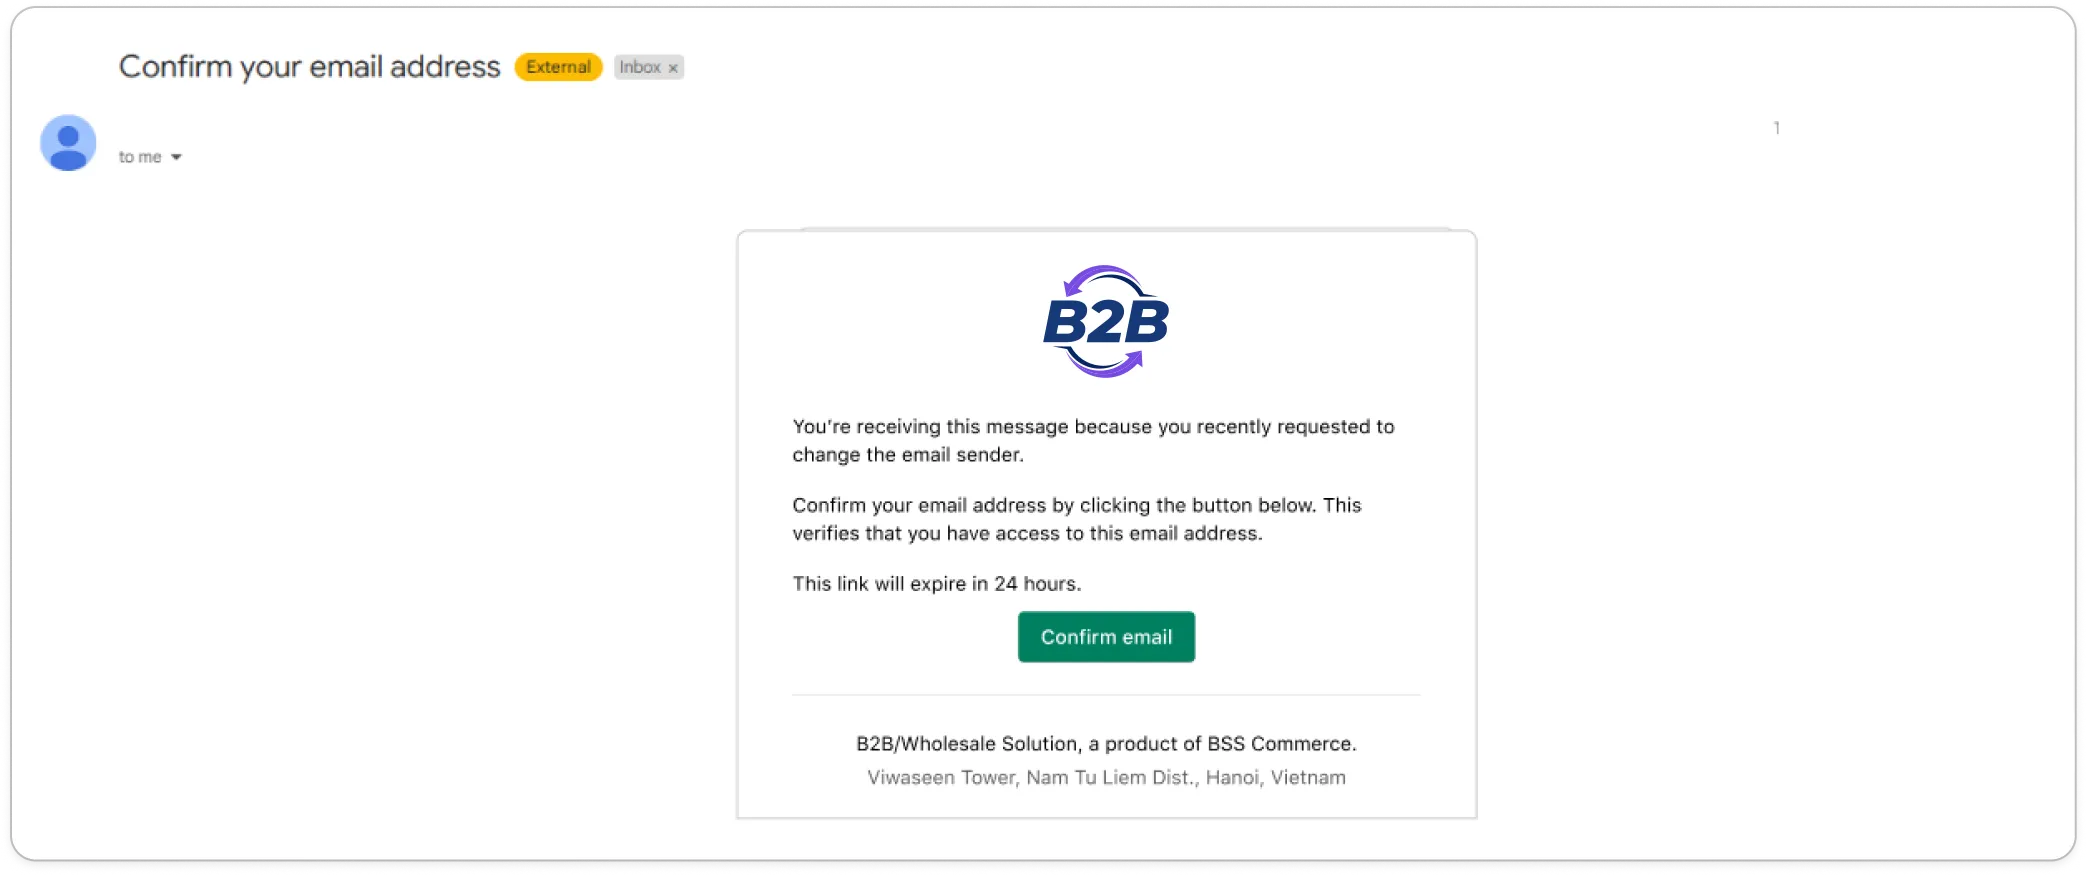
Section titled “Step 4: Confirm Your Email”Check your inbox and click Confirm Email to verify ownership of your sender address.
After confirmation, return to the app to proceed with DNS setup.
Step 5: Configure DNS Records
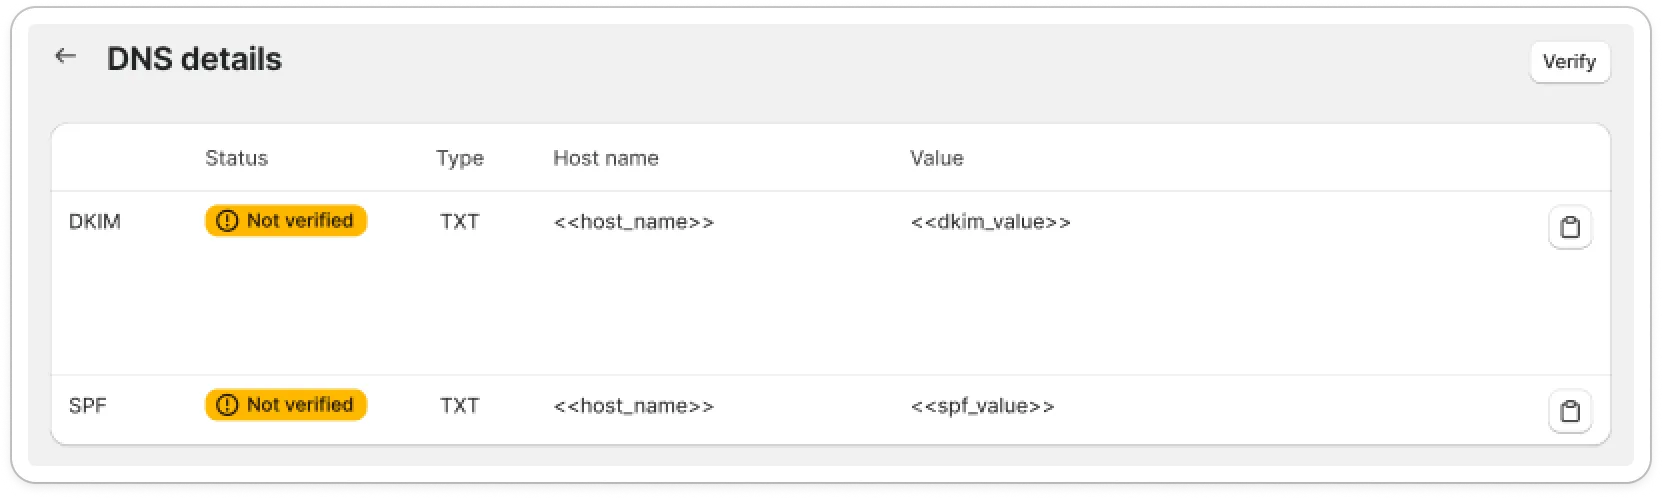
Section titled “Step 5: Configure DNS Records”To fully authenticate your email domain:
- Go to your Domain Provider (e.g., Cloudflare, GoDaddy, Namecheap, DigitalOcean, Google Domains, etc.)
- Add the DKIM and SPF records displayed in your app dashboard.
- Use the 1-click Copy icon next to each field to copy the exact Host Name and Value directly into your DNS zone manager, avoiding formatting errors or domain verification failures.
Step 6: Verify Your DNS Settings
Section titled “Step 6: Verify Your DNS Settings”Once DNS records are updated:
- Return to the app and click Verify.
- If everything is set up correctly, the status will change to ✅ Verified.
Your customized sender email is now active: ensuring professional and reliable email delivery.
