
How Do I Sell Tax-Exempt to Verified Businesses?
B2B buyers often have a legitimate tax exemption - a US EIN, EU VAT number, or Australian ABN - but your Shopify store charges tax by default. This walkthrough combines Tax Exempt, Net Terms for deferred payment, and Registration Form to collect the tax ID during sign-up. Together, the three modules take a business from application, to verification, to tax-free checkout with Net 30 payment terms.
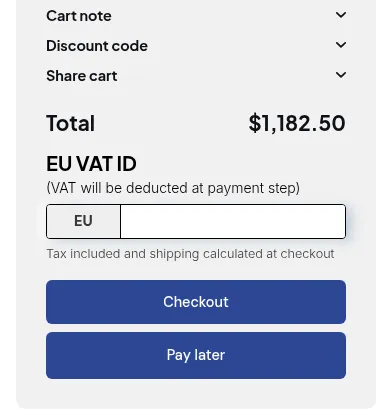
What your customers see on the storefront.
Step 1: Collect the tax ID during registration
Section titled “Step 1: Collect the tax ID during registration”Add a tax-validation field to your wholesale application form so applicants submit their number at sign-up - before any manual review.
- Go to B2B Customers > Registration Forms and edit your wholesale application form (or create one - see Set Up Registration Form).
- In the form builder, drag in the relevant system field for your market:
- EU VAT Validation - validates against VIES on form submission.
- US EIN Validation - validates format
XX-XXXXXXX. - ABN Validation - validates against the Australian Business Register.
- UK VAT Validation - validates against UK HMRC.
- Mark the field Required so applicants cannot submit without a number.
- Under Customer settings, enable Auto exempt tax for customers registered with this form. Approved customers are marked as tax exempt in Shopify.
- Set Assign tag when customer is approved to
tax-exempt-verified(used in the next step to scope Tax Exempt and Net Terms visibility). - Save the form.
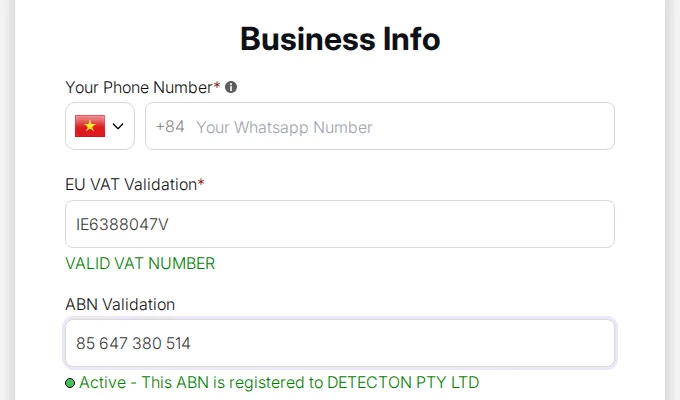
See Set Up Registration Form for all field options.
Step 2: Configure Tax Exempt for cart-page validation
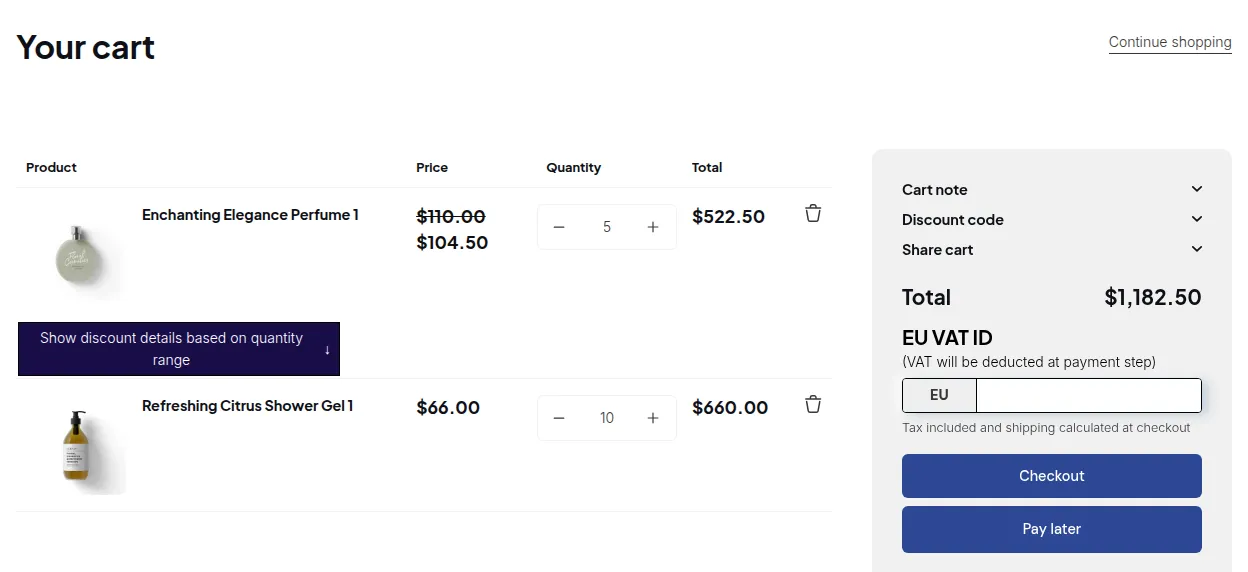
Section titled “Step 2: Configure Tax Exempt for cart-page validation”Tax Exempt adds a tax ID box to the cart page. The buyer enters their tax ID, the app validates it, and when it is valid the order is created without tax. The exemption applies to that order; it does not change the customer’s tax setting in Shopify (use Bulk tax exempt for that).
- Go to B2B Tax & Currency > Tax Exempt > Configuration.
- Turn on Show tax ID validation box on cart page.
- Under Choose tax ID type for validation, tick the types you collected on the form: EU VAT API, UK VAT API, ABN VAT API, India GST API or US EIN API.
- Under the cart page options:
- Keep Auto exempt tax for valid tax IDs on (default) so a valid ID removes tax from the order.
- Optionally turn on Require valid tax IDs to block checkout until the buyer enters a valid ID.
- Under Apply to customers, choose Customer tags >
tax-exempt-verified. Only customers with that tag see the tax ID box, so retail buyers never see it. - Under Actions, add a tag in Add tag to tax-exempt orders (e.g.
tax-exempt) so you can filter exempt orders in Shopify admin. - If your store uses Shopify’s Taxes and Duties settings, click Update Settings under Sync with Taxes and Duties Settings.
- Add the Tax Exempt block to your theme: go to Online Store > Themes > Customize, navigate to the Cart template, click Add block, and add the Tax Exempt block from BSS B2B Solution. Save.
See Set Up Tax Exempt for bulk-exemption, translations, and the full settings reference.
Step 3: Configure Net Terms for deferred payment
Section titled “Step 3: Configure Net Terms for deferred payment”Tax-exempt business buyers often also need to pay on account (Net 30, Net 60). Net Terms adds a “Pay later” button to the cart and creates a Shopify draft order instead of collecting payment immediately.
- Go to B2B Orders > Net Terms and click Add rule.
- Step 1: Name “Net 30 – Tax Exempt Accounts”, priority
1, status enabled. - Step 2 - Target:
- Customer condition: By customer tag >
tax-exempt-verified. - Product condition: All products.
- Step 3 - Settings:
- Order limit: Minimum amount >
$100(optional floor to avoid tiny net-term orders). - Payment due date: Within 30 days.
- Go to B2B Orders > Net Terms > Installation, click Enable button, and add the Net terms block to your cart template in the Theme Editor.
See Set Up Net Terms for the full due-date schedule, form fields, and payment terms.
Step 4: Enable the App Embed
Section titled “Step 4: Enable the App Embed”Registration Form, Tax Exempt, and Net Terms all render through (or alongside) the BSS B2B Solution app embed.
In Online Store > Themes > Customize > App embeds, confirm BSS B2B Solution is on and saved.
# Example
Section titled “# Example”Store: EU-based B2B chemical supplier, prices set as “taxes included” in Shopify. Workflow:
| Stage | What happens |
|---|---|
Applicant submits form with EU VAT DE123456789 |
VAT validated against VIES at form submission. Record saved as Pending. |
| Merchant approves application | Customer account created with tags tax-exempt-verified and wholesale-approved. Customer marked as tax exempt in Shopify customer. |
| Customer logs in and adds €200 of products to cart | tax ID validation box appears (visible to tax-exempt-verified tag). Customer enters DE123456789. Green checkmark: “Your VAT ID has been successfully validated.” Tax line zeroed. |
| Customer sees “Pay later” button | Net Terms rule matches (tax-exempt-verified, cart ≥ $100). Modal opens. Net 30 due date shown. |
| Customer confirms net-term order | Shopify draft order created without tax and with payment due within 30 days. Order tagged tax-exempt. Merchant invoices in 30 days. |
# Summary
Section titled “# Summary”| Feature | Role in this scenario | Notes |
|---|---|---|
| Registration Form | ✅ Collects EIN/VAT/ABN on sign-up; marks the customer tax exempt in Shopify on approval | Add the EIN, VAT or ABN validation fields; enable “Auto exempt tax for customers registered with this form” |
| Tax Exempt | ✅ Adds cart-page validation widget; removes tax from orders with a valid tax ID | Scoped to tax-exempt-verified tag; auto-exempt on validation; requires the Tax Exempt app block |
| Net Terms | ✅ “Pay later” button for deferred payment on Net 30 terms | Draft order flow; requires the Net terms app block added to cart template |
| App Embed | ✅ Required for Registration Form and Tax Exempt storefront rendering | Enable in Online Store > Themes > Customize > App embeds |