
Set Up Net Terms for Your B2B Customers
The Net Terms feature allows you to offer customers the flexibility to buy now and pay later: a must-have for B2B and wholesale businesses. Instead of requiring immediate payment, you can assign a specific payment term (for example, Net 7, Net 15, Net 30, etc.) to your customers, giving them a set number of days to complete their payment after an order is placed.
This helps you build stronger, long-term relationships with trusted buyers while maintaining smooth cash flow and clear payment tracking.
Before You Start: Add the Net Terms Button to Your Cart Page
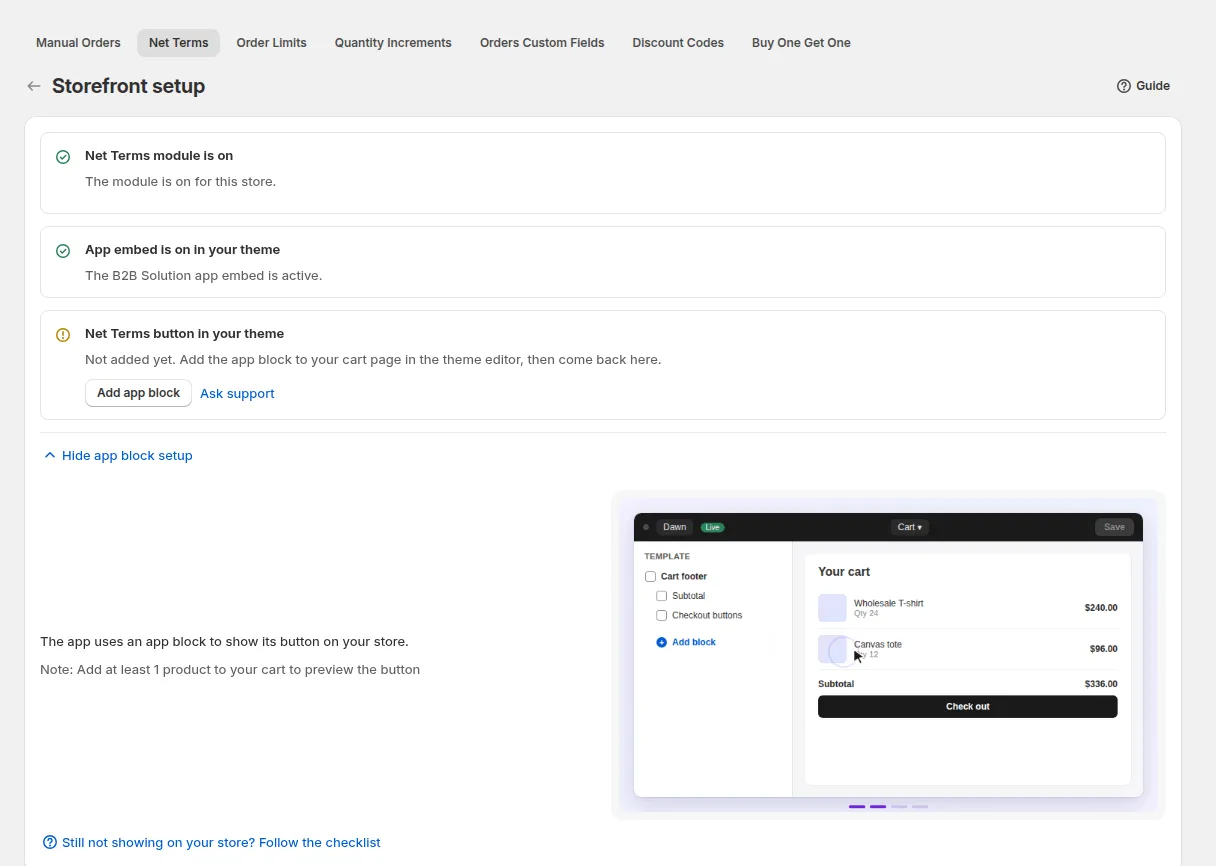
Section titled “Before You Start: Add the Net Terms Button to Your Cart Page”The Net Terms button (default label: Pay later) does not appear on your cart page automatically. It is a theme app block that must be added manually, in addition to enabling the app in your theme (see Enable or Disable the App in Your Theme).
- On the Net Terms page, click Storefront setup.
- Click Enable button on Cart page. This opens your Shopify Theme Editor on the Cart page, with the Net Terms block ready to add.
- Add at least 1 product to your cart to preview the button, then add the block and click Save in the Theme Editor.
- In the block settings you can change the Display text (default “Pay later”), text and background color, width, height and alignment.
How to Set Up Net Terms
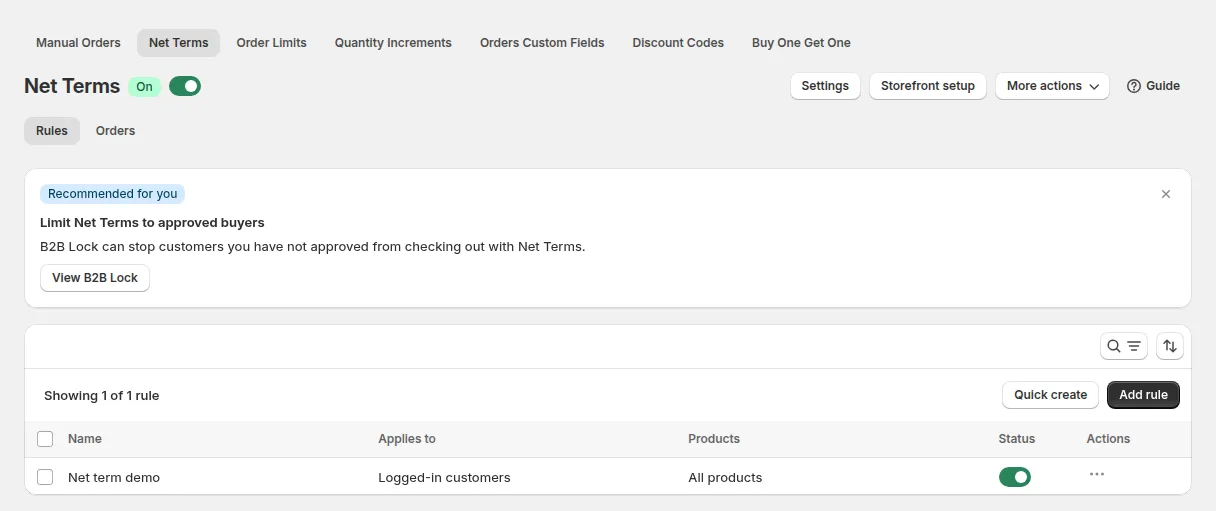

Section titled “How to Set Up Net Terms”Go to B2B orders & discounts > Net Terms and click Add rule. The rule page has the cards Rule, Customers, Products, Payment terms, Net Terms order limit, Auto-tag orders when purchasing with this rule, Application for Net Terms and Advanced.
Step 1, Rule
Section titled “Step 1, Rule”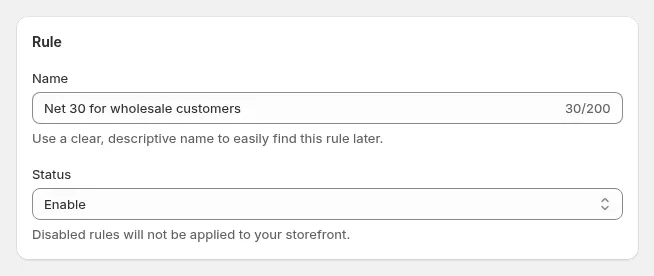
| Field | What to set |
|---|---|
| Name | Internal label for this rule (e.g., “Net 30 Gold Partners”). Shown in Order History. |
| Status | Enable or Disable. Only enabled rules are offered to customers. |
| Priority | In the Advanced card. When several rules match the customer, the rule with the lowest number whose products cover the whole cart is used. |
Step 2, Customers and Products
Section titled “Step 2, Customers and Products”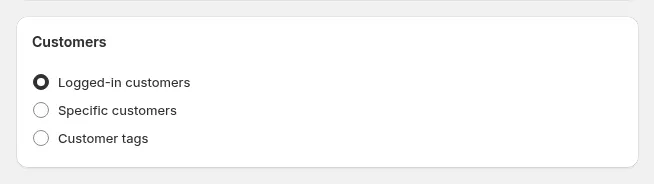
Customer condition: choose who this rule applies to:
| Option | Behaviour |
|---|---|
| All logged-in customers | Applies to every signed-in buyer |
| Specific customer tags | Applies only to buyers with a matching Shopify customer tag |
| Specific customers | Applies to buyers matched by individual email address |
Guests cannot use Net Terms: the customer must be logged in.
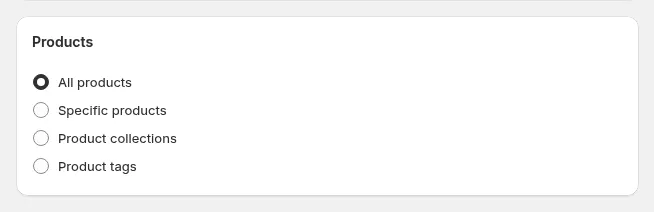
Product condition: choose which products in the cart are eligible for Net Terms:
| Option | Behaviour |
|---|---|
| All products | Every product in the cart is eligible |
| Specific products | Only listed product IDs qualify |
| Specific collections | Only products from selected collections qualify |
| Specific product tags | Only products with matching tags qualify |
If a customer’s cart contains products that are not eligible, the app shows a message listing the ineligible items and blocks the Net Terms checkout until the cart is updated.
Step 3, Order Limit, Order Tags and Payment Terms
Section titled “Step 3, Order Limit, Order Tags and Payment Terms”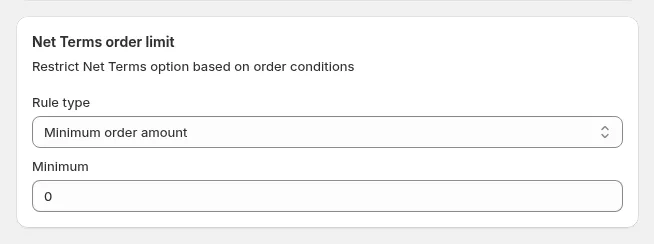
Order limit: optionally restrict which orders qualify:
| Limit type | What it controls |
|---|---|
| Minimum order amount | Cart subtotal must be at or above this value |
| Maximum order amount | Cart subtotal must be at or below this value |
| Minimum order quantity | Total cart item count must be at or above this value |
| Maximum order quantity | Total cart item count must be at or below this value |
Auto order tags: optionally add Shopify order tags to every Net Terms order created under this rule. Useful for filtering orders in Shopify admin.
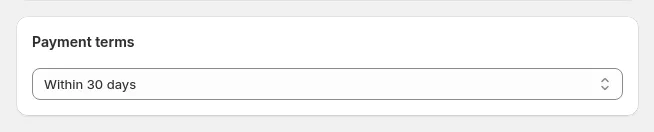
Payment terms: select when payment is due.
| Option | When payment is due |
|---|---|
| Due on receipt | On receipt of the order |
| Due on fulfillment | When the order is fulfilled |
| Within 7 / 15 / 30 / 60 / 90 days | That many days after the order date (Net 7 to Net 90) |
| End of Month | The last day of the month the order was placed |
| End of Month + X Days | The last day of the order month, plus the number of days you enter |
| End of Next Month | The last day of the following month |
| Due on specific day of month | Every N months on a day you choose (1 to 31). If a month does not have that day, the due date moves to that day of the next month |
| Custom | A number of days, weeks or months after the order date |
Step 4, Application for Net Terms
Section titled “Step 4, Application for Net Terms”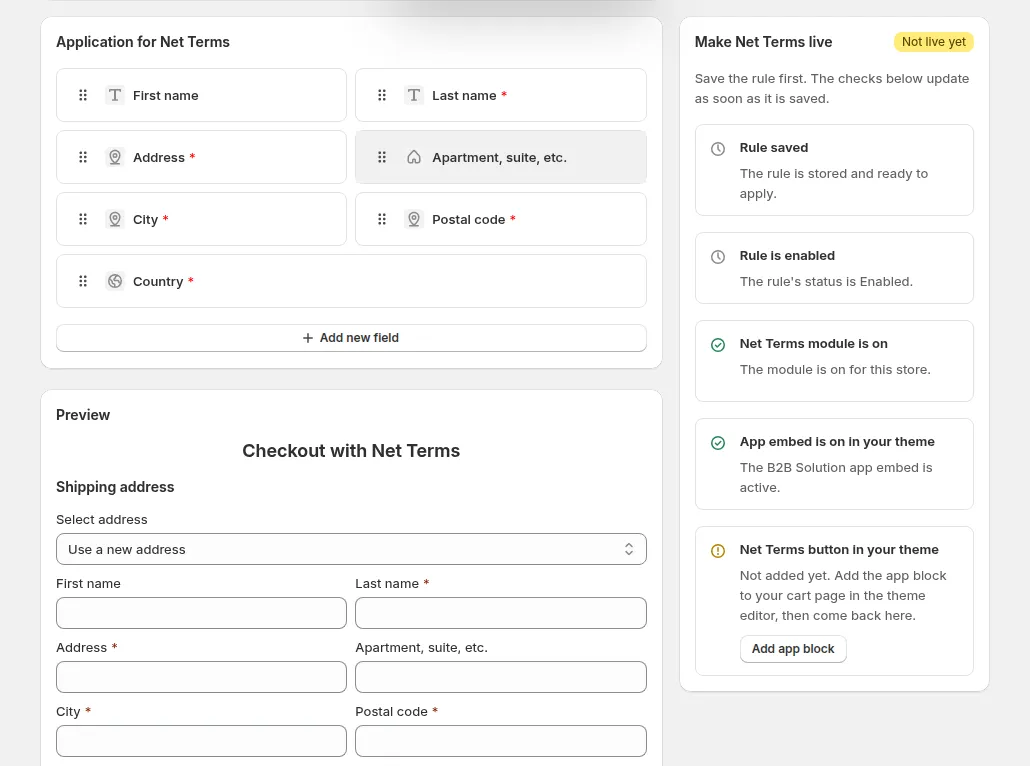
Configure the form buyers fill in when they click the Net Terms button on the storefront. This form collects the shipping address and any additional information you require.
Default address fields (always present, some required):
| Field | Required by default |
|---|---|
| First name | No |
| Last name | Yes |
| Address | Yes |
| Apartment, suite, etc. | No |
| City | Yes |
| Postal code | Yes |
| Country / State | Yes |
Custom fields you can add:
| Field | Notes |
|---|---|
| Phone | Text field with built-in E.164 international validation; automatically saved to Shopify Order Shipping and Billing Addresses |
| Company | Text field |
| Purchase Order Number | Text field; value saved to order notes |
| Dropdown selection | Single-select with configurable options |
| Multiple checkbox | Multi-select with configurable options |
| Radio options | Single-select radio with configurable options |
| Text field | Free-text input |
| Text area | Multi-line text input |
| Heading | Section label (no input) |
| Number | Numeric input |
| Date field | Date picker |
| File upload | Accepts CSV, DOC/DOCX, GIF, JPG, PNG, PDF, WAV, XLS/XLSX, ZIP, MP4, TXT (max 10 MB per file) |
VAT / tax ID fields (optional, with live validation):
| Field | Validates |
|---|---|
| EU VAT | European VAT number format |
| UK VAT | UK VAT Registration number |
| US EIN | US Employer Identification Number |
| ABN | Australian Business Number |
| India GST | Indian GST number |
Click Save. The rule is now active.
Configure global settings
Section titled “Configure global settings”Go to Net Terms > Settings to set options that apply across all rules.
Order submission
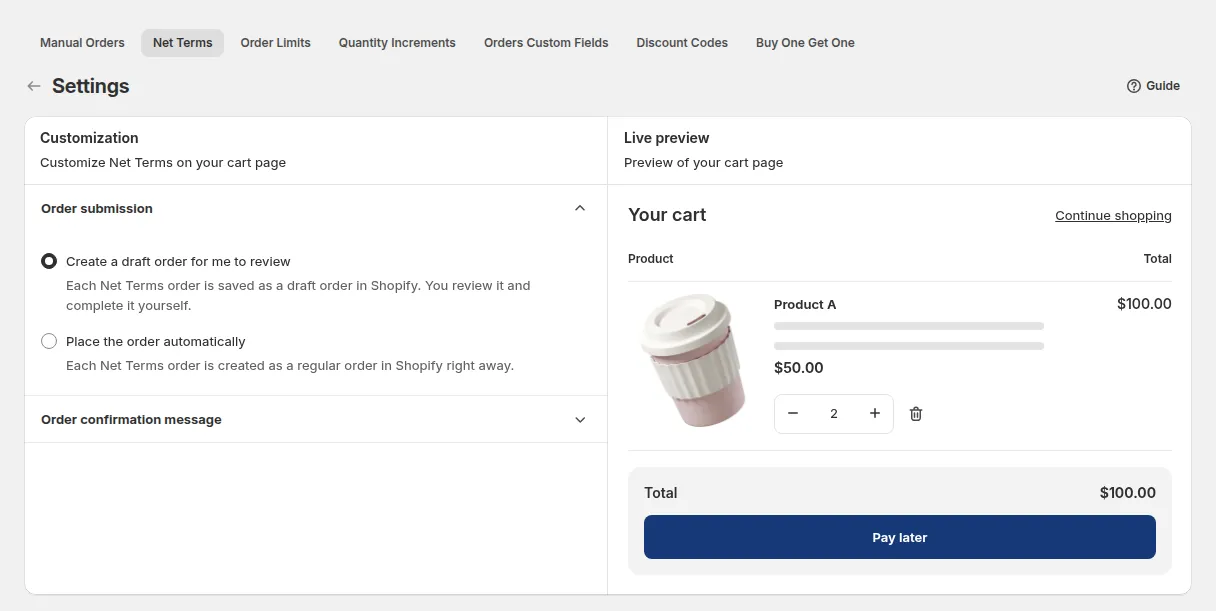
Section titled “Order submission”Choose how Net Terms orders are created in Shopify:
| Option | Behaviour |
|---|---|
| Create a draft order for me to review (default) | Order is created as a Shopify draft order; you review it and turn it into an order yourself |
| Place the order automatically | The draft is completed right away into a Shopify order with payment pending |
Confirmation message
Section titled “Confirmation message”Customize the message shown to buyers in the confirmation modal after they complete a Net Terms checkout. Use the variables {{order_name}} (the order or draft order name) and {{number_of_days}} (the due date) to dynamically display order details. You can edit the message with the built-in rich text editor.
General Translations
Section titled “General Translations”Translate the storefront-facing UI text that appears in the Net Terms checkout flow. Select a language, then edit strings across four sections:
Tip: Use the variable placeholders shown above (
{{date}},{{value}},{{quantity}}) in your translated strings so dynamic values still appear correctly.
Form Translations
Section titled “Form Translations”Translate the field labels and option text on the Net Terms checkout form, per rule and per language.
- Select the rule whose form you want to translate.
- Select a language.
- Switch between Default fields and Custom fields using the sidebar.
Changes to Form Translations apply per rule. If you have multiple rules with different form fields, translate each rule separately.
Verify the setup
Section titled “Verify the setup”- Log in to your storefront as a customer who matches the rule’s targeting condition.
- Add an eligible product to the cart.

- Go to the cart page. Confirm the Net Terms checkout button is visible. (If it isn’t, make sure you’ve completed the “Before You Start” step above.)
- Click the Net Terms button. Confirm the Net Terms form opens.
- Fill in the required fields and click Confirm.
- Check Net Terms → Order History in the app: the order should appear with the correct due date and payment status.
- Check Shopify admin → Orders (or Draft Orders): the order should be present with the status matching your submission setting (draft or unpaid).
Negative test: Log in as a customer who does NOT match the rule. Confirm the Net Terms button does not appear.
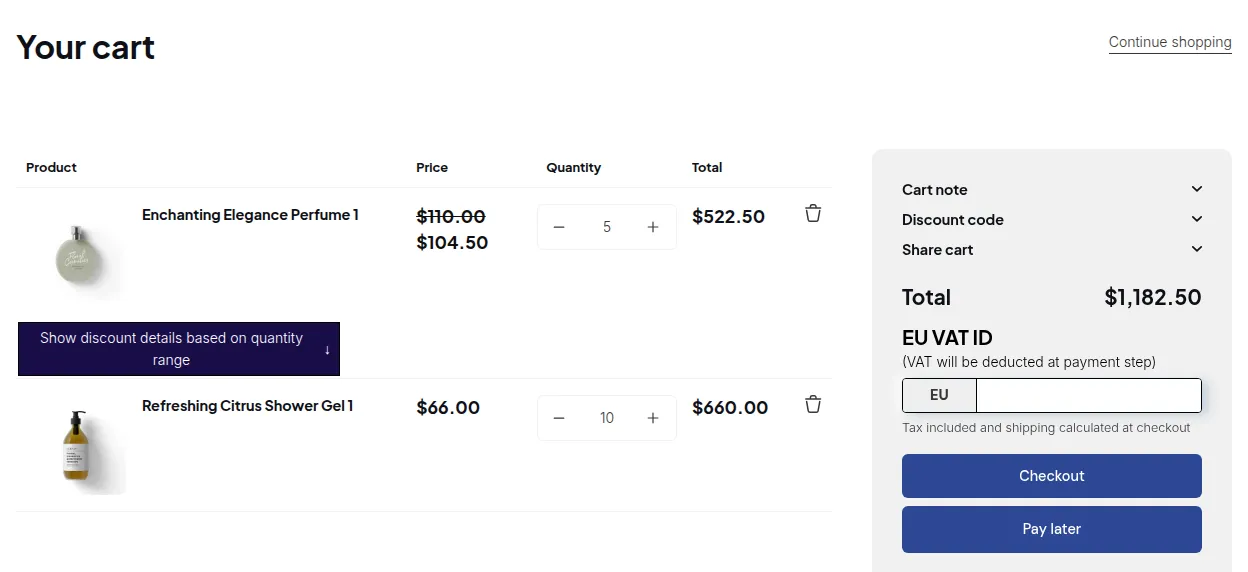
Clicking Pay later opens the Checkout with Net Terms form with the due date, the address fields from your rule and an order summary:
Example
Section titled “Example”If you assign Net 30 to a customer:
- They place an order today (October 14).
- The order is automatically marked as “Unpaid.”
- The payment due date is set to November 13.
Search Order History
Section titled “Search Order History”Use the search box above the Order History table to quickly find an order by order number, customer email, or customer name.
Export Net Terms Order History (CSV)
Section titled “Export Net Terms Order History (CSV)”Merchants can export Net Terms order history directly to CSV for bookkeeping and accounting audits:
- Go to Net Terms → Order History.
- Apply any active filters (by date range, customer, or payment status).
- Click Export in the top-right corner.
- In the confirmation modal, select whether to export the Current page or All filtered records.
- A live progress bar tracks the export generation. Once complete, click the download link to receive a CSV file containing:
- Order Number (
#1001) - Customer Name & Email
- Payment Term Rule Name & Duration (e.g.
Net 30) - Order Date & Due Date
- Due Status (
Due,Undue,Due on receipt,Due on fulfillment) - Total Amount & Outstanding Balance
- Order Number (
Filter by Payment Due Status
Section titled “Filter by Payment Due Status”Quickly track unpaid and overdue orders using the Remaining days filter in Order History:
| Filter Option | Description |
|---|---|
| All | Displays all Net Terms orders regardless of due status. |
| Due | Shows orders where the payment due date has passed without payment. |
| Undue | Shows orders currently within their allowed credit period (not yet due). |
| Due on receipt | Shows orders requiring immediate payment upon delivery. |
| Due on fulfillment | Shows orders where payment is triggered upon shipment fulfillment. |
Benefits
Section titled “Benefits”- 🤝 Build Stronger B2B Relationships: Offer payment flexibility to loyal or high-value clients.
- 💰 Improve Cash Flow Management: Keep track of all pending payments with due dates clearly displayed.
- 🧾 Easy Administration: Quickly create, assign, and monitor Net Terms in one centralized dashboard.
- ⚙️ Seamless Checkout Experience: Let approved customers complete orders without paying upfront.