
Add Sales Reps: Allow Access, Add Reps, Turn On the Portal
To set up Sales Reps, allow access to your product catalog, add each rep from a customer account, turn on Sales Reps and turn on the rep portal in your theme. A rep signs in to your store with a customer account. The rep does not need a Shopify staff account. Before you start, add the add-on as described in get started.
Key takeaways
Section titled “Key takeaways”- Reps can’t create orders until you click Allow access on the banner Allow access to your product catalog.
- A rep is an existing Shopify customer. Search for the customer by name or email.
- Turning on Sales Reps does not send invites. Add the reps first, then turn it on, then use Resend invite where needed.
- Active reps and paused reps both use a seat.
- A rep with a Maximum discount of 0 can’t lower any price. This is the default.
How do I allow access to my product catalog?
Section titled “How do I allow access to my product catalog?”Shopify asks you for one extra permission, read_publications, so the rep portal can check which products are in each customer’s catalog. Until you grant it, no rep can create an order. Your reps and their assigned companies are kept.
-
Open the Reps page
Section titled “Open the Reps page”In the Shopify admin, open BSS B2B Solution > B2B orders & discounts > Sales Reps.
-
Click Allow access
Section titled “Click Allow access”If the permission is missing, the banner Allow access to your product catalog shows at the top. Click Allow access.
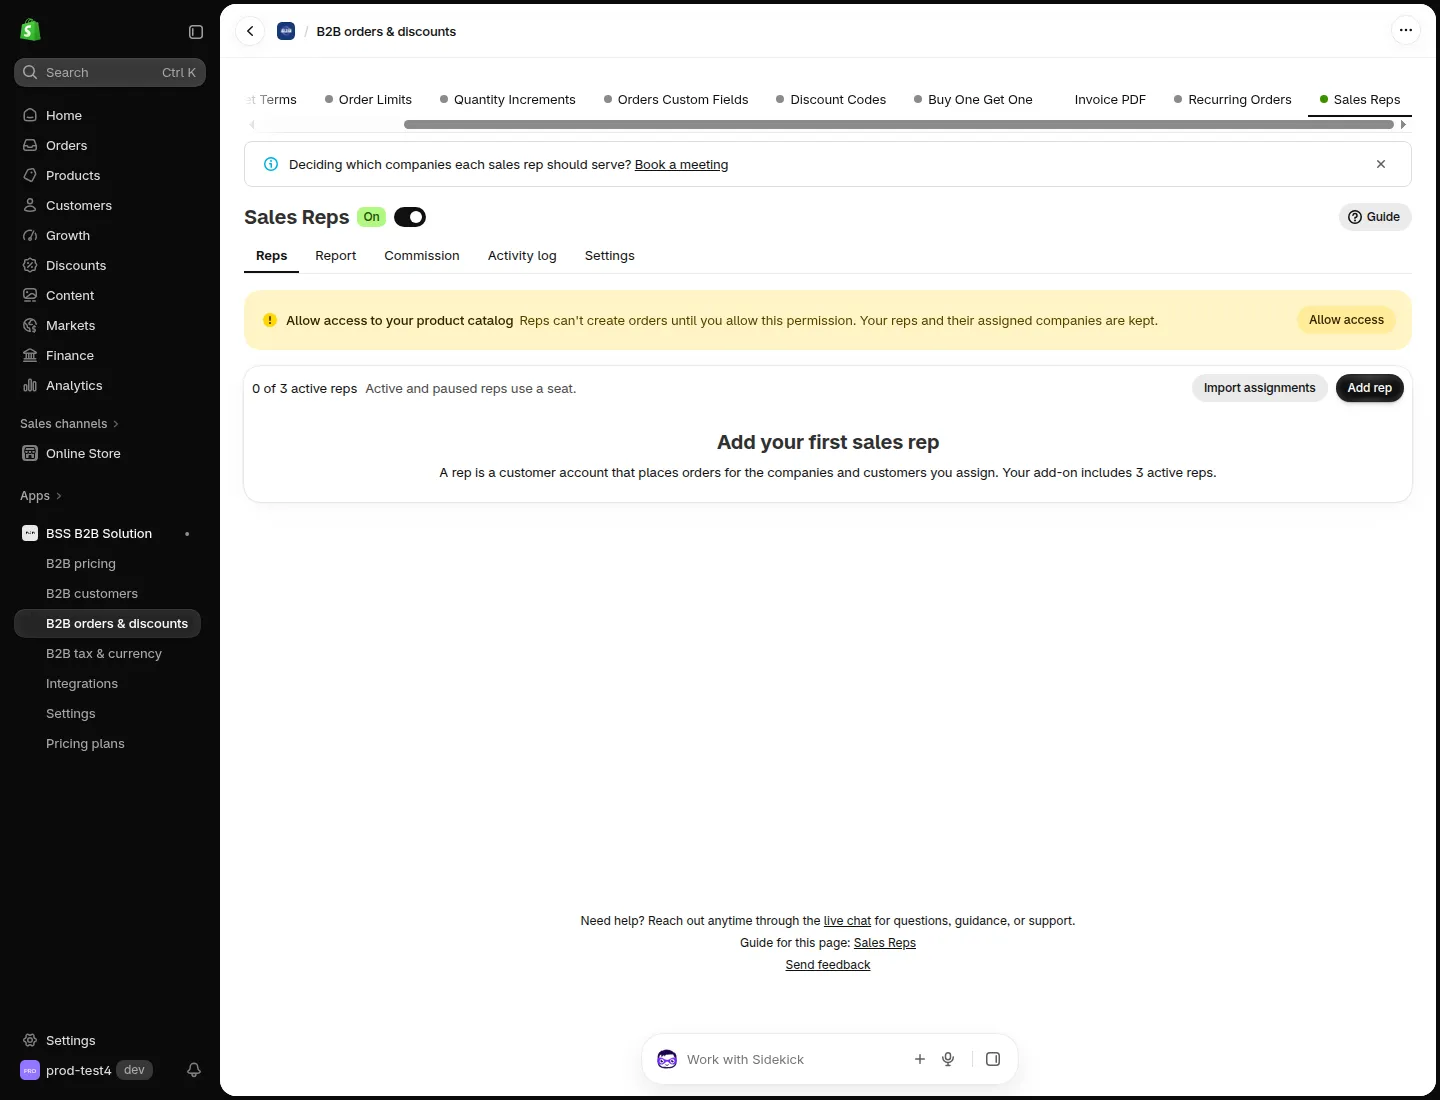
The banner shows until you grant the permission.
-
Choose Allow in Shopify
Section titled “Choose Allow in Shopify”Shopify asks you to confirm. Choose Allow. If the banner We couldn’t get the permission shows, nothing was changed. Click Try again.
Expected result: the banner disappears. The change can take about a minute to show.
How do I add a rep?
Section titled “How do I add a rep?”-
Click Add rep
Section titled “Click Add rep”On the Reps tab, click Add rep. The page Add rep opens.
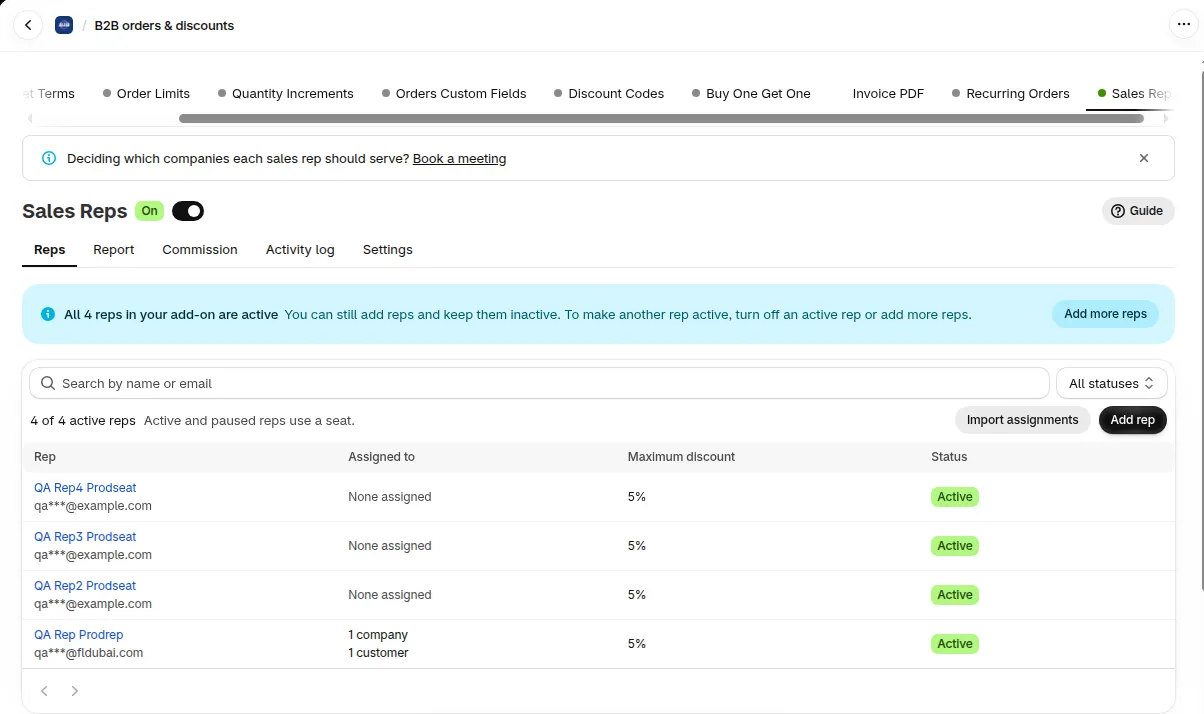
The Reps tab shows the banner, the seat count and the Add rep button.
-
Choose the customer
Section titled “Choose the customer”In Customer, search by name or email and select the customer. The rep signs in to your store with this customer account. If the customer is already a rep, you see “is already a rep”.
-
Assign companies and customers
Section titled “Assign companies and customers”Under Assigned companies, click Assign companies to pick company locations. Under Assigned customers, add customers who don’t belong to a company. See assign customers. You can also add assignments later or in bulk with Import assignments.
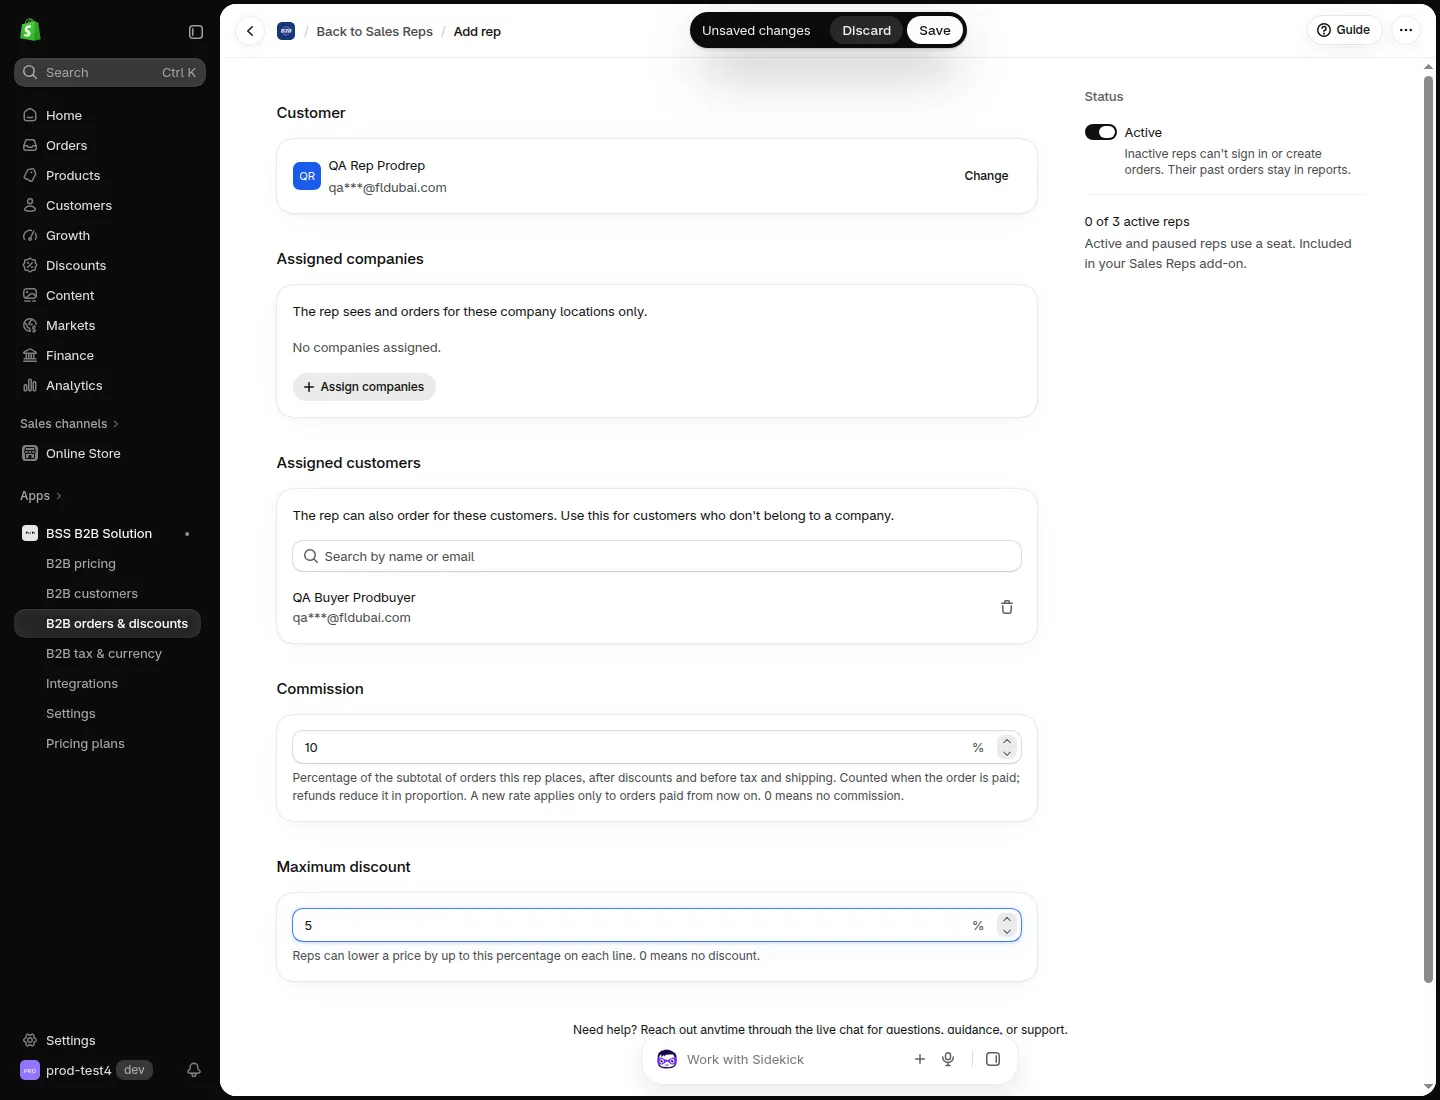
The Add rep form.
-
Set Maximum discount and Commission rate
Section titled “Set Maximum discount and Commission rate”Enter the Maximum discount as a percentage from 0 to 100. Reps can lower a price by up to this percentage on each line. The default is 0, which means no discount. Enter the Commission rate as a percentage from 0 to 100, with up to 2 decimals. The default is 0, which means no commission. See commission.
-
Click Save. The toast Rep added shows. When Sales Reps is on, the rep gets an invite email: “You have been added as a sales rep at” your store name. The email asks the rep to log in to the customer account at your store’s account page.
Expected result: the rep appears in the list with the status Active, and the counter shows how many of your seats are in use.
What if all my seats are in use?
Section titled “What if all my seats are in use?”A banner such as All 3 reps in your add-on are active appears. The number is your seat count. You can still add reps and keep them inactive. To make another rep active, turn off an active rep, or click Add more reps. An inactive rep can’t sign in or create orders. Past orders stay in reports.
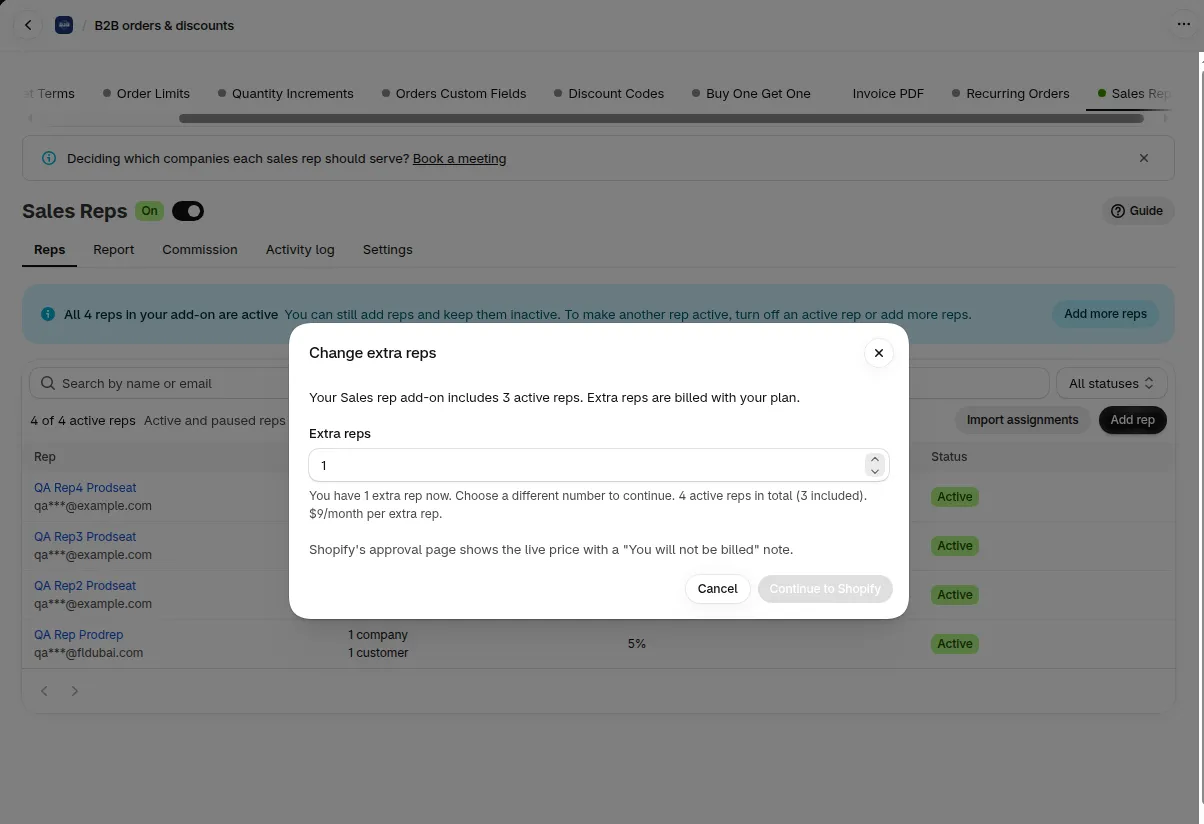
The dialog shows the price of each extra rep and the new total.
How do I turn on Sales Reps?
Section titled “How do I turn on Sales Reps?”The switch Turn Sales Reps on or off is in the header of the Sales Reps pages. While it is off, reps can’t sign in or create orders.
- Click the switch. The dialog Turn on Sales Reps? shows how many active reps you have.
- Click Turn on Sales Reps.
Turning on does not send invites. Open each rep and click Resend invite. If you added reps while the module was off, no invite was sent to them.
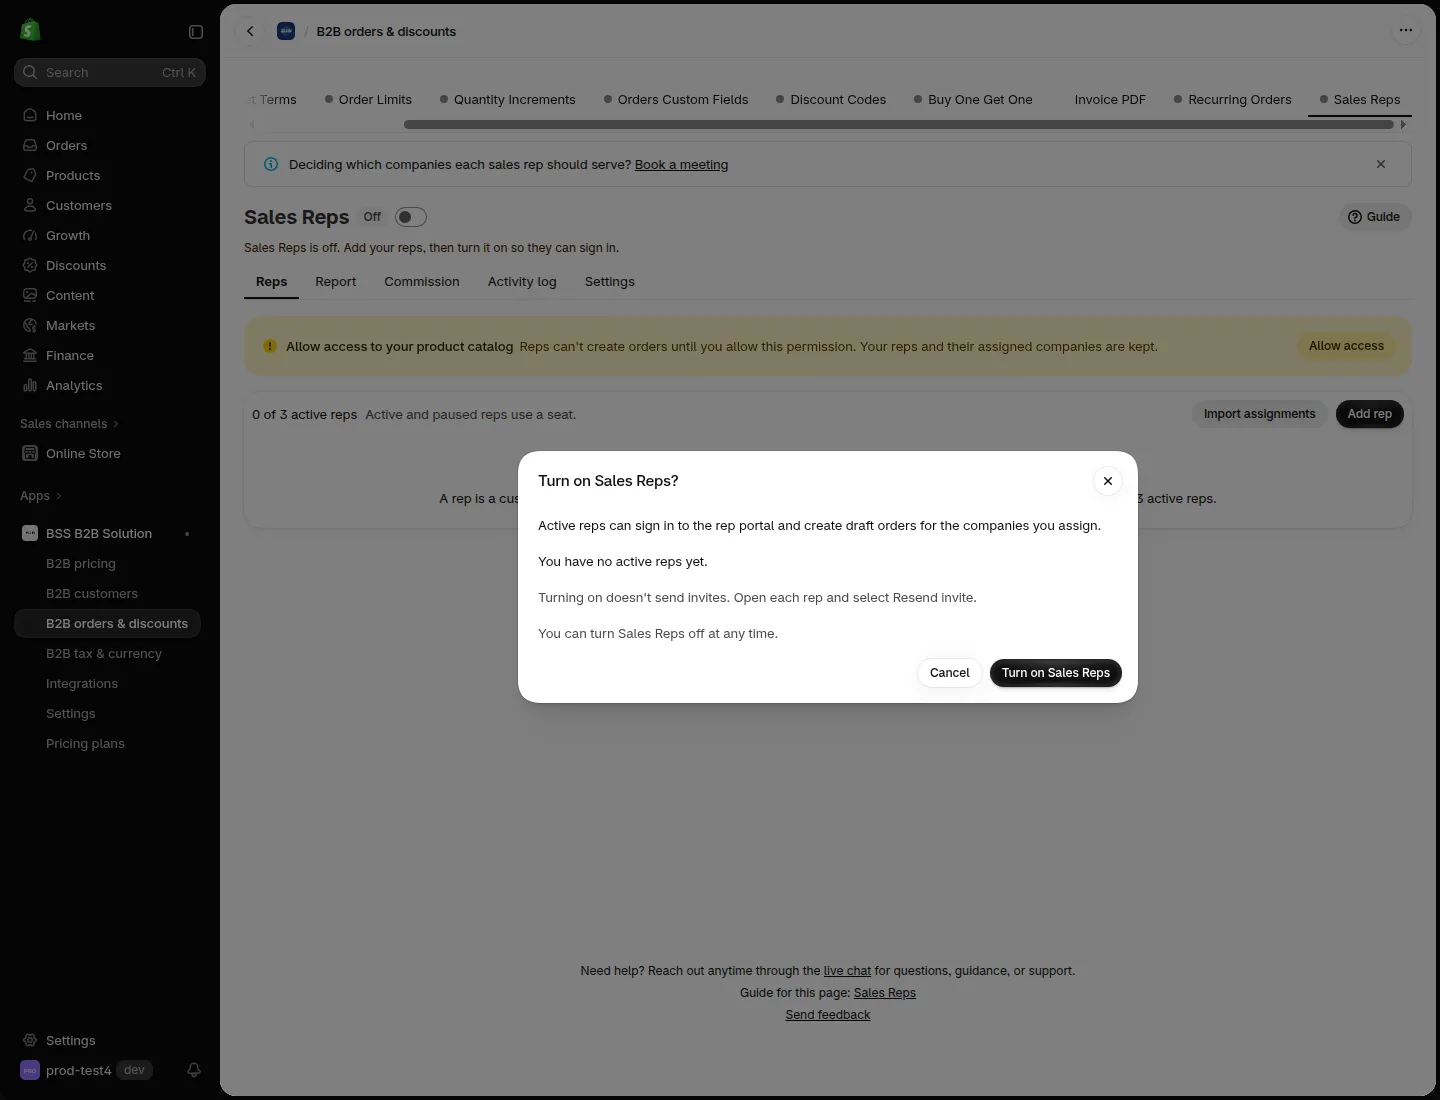
The dialog shows how many active reps you have.
You can turn Sales Reps off at any time. Your reps and assignments are kept.
The module also shows in Settings > B2B Portal > Modules. The Sales Reps row shows On, with a link to Sales Reps settings.
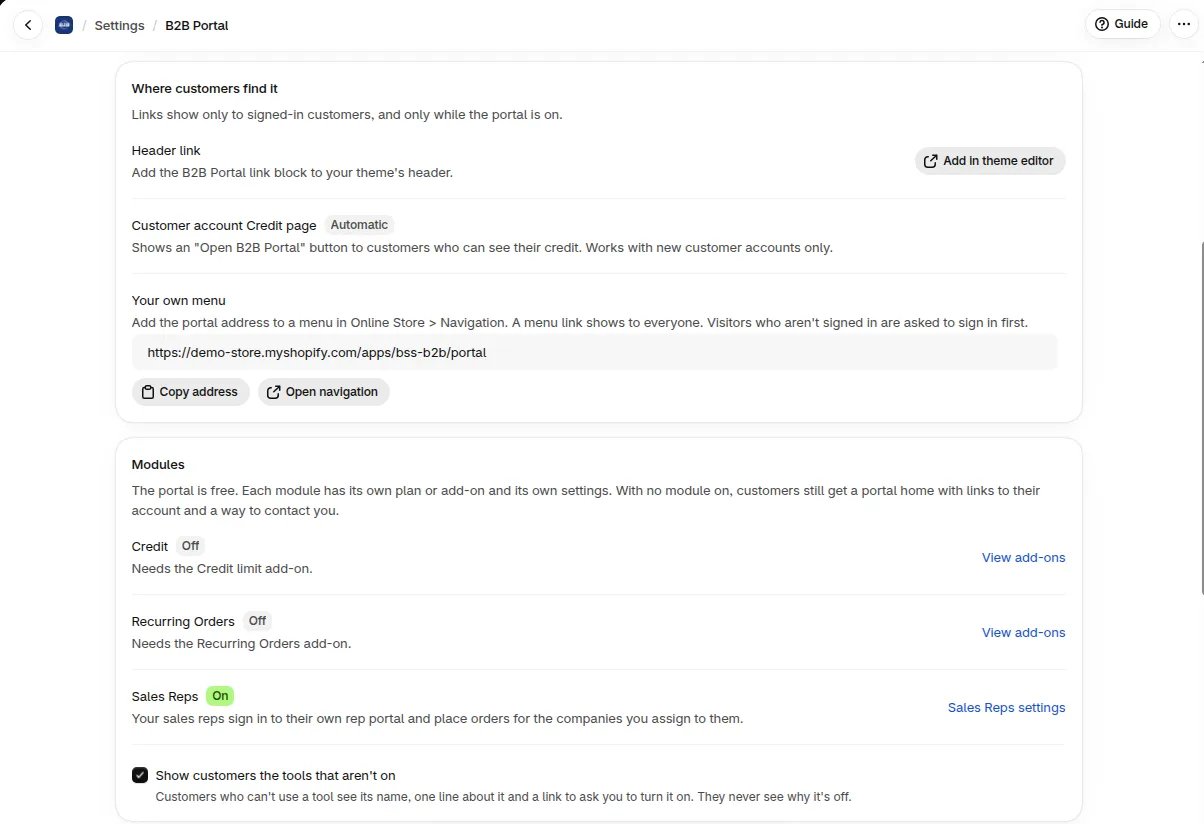
The Sales Reps row in B2B Portal, under Modules.
How do I turn on the rep portal in my theme?
Section titled “How do I turn on the rep portal in my theme?”The rep portal button comes from an app embed. It shows only to signed-in reps. No other visitor sees anything.
- In the Shopify admin, open Online Store > Themes > Customize.
- Open App embeds and turn on BSS Sales rep portal.
- Optional: choose an Accent colour and a Colour scheme (Light or Dark). A colour that is hard to read is ignored and the default is used.
- Click Save.
By default the portal page is at /apps/bss-b2b/rep on your store. If you changed the app proxy path, it is at <your proxy path>/rep. The Rep portal button always opens the right address. A signed-in rep sees the Rep portal button on every page of your store. See the rep portal.
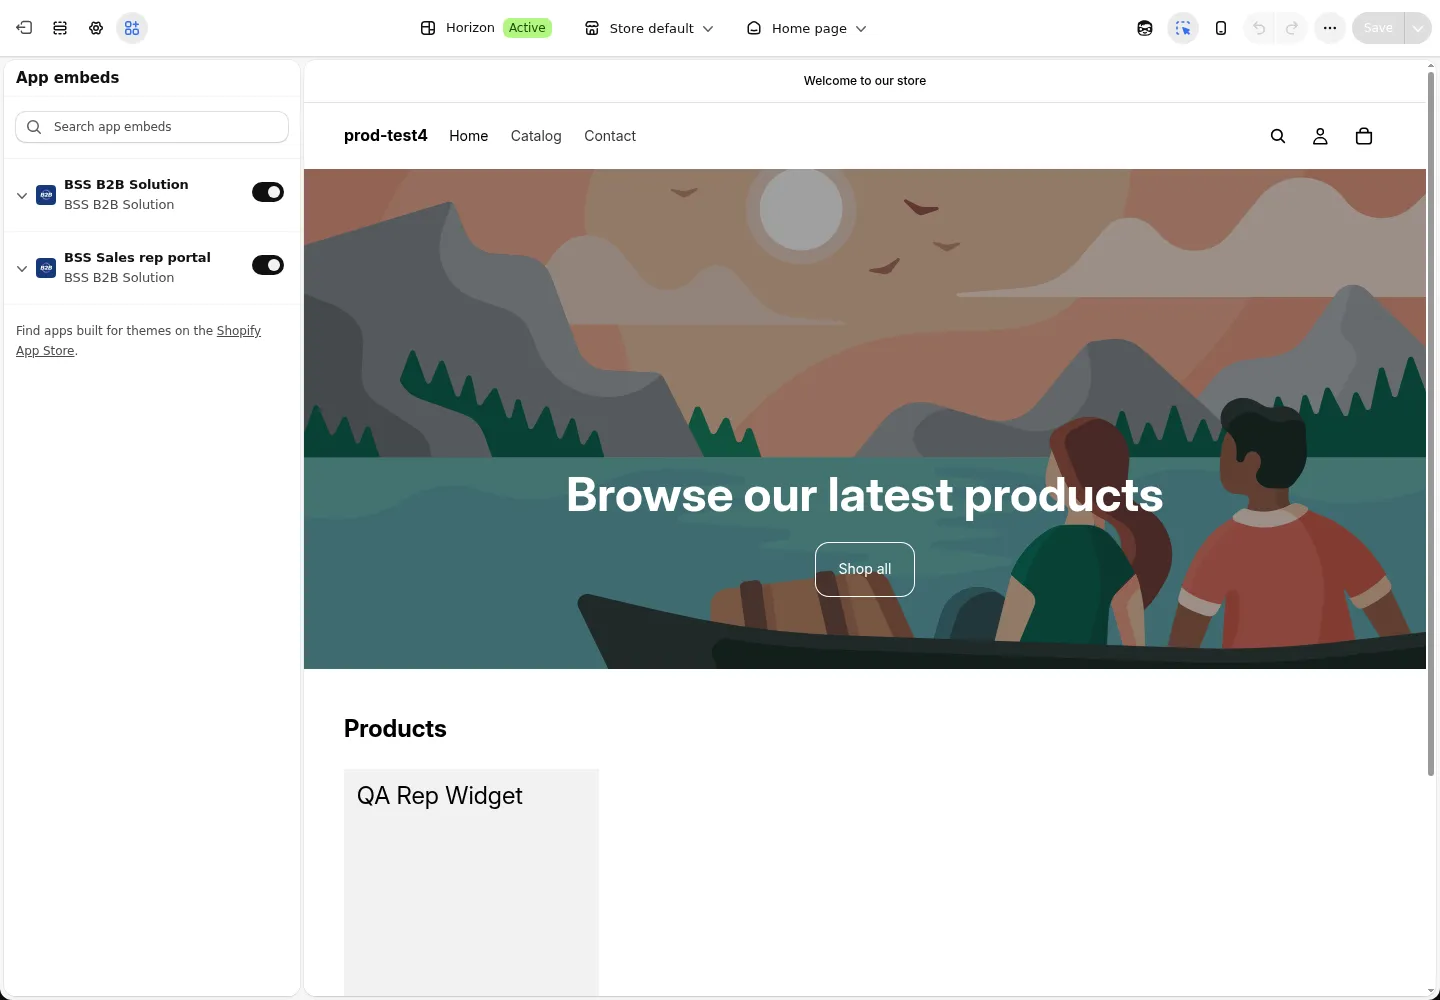
The app embed is on in the theme editor.
How do I pause a rep?
Section titled “How do I pause a rep?”Pausing stops a rep from creating orders without removing the rep. On the rep’s page, click Pause ordering. You can add a reason of up to 200 characters. The reason is saved in the Activity log, so don’t enter personal information.
A paused rep can still sign in and see their orders. Their companies and seat are kept. To undo it, click Resume ordering.
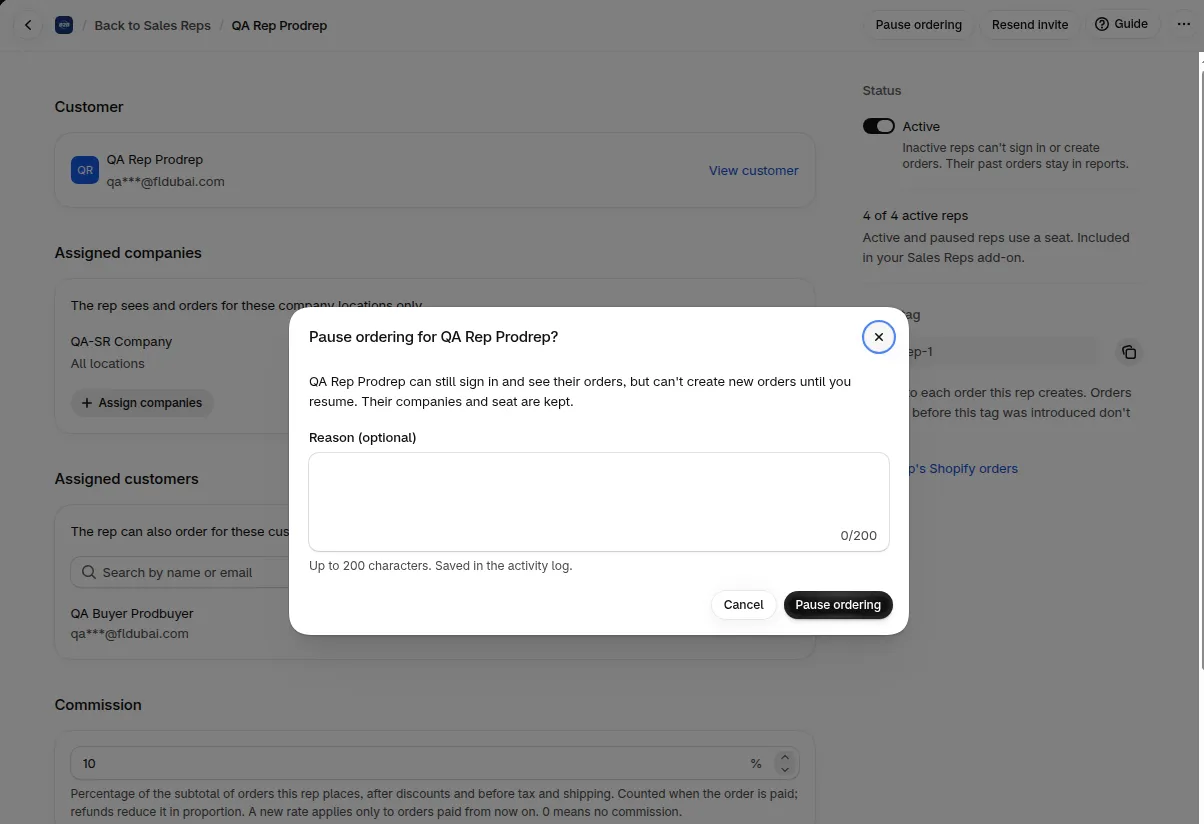
The Pause ordering dialog asks for an optional reason.
How do I turn a rep off?
Section titled “How do I turn a rep off?”Open the rep and turn Active off. An inactive rep can’t sign in or create orders, and no longer uses a seat. Their past orders stay in your reports. Turn Active on again at any time, if you have a free seat.
Troubleshooting
Section titled “Troubleshooting”More fixes are in troubleshooting.